


Revcontent and RedTrack

Revcontent believes that all sites and placements are not created equal, which is why they monitor and shutdown any sites not performing. Their ROI is as much as 50% higher than other non Premium Content Recommendation Networks.
RedTrack has an API integration with Revcontent, which gives you the following benefits:
- Synchronize costs.
- Pause: campaign, placement, creative
- Create automated rules
Integration
Important before you start
Before you proceed with the integration, make sure to have the already added:
- Custom tracking domain
- Offer source and Offer (if you’re an Affiliate)/Store and Store tracking URL (if you’re an Advertiser)
- Conversion types you’re planning to work with
Integration steps
1. Add Revcontent as a Traffic channel in RedTrack.
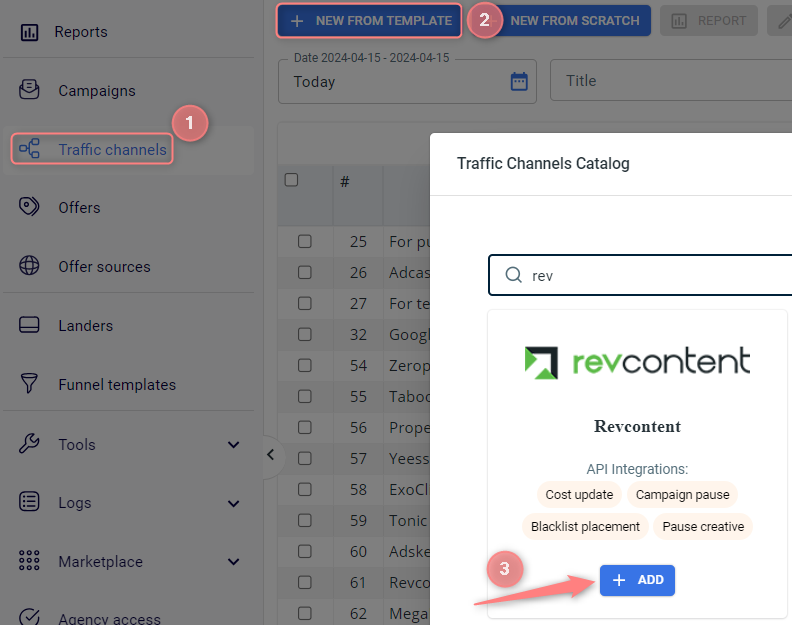
Go to your RedTrack account → Traffic channels → New from template → find Revcontent → Add → Save the template:

2. Integrate Revcontent with RedTrack.
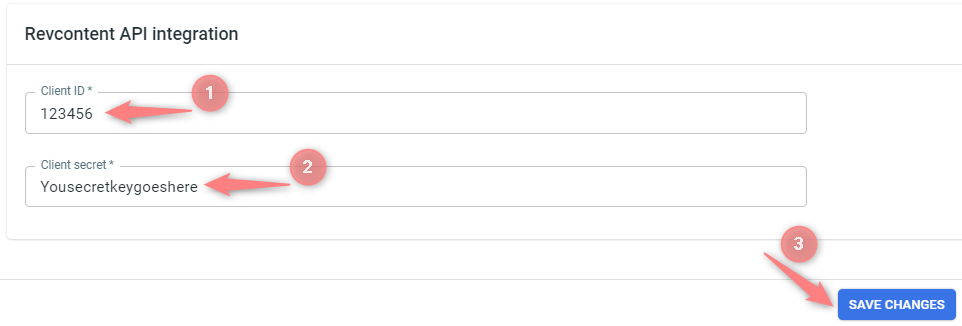
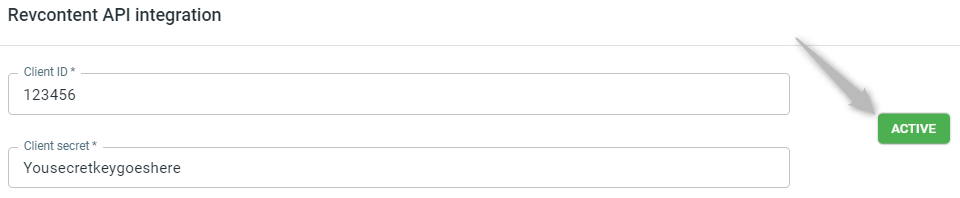
In the added Revcontent template go to the Revcontent API integration section → fill in the Client ID and Client secret fields → Save changes to the template:
3. Create a campaign/ad tracking in RedTrack with Revcontent as your traffic channel.
To create a campaign/ad tracking in RT act depending on your account type:
3.1. Campaigns → Create new campaign → fill in the info in all the sections and tabs:
- General: Give it the name, and choose the traffic channel, tracking domain, and cost-tracking method.
- Funnels: Choose the type of funnel you are using and add the elements from the drop-downs.
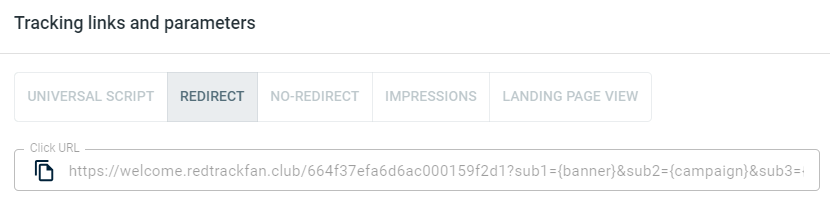
3.2. Once the Campaign is saved go to Tracking links and parameters → copy the automatically generated click URL (your tracking link):
3.1. Ad Tracking → New Ad Tracking → fill in the info in all the sections and tabs:
- General: Give it the name, and choose the traffic channel, and cost-tracking method.
- Funnels: Choose the type of funnel you are using and add the elements from the drop-downs.
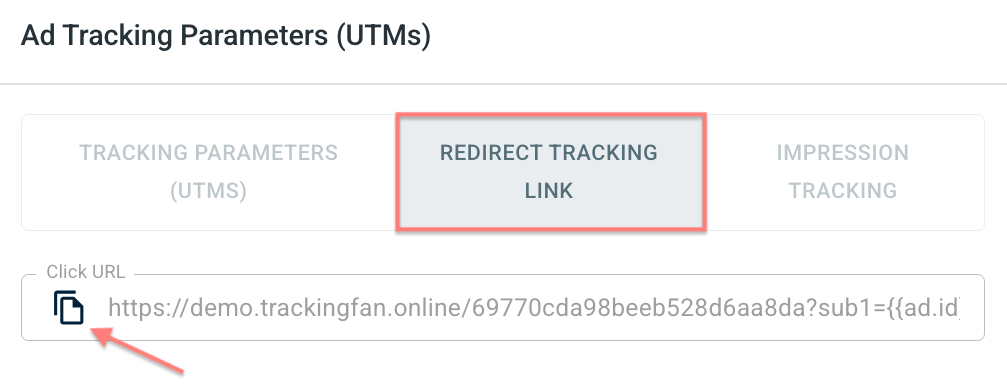
3.2. Once the Ad Tracking is saved go to Ad Tracking Parameters (UTMs) → copy Click URL from the Redirect tracking link tab:
– Universal script
– No-redirect
– Impressions
4. Set up the tracking on the Revcontent side.
In your Revcontent account go to the Campaign Boosts section → Create Campaign Boost→ fill out the necessary information regarding your desired traffic.
We recommend to skip this part and use RedTrack for generating your Campaign Tracking code, as all macros will be populated automatically, and you won’t need to insert them manually.
Save your Campaign and open it from the Dashboard → proceed to the Manage Content section → paste the Campaign URL you have copied within step 3 into the Destination URL section → click Submit to upload your images and content information.
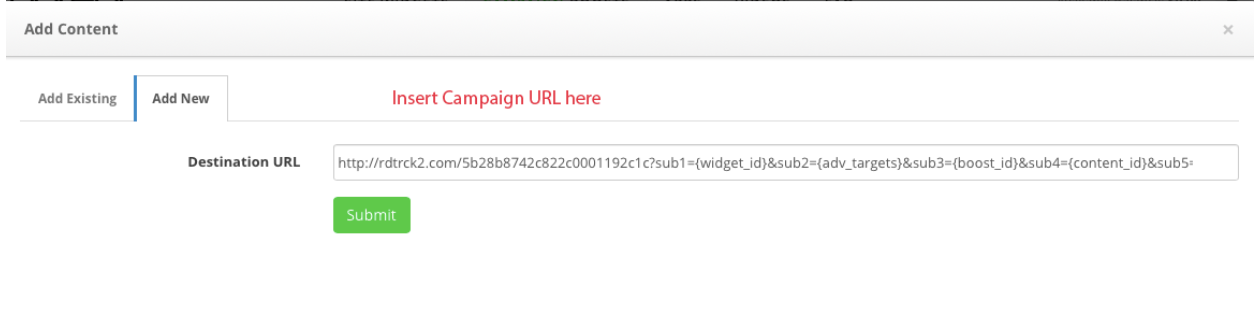
After a quick approval, your Campaign is ready to go live!
5. Set up the Postback URL in RedTrack.
In Campaign/Ad Tracking settings (created in step 3) scroll down to S2S Postback for Revcontent/ Ad network webhook for conversions → press Add → replace the REVCONTENTAPIKEY part with the real API key value from Revcontent → Save changes:
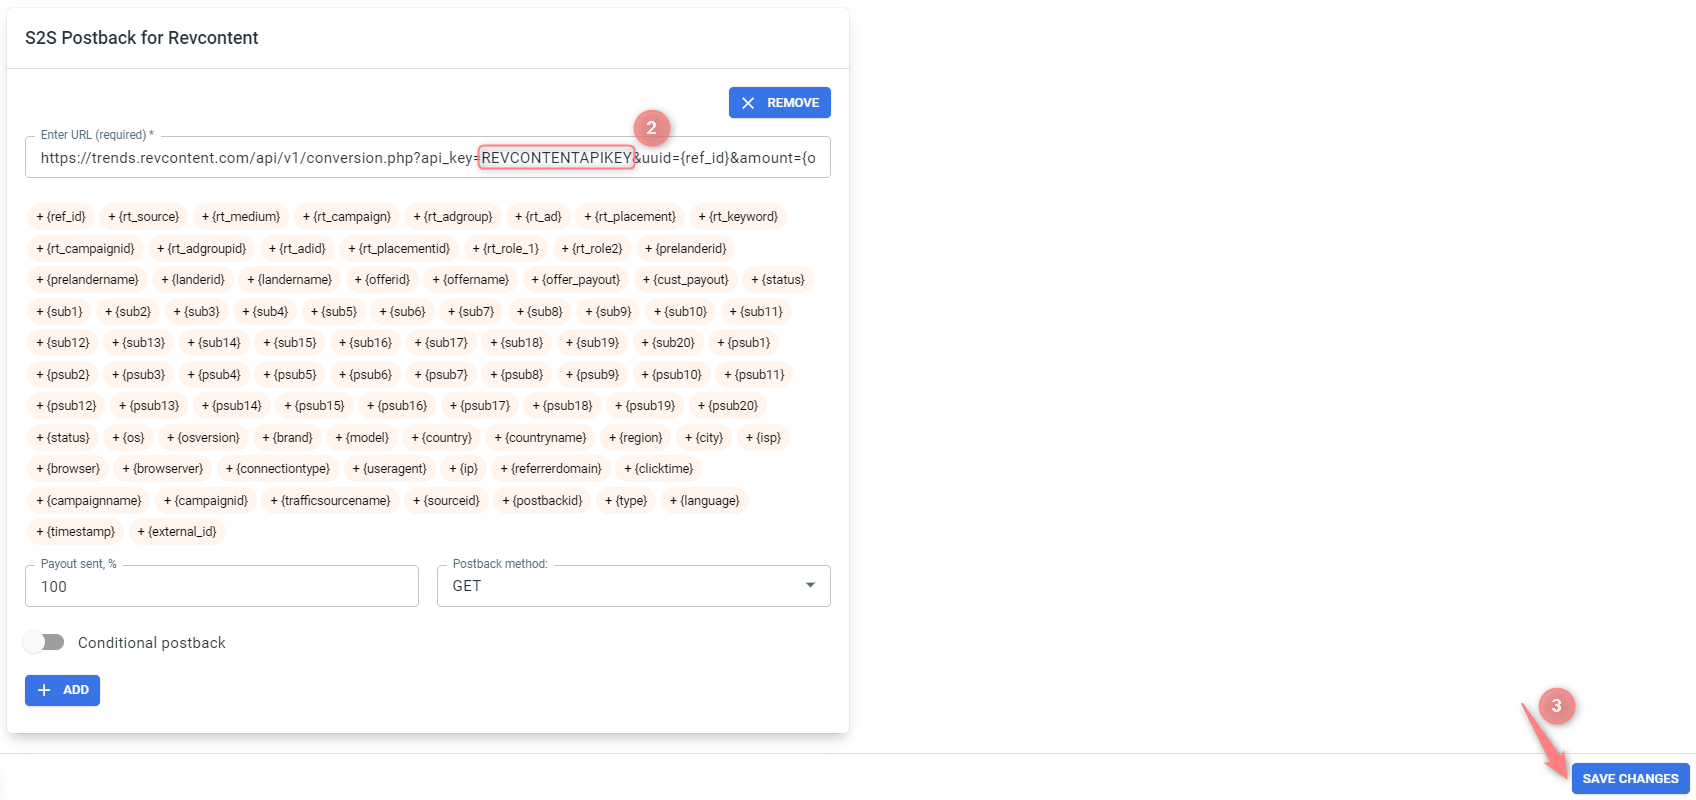
▸ If you changed the Postback URL in the Traffic channel (added/removed some parameters to it), remember to manually update the link in Campaign/Ad Tracking settings as well, as it won’t be generated correctly automatically.
▸ Some Traffic channels require you to edit the Postback with specific parameters for each Campaign/Ad Tracking (e.g., the goal for Exoclick or ap_key for Go2Mobi). If the field remains blank or something like “REPLACE” is stated, that means you need to define the Postback conditions manually.
6. Set up the automation.
- Use this guide to help set up rules.
- Use this guide for setting up the auto update cost feature.

