
BuyGoods and RedTrack

BuyGoods is a sales platform for tracking, analytics, reporting, and advertiser management.
Integration
Important before you start
Before you proceed with the integration, make sure to have the already added:
Integration steps
1. Add the conversion types to RedTrack.
On the s2s postback level, BuyGoods supports only Purchase events such as frontend and upsell and InitiateCheckout (added via script). To track these events, first you need to add them as conversion types in RedTrack:
| Add these events if you want to differentiate sale, frontend and upsell in RedTrack | sale frontend upsell 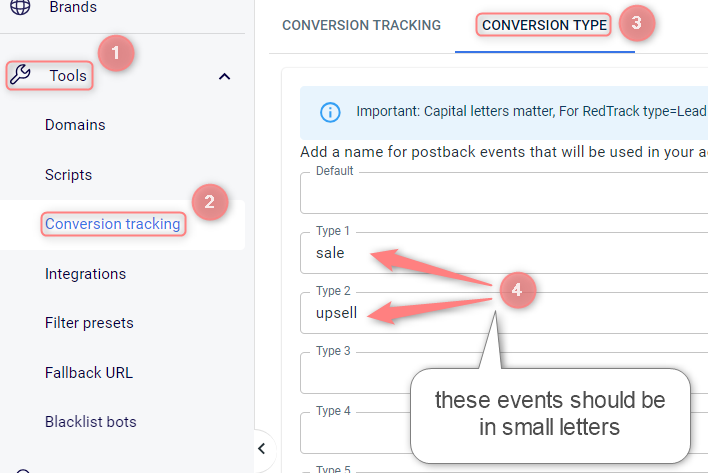 |
| Add a unified name for all the conversions if you prefer this option | For For Facebook, the best option will be Purchase: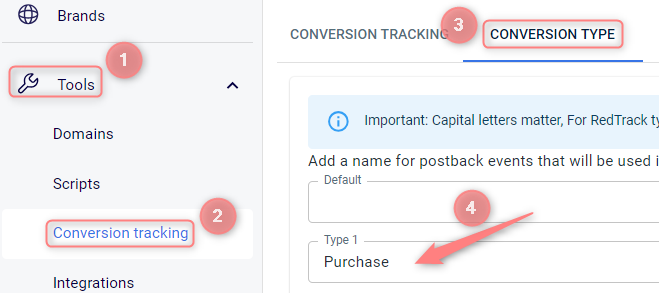 |
| Add the Initiate Checkout event if you want to track it | 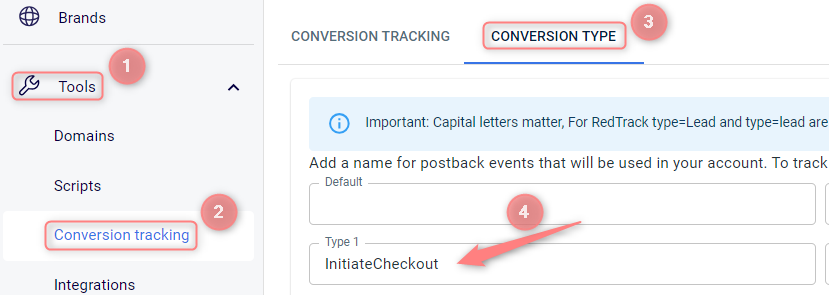 |
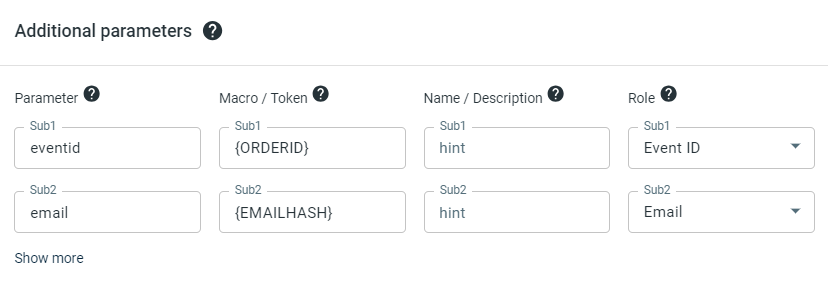
2. Add BuyGoods as an Offer source in RedTrack.
Offer Sources → New from template → add BuyGoods template → add the additional parameters and assign corresponding roles to them → save the template
Parameter eventid – Macro {ORDERID} – Role Event ID
Parameter email – Macro {EMAILHASH} – Role Email
3. Adjust and copy the postback URL.

| If you work with: sale frontend upsell | The postback example is: https://tracking.domain/postback?eventid={ORDERID}&email={EMAILHASH}&clickid={SUBID}&sum={COMMISSION_AMOUNT}&type={CONV_TYPE} Replace the tracking domain with your actual tracking domain. |
| If you work with a unified parameter | The postback example: https://tracking.domain/postback?eventid={ORDERID}&email={EMAILHASH}&clickid={SUBID}&sum={COMMISSION_AMOUNT}&type=Purchase Replace Purchase in &type=Purchase with your event name if it differs. Replace the tracking domain with your actual tracking domain. |
| If you want to track InitiateCheckout events | Add this script to BuyGoods (to the InitiateCheckout script). Remember to replace the track.example.com with your custom tracking domain:<script> document.addEventListener("DOMContentLoaded", function() { var postbackUrl = "https://track.example.com/postback?clickid={SUBID}&type=InitiateCheckout"; var img = new Image(); img.src = postbackUrl; }); </script> |
4. Add the postback to BuyGoods
BuyGoods account → Postback Pixels → add new → paste the postback URL you have generated before → save the changes

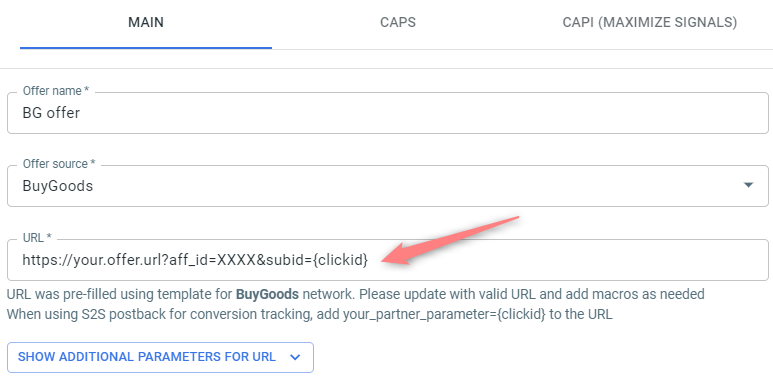
5. Grab the offer link from BuyGoods and add it to RedTrack
Offers → New → BuyGoods as your offer source (the URL field is automatically filled in with the template for your offer) → paste in there your actual offer URL → add &subid={clickid} to the end of your offer URL:
6. Create a paid traffic Campaign in RedTrack. Refer to this guide for details.