
TrafficJunky and RedTrack

TrafficJunky is an innovative web advertising and digital marketing company whose mission is to improve the performance of your company and product(s) with each internet marketing ad campaign.
– Pause Campaigns, Creatives.
– Enable the auto-cost update feature.
Integration
Important before you start
Before you proceed with the integration, make sure to have the already added:
- Custom tracking domain
- Offer source and Offer (if you’re an Affiliate)/ Brand and Website (if you’re an Advertiser)
- Conversion types you’re planning to work with
Integration steps
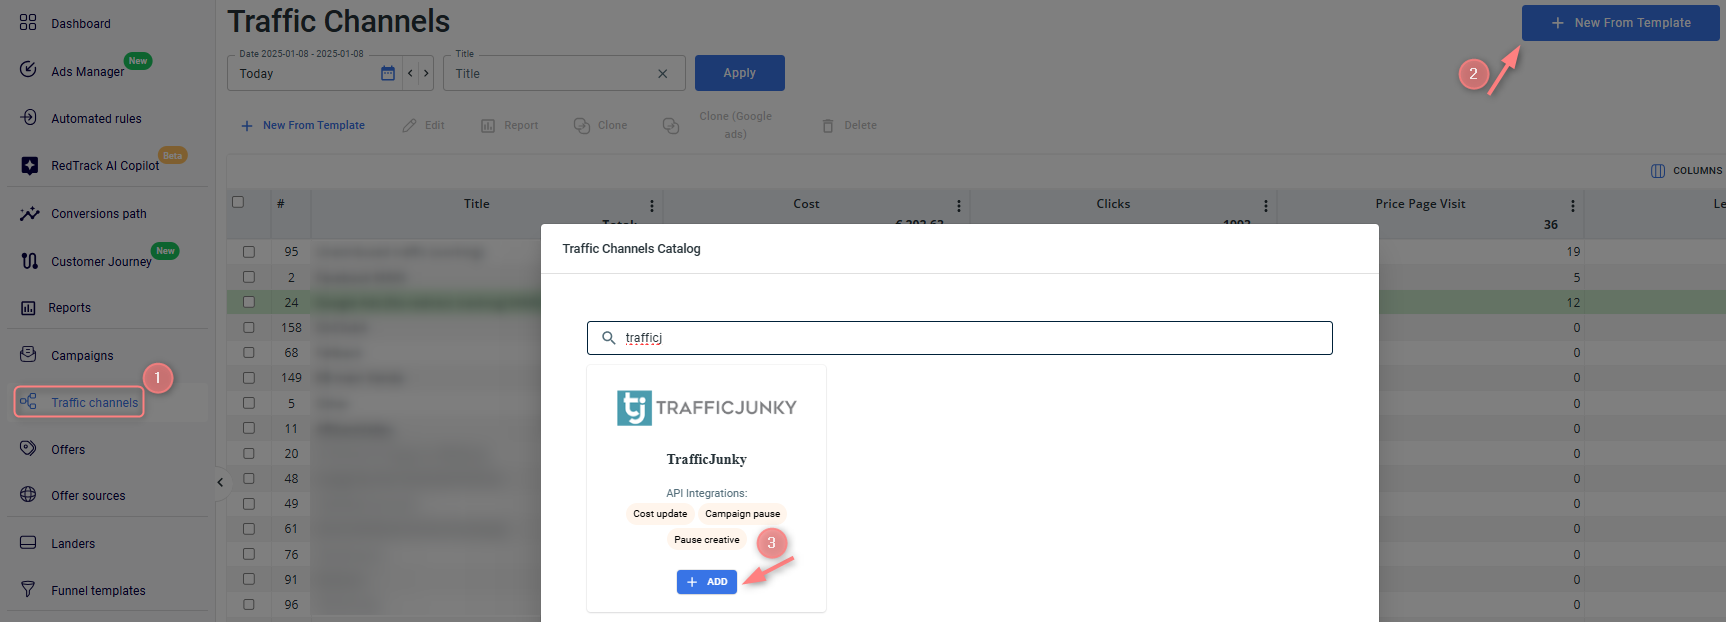
1. Add TrafficJunky template to RedTrack.
Traffic channels → New from template → TrafficJunky → Add → Save the template:

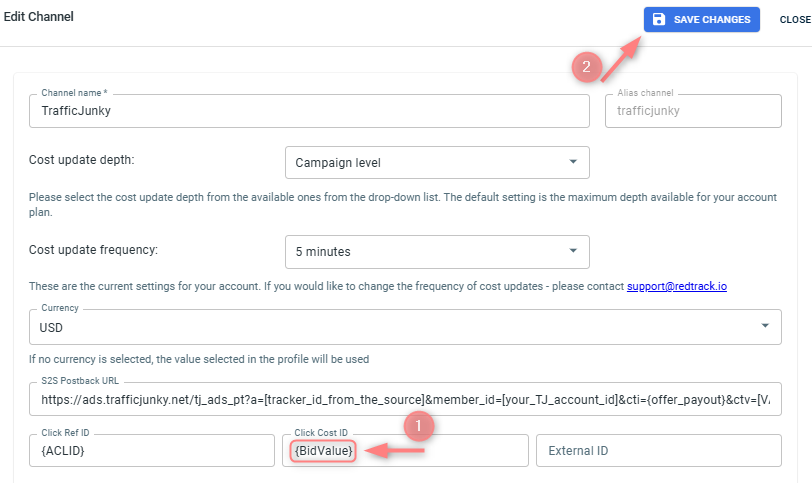
This setup allows you to track campaign costs accurately in RT:
2. Integrate RedTrack with your TrafficJunky account.
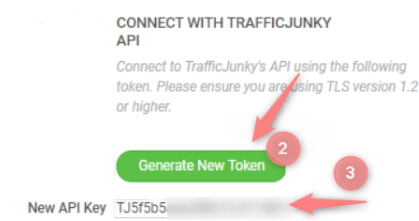
2.1 Go to TrafficJunky account → My Profile → scroll down to the section Connect with TrafficJunky API → click the Generate New Token button → copy the API key:

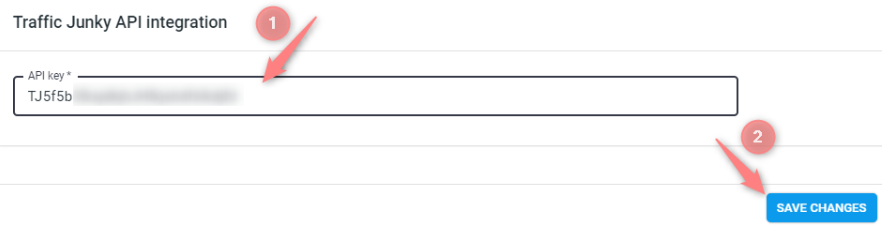
2.2 Get back to RedTrack → TrafficJunky template added within step 1.1→ scroll down to the section Traffic Junky API integration → paste the API key copied within step 1.2 → Save changes:

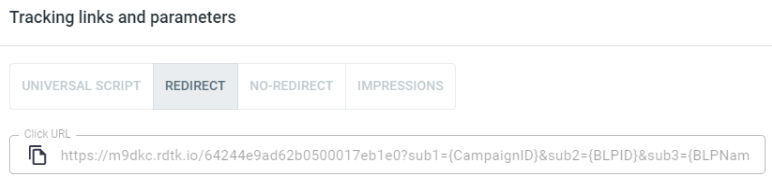
3. Create a Campaign in RedTrack with TrafficJunky as a traffic channel.
Campaigns → Create new campaign (use this guide if you are an affiliate and this guide if you are an advertiser) → once your campaign is saved, copy the automatically generated click URL (your tracking link):
– Universal script
– No-redirect
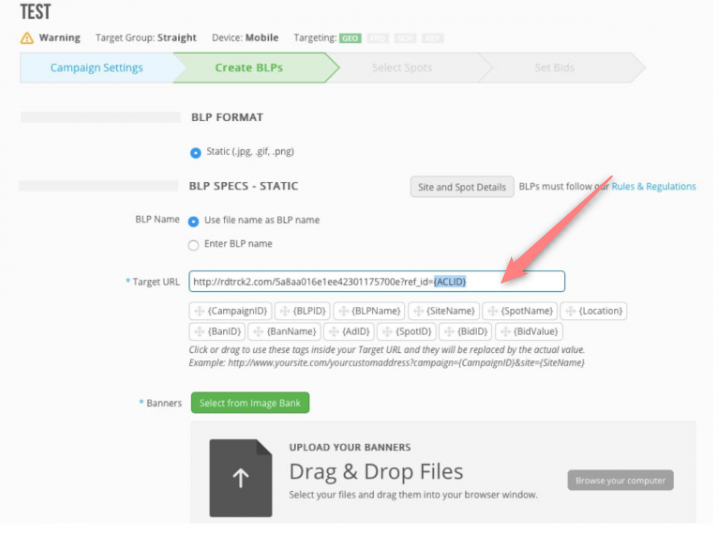
4. Set up the tracking in TrafficJunky.
In your TJ advertiser account click the Campaigns tab → either choose an existing campaign / click New Campaign → fill in the information related to your campaign → paste the Campaign URL you have obtained in step 2 into the Target URL section and proceed with setting up your TJ Campaign:
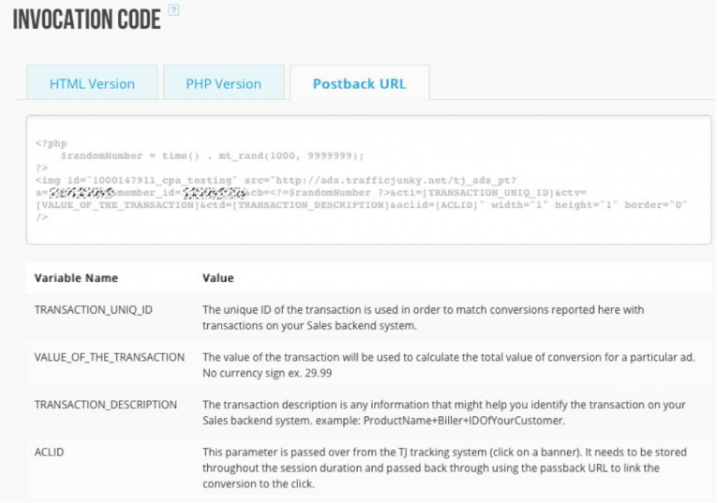
5. Set up a new tracker in TrafficJunky.
You need to set up a new tracker in TJ to pass your conversions correctly.
To do that, open Tools → Conversion Tracker → New Tracker→ enter the name of your tracker (RedTrack) and set the type of events you want to track → Add Tracker → find your tracker in the list → view in the Invocation Code column → choose Postback URL.
Your Postback URL will be generated automatically → copy the a and member_id values from the Invocation code:
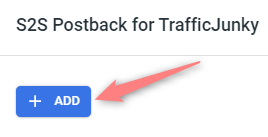
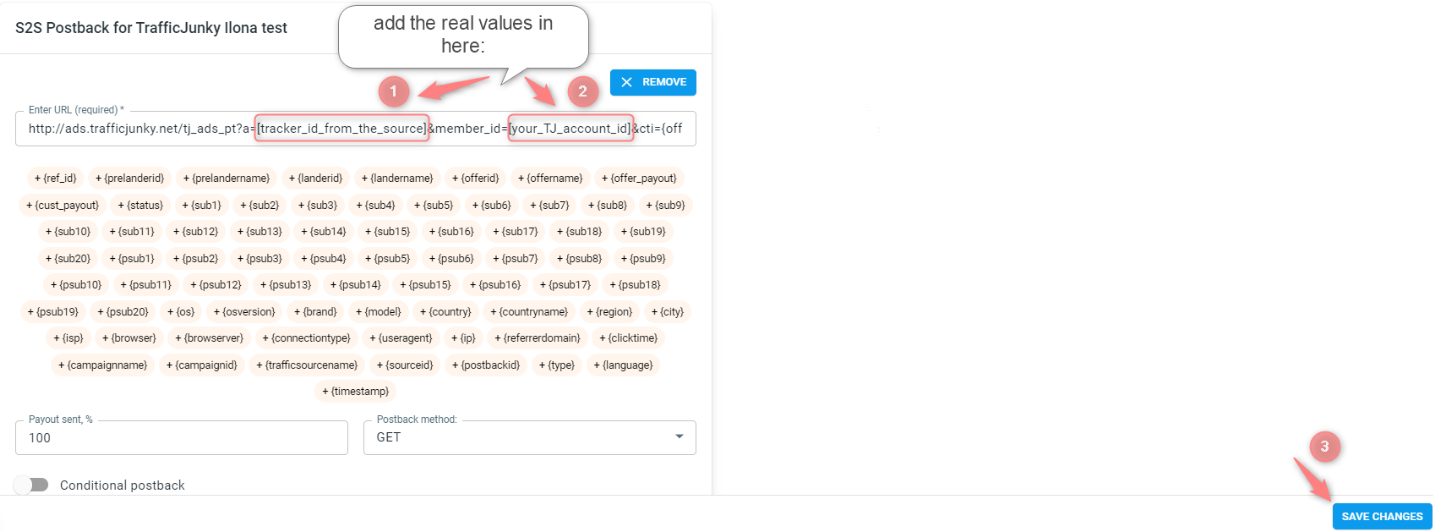
6. Set up the Postback URL in RedTrack.
Go to the Campaign created within step 2 → S2S Postback section → Add → put the correct postback values (“a” and “member_id”) and make sure that your postback contains clickid values that should look like this aclid={ref_id}:
Remember to manually update the postback link in campaign settings if you make any changes to the postback with the TrafficJunky traffic channel template.
7. Set up the automation.
- Use this guide to help set up rules.
- Use this guide for setting up the auto update cost feature.