
Partnership portal: creating a campaign
To create a Campaign for your branded portal, act as follows:
1. Add a Traffic channel For Publishers
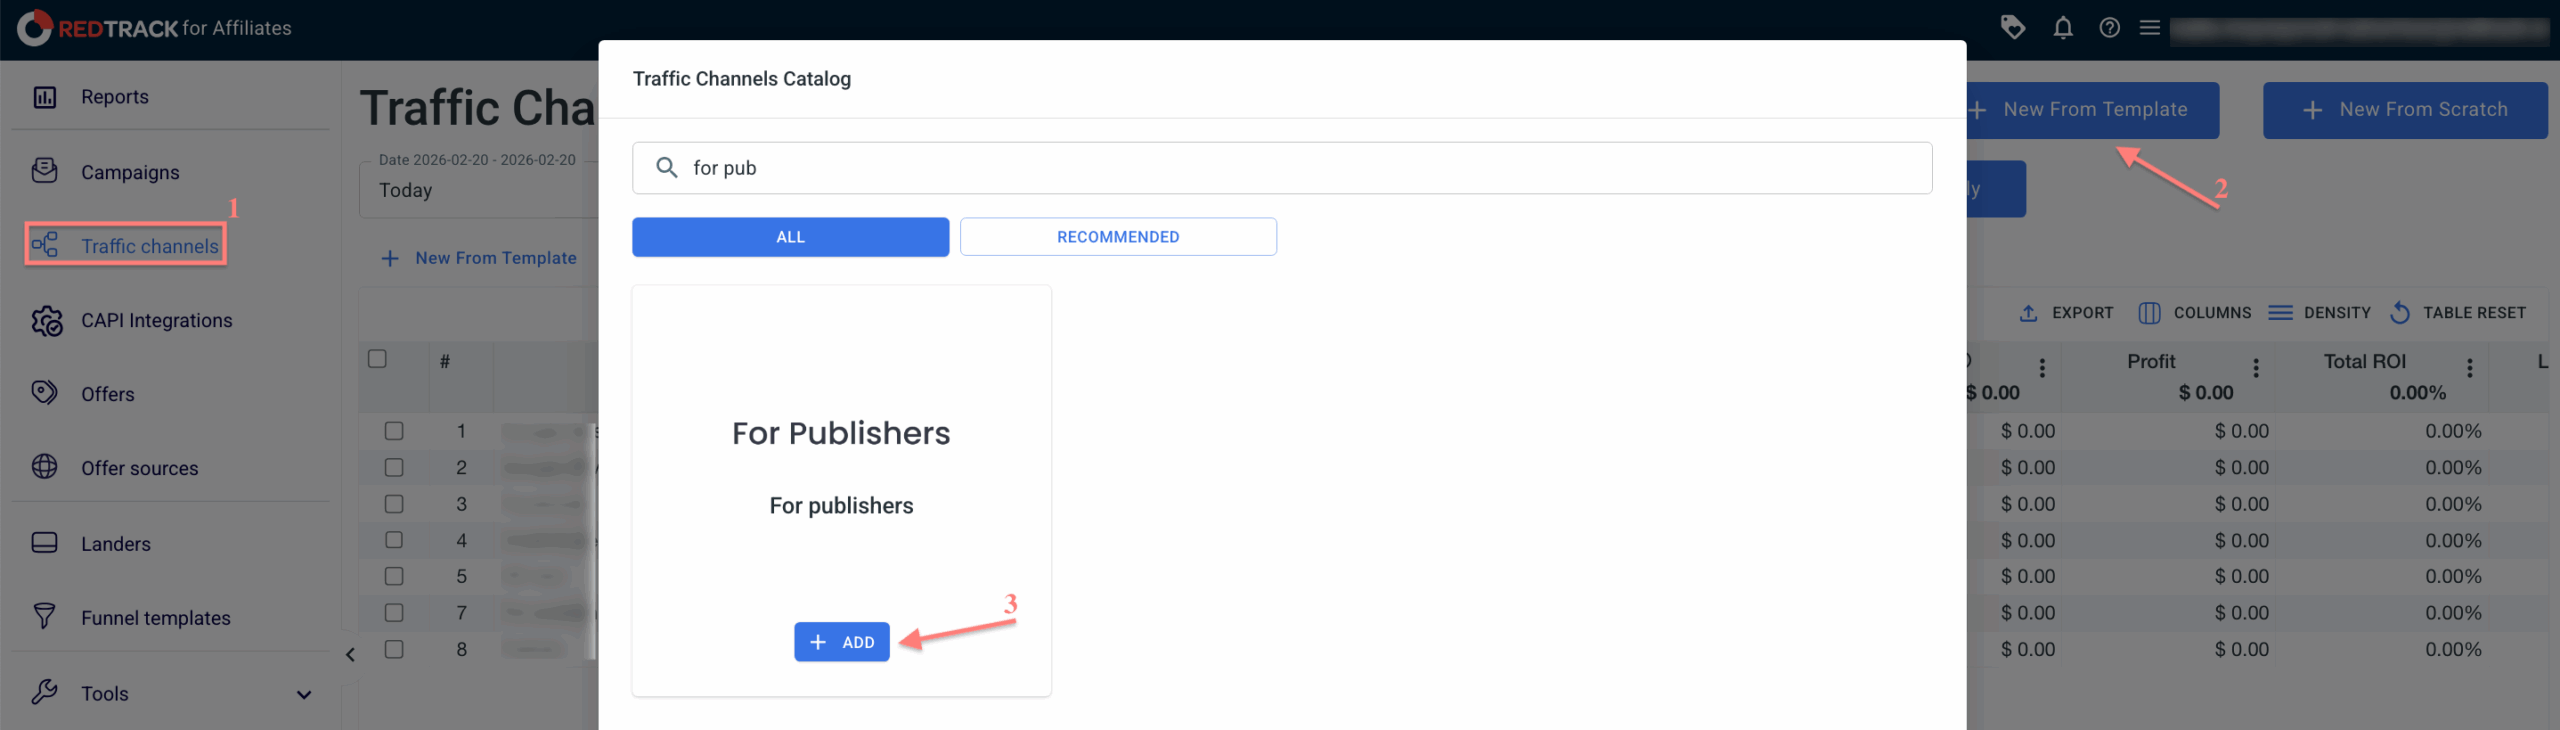
1. Go to Traffic channels → New from template → find the template For Publishers and click Add:
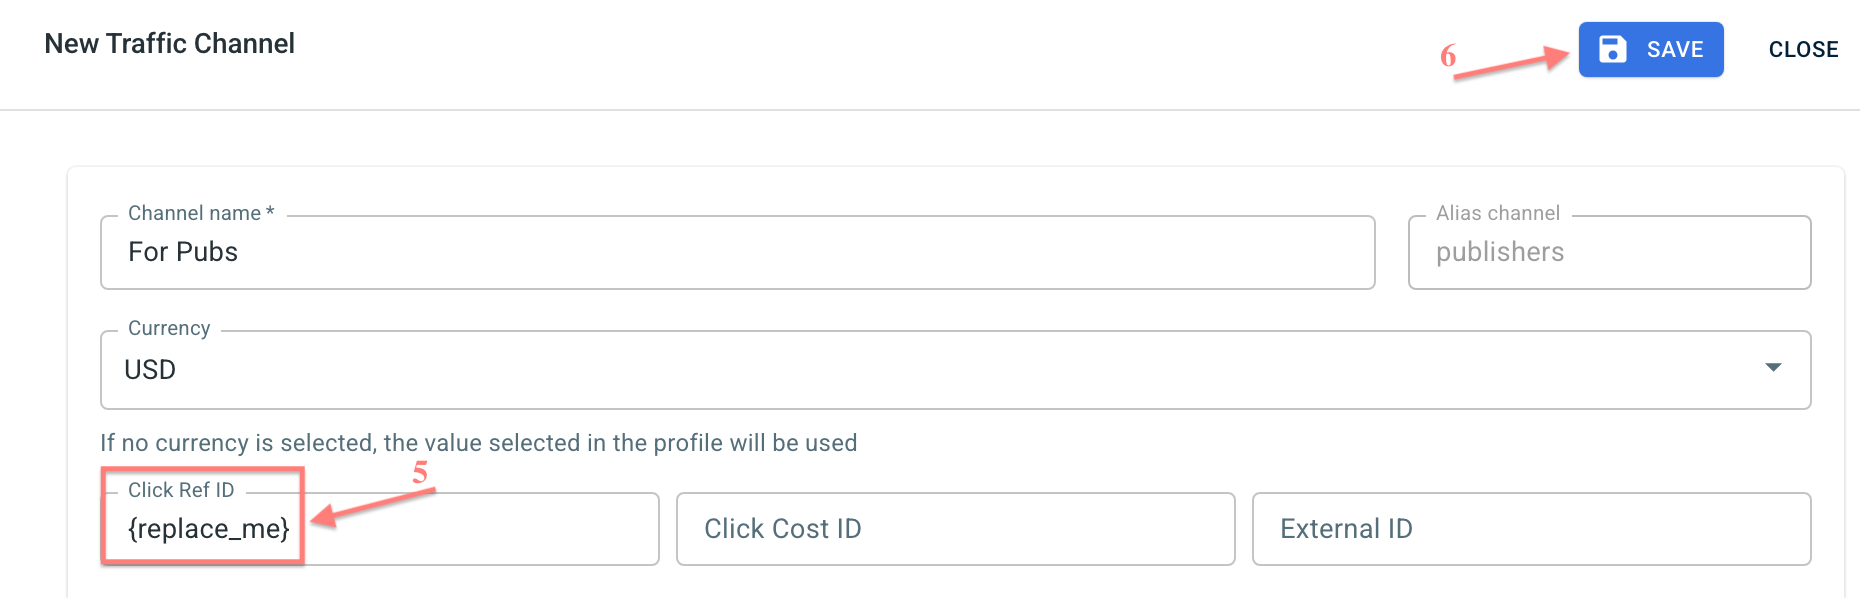
2. Rename your Traffic channel the way you want in the Channel name field:

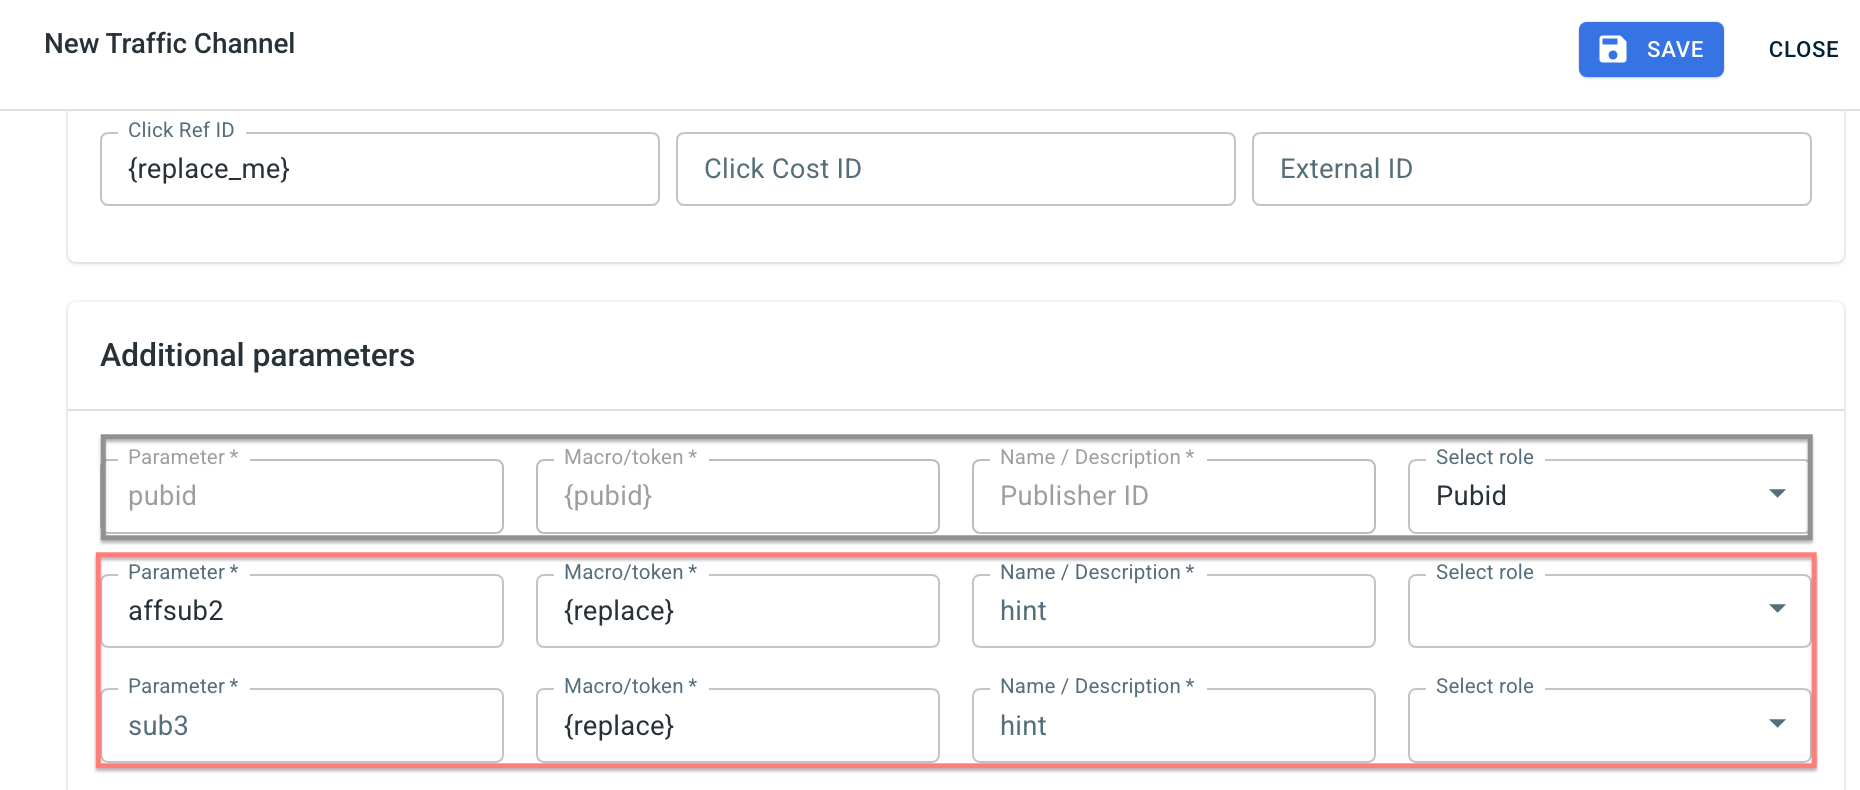
3. {replace_me} parameter in the Click Ref ID field is added as a placeholder for your publisher to see this value in the tracking link. Replace it with their own click ID macro used on their side → click Save:
2. Add an Offer
This is the target destination link where you plan to run the traffic: it can be an affiliate offer, a direct link to your website, or the shop.
1. Add the offer source: New from template/New from scratch → find the affiliate network you work with/add your custom name → Save.
2. Add the offer link: Offers → Create new offer → choose the offer source from the list, add the offer URL → save the changes.
For example: &affsub={clickid} where {clickid} is RedTrack parameter
More information on the offer source and offer in RT can be found here.
3. (optional) Add a landing page
Landers → Create new lander → fill in the mandatory fields → Save.
More information on the landing page in RT can be found here.
4. Create a Campaign
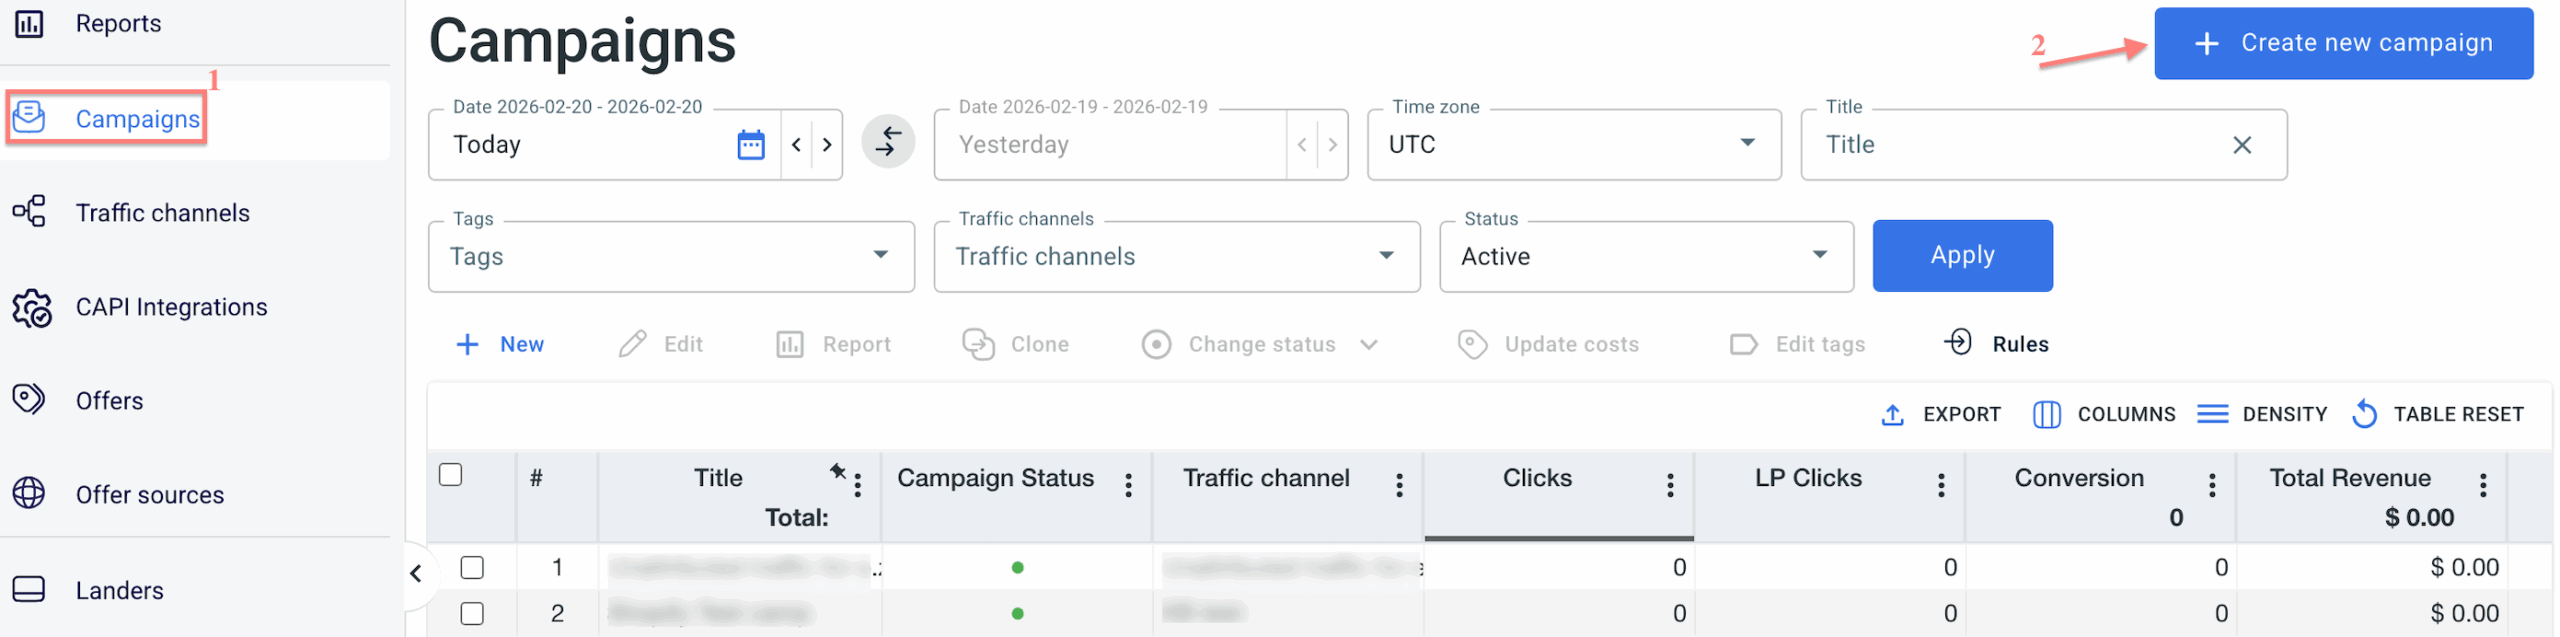
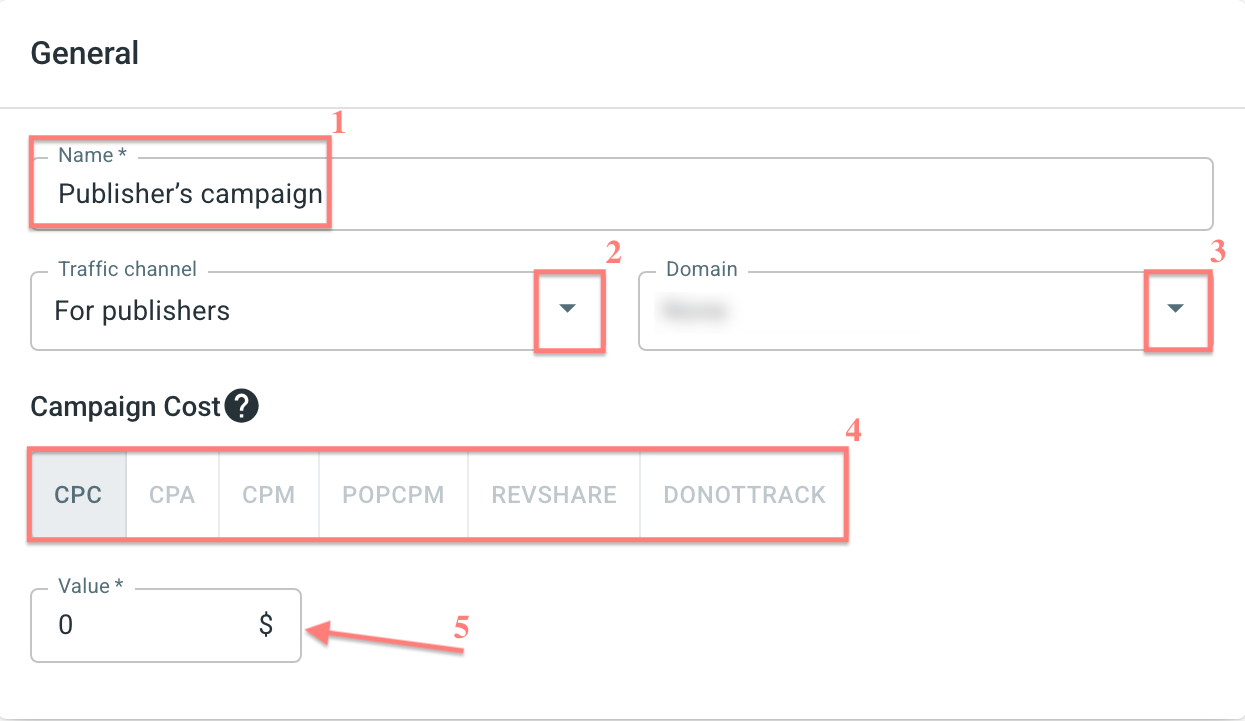
1. Campaigns → Create new campaign:
2. Give your Campaign a name → choose the Traffic channel you have created for your partner/publisher within step 1 → select the corresponding custom tracking domain → press on the needed Campaign Cost model and fill in the Value accordingly:
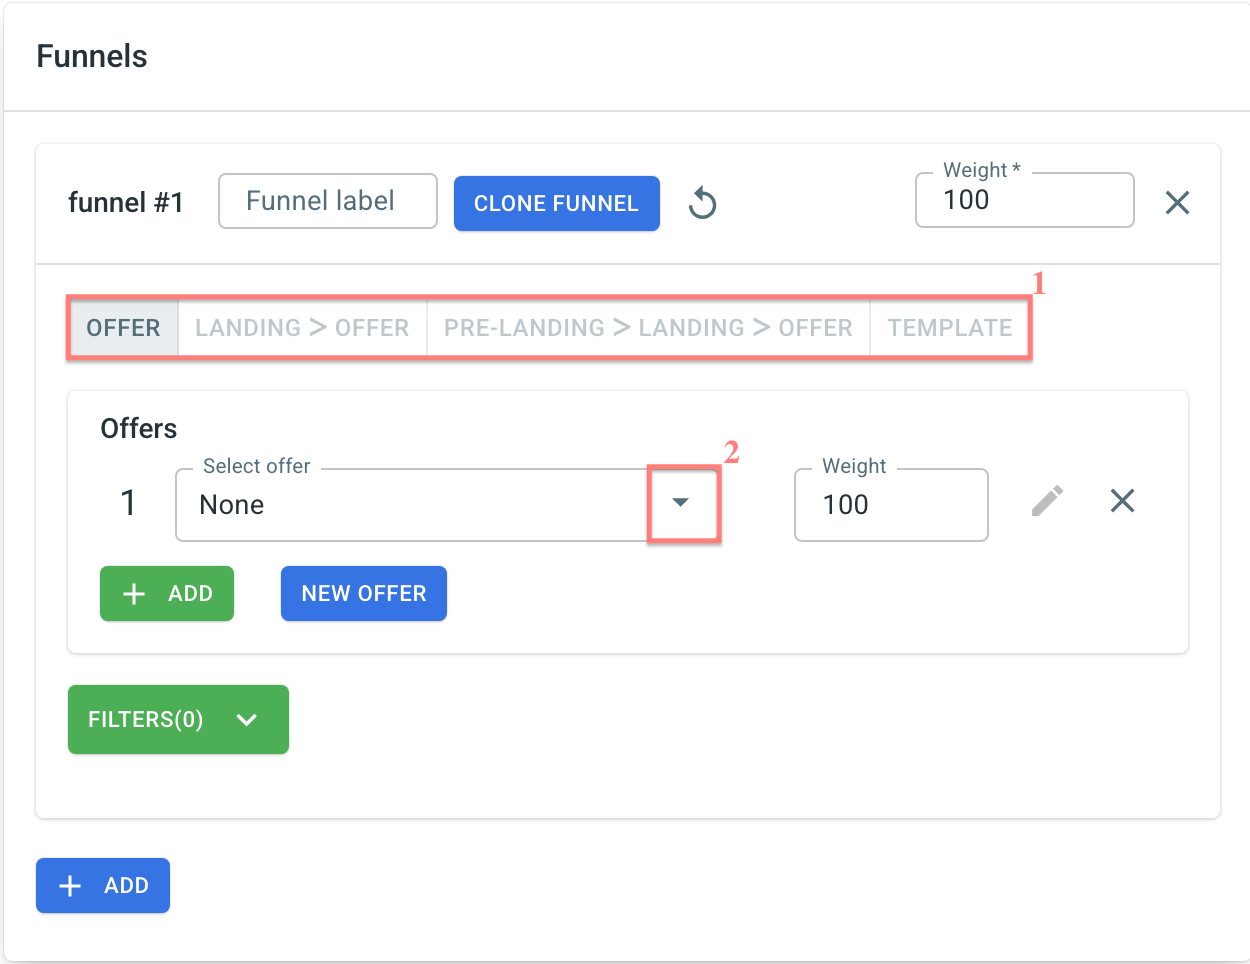
3. Add the needed funnel:
5. Set campaign details for publishers
1. Go to the Details for Publishers tab next to the Campaign Details tab :

2. Set additional information for your partners/publishers → click Save details → click Save changes:
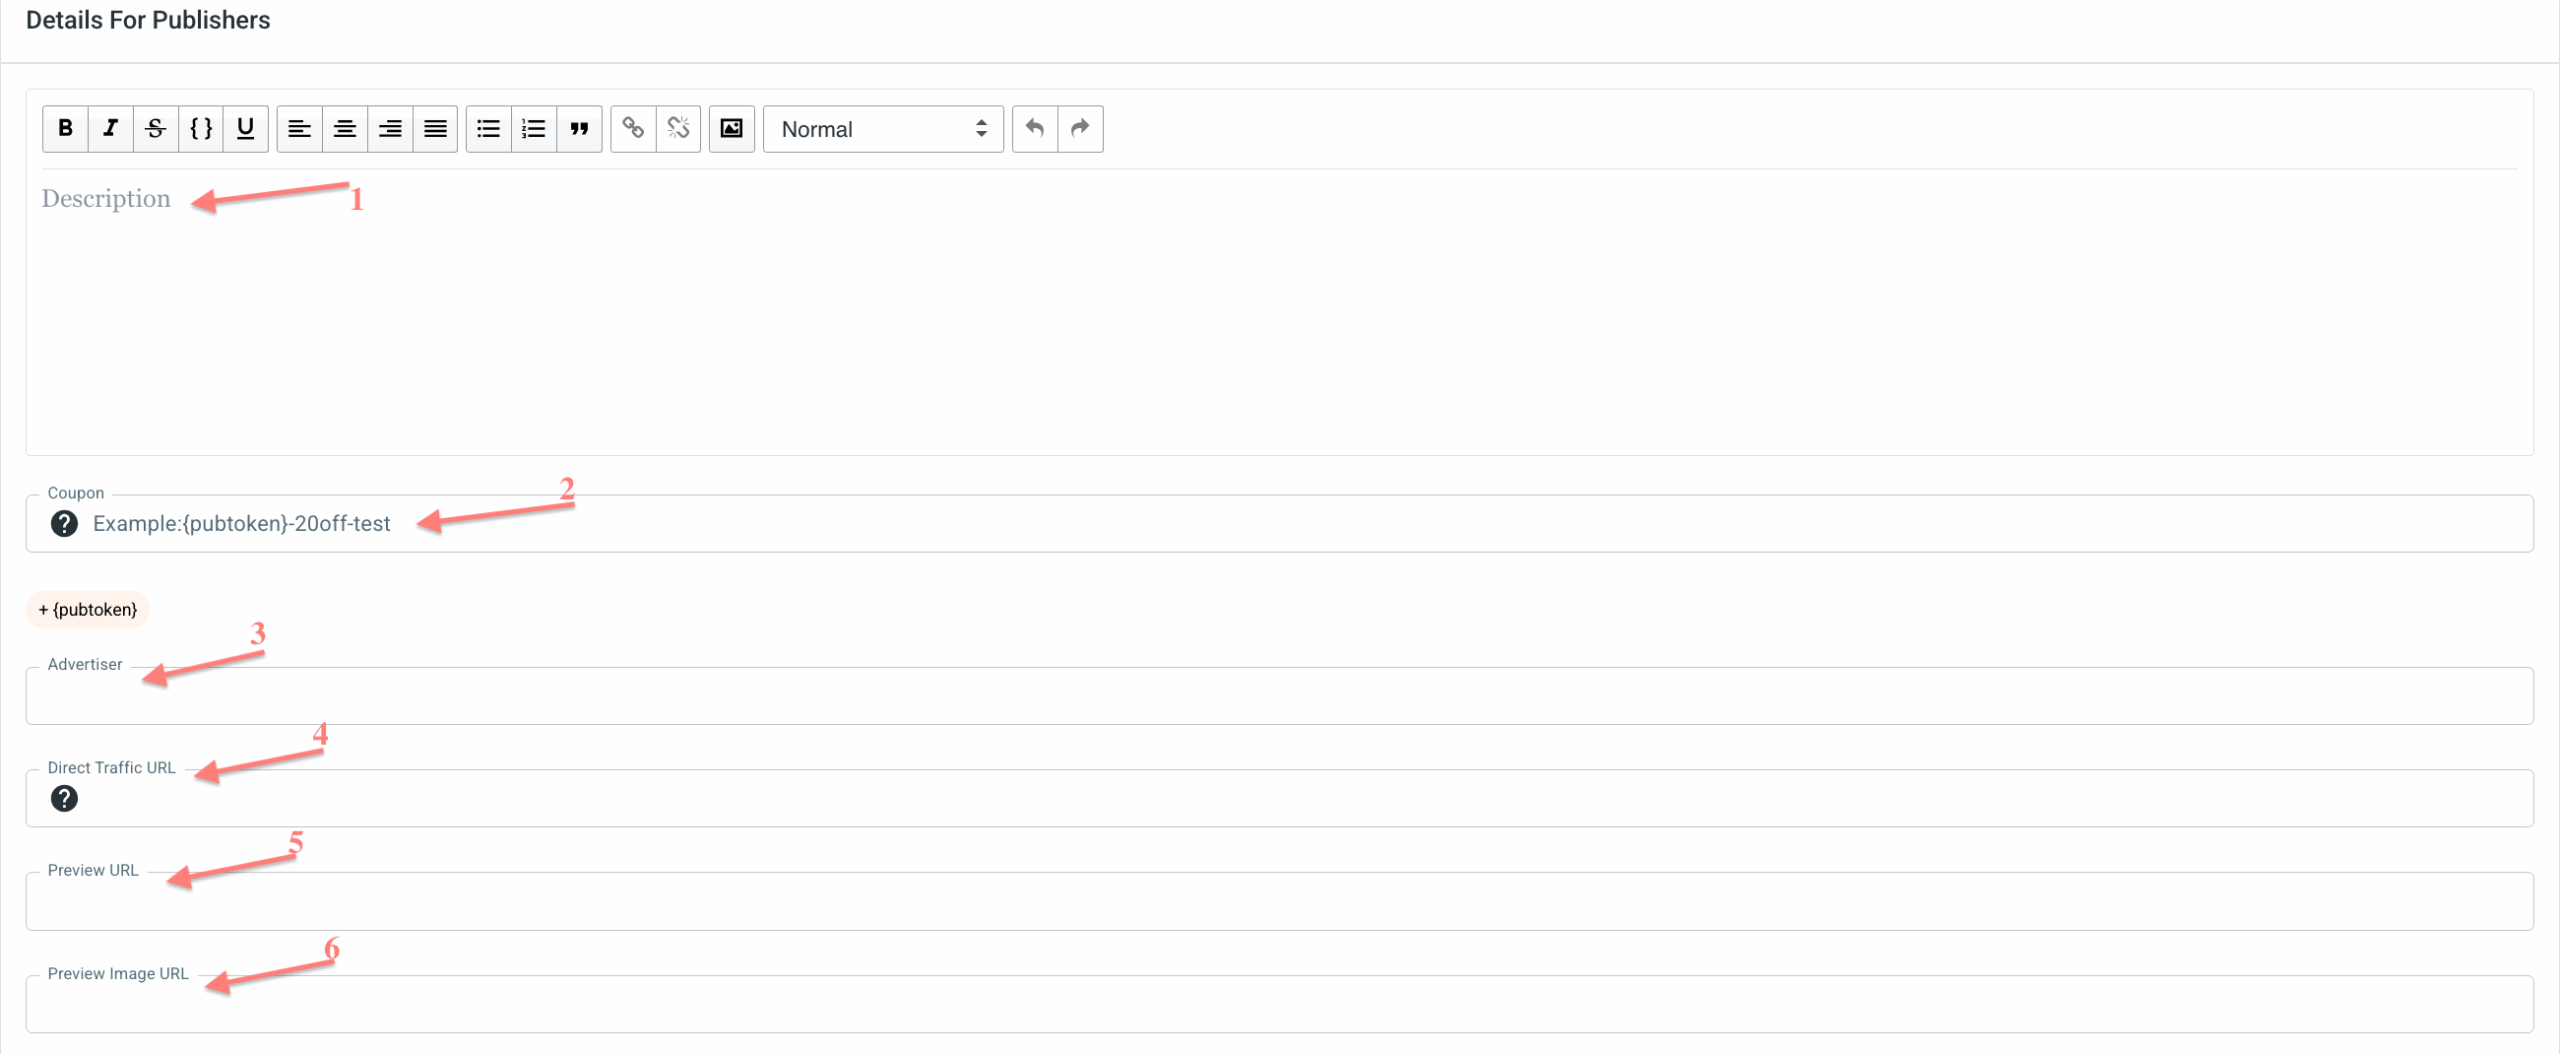
Fields explained:
1. Description – add a description of the campaign that will be visible to publishers in the publisher panel.
2. Coupon – enter a coupon code if applicable. For more details, go here.
3. Advertiser – specify the advertiser associated with this campaign (if required).
4. Direct Traffic URL – enter the destination URL where publishers should send traffic.
5. Preview URL – set a preview link so publishers can review the landing page before promoting the campaign.
6. Preview Image URL – add an image URL that will be displayed as a campaign preview in the portal.
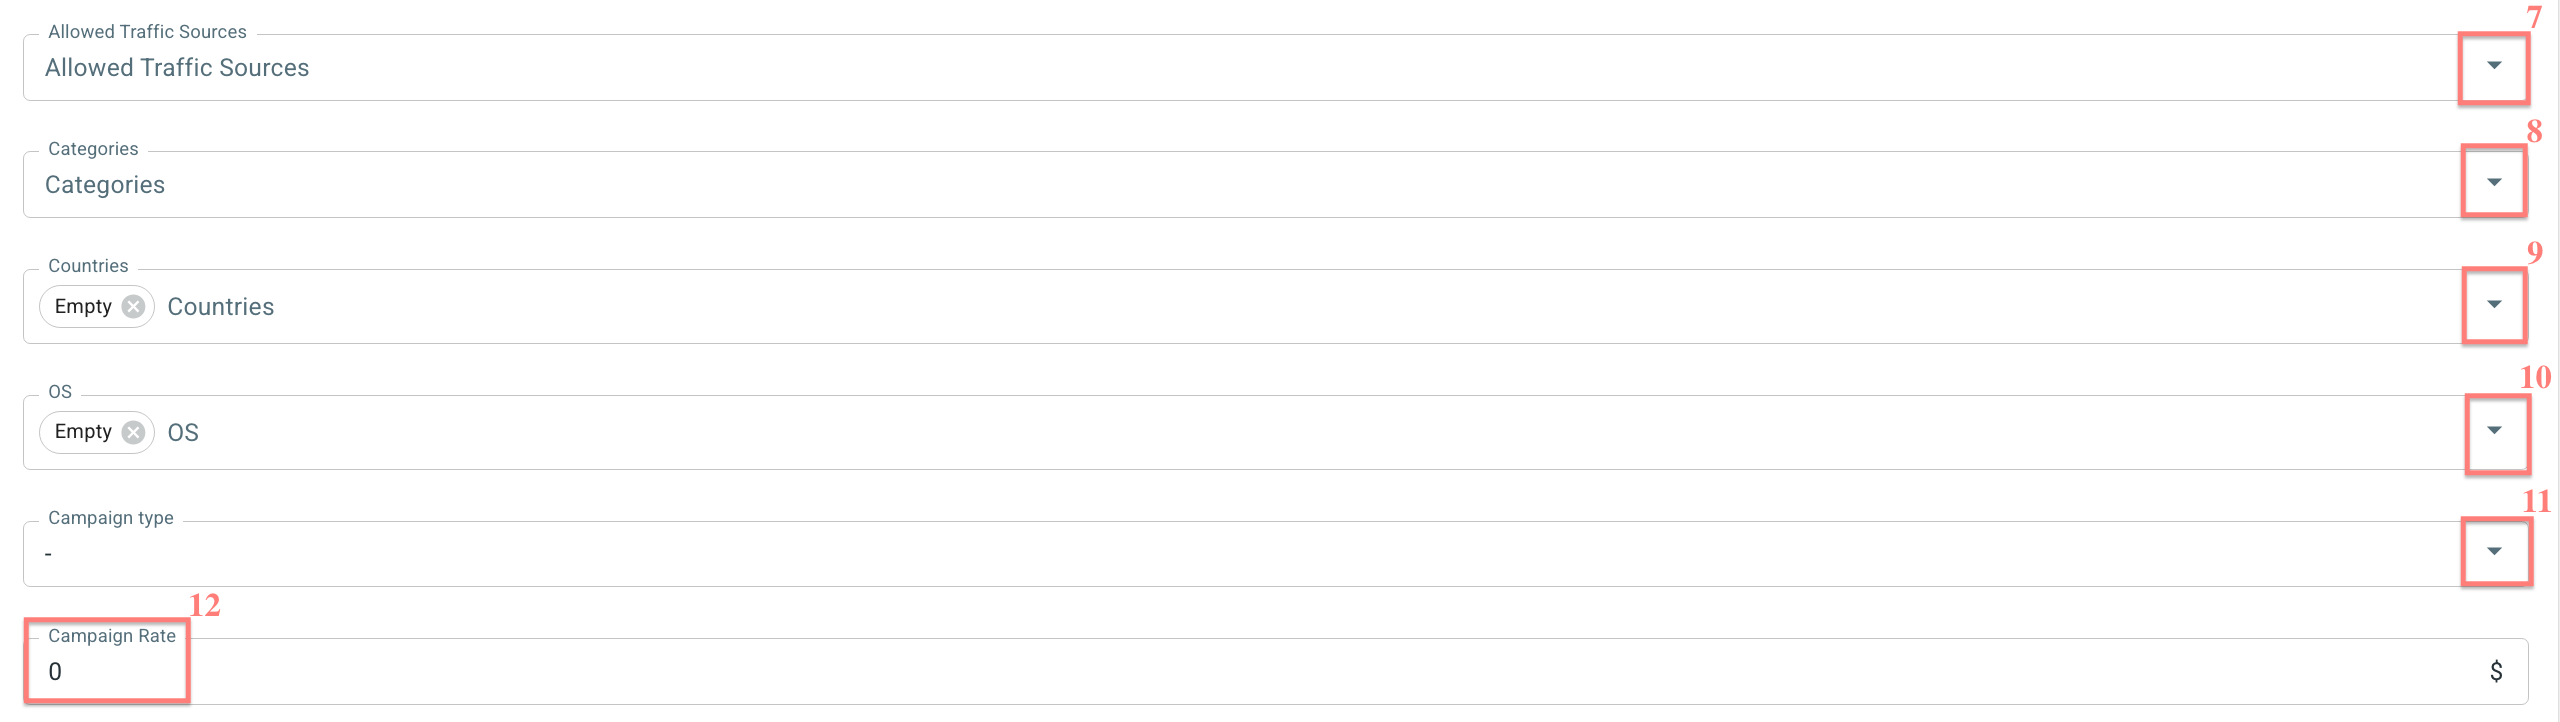
Fields explained:
7. Allowed Traffic Sources – select which traffic sources are permitted for this campaign.
8. Categories – assign categories to help publishers easily find and filter the campaign.
9. Countries – select the countries where traffic is allowed.
10. OS – select the allowed operating systems.
11. and 12. Campaign type and Campaign rate are pulled into the Details for Publishers tab by default from the main Campaign settings. If you need different values in the Details for Publishers tab, you have to manually enter these values in the relevant fields.
Fields explained:
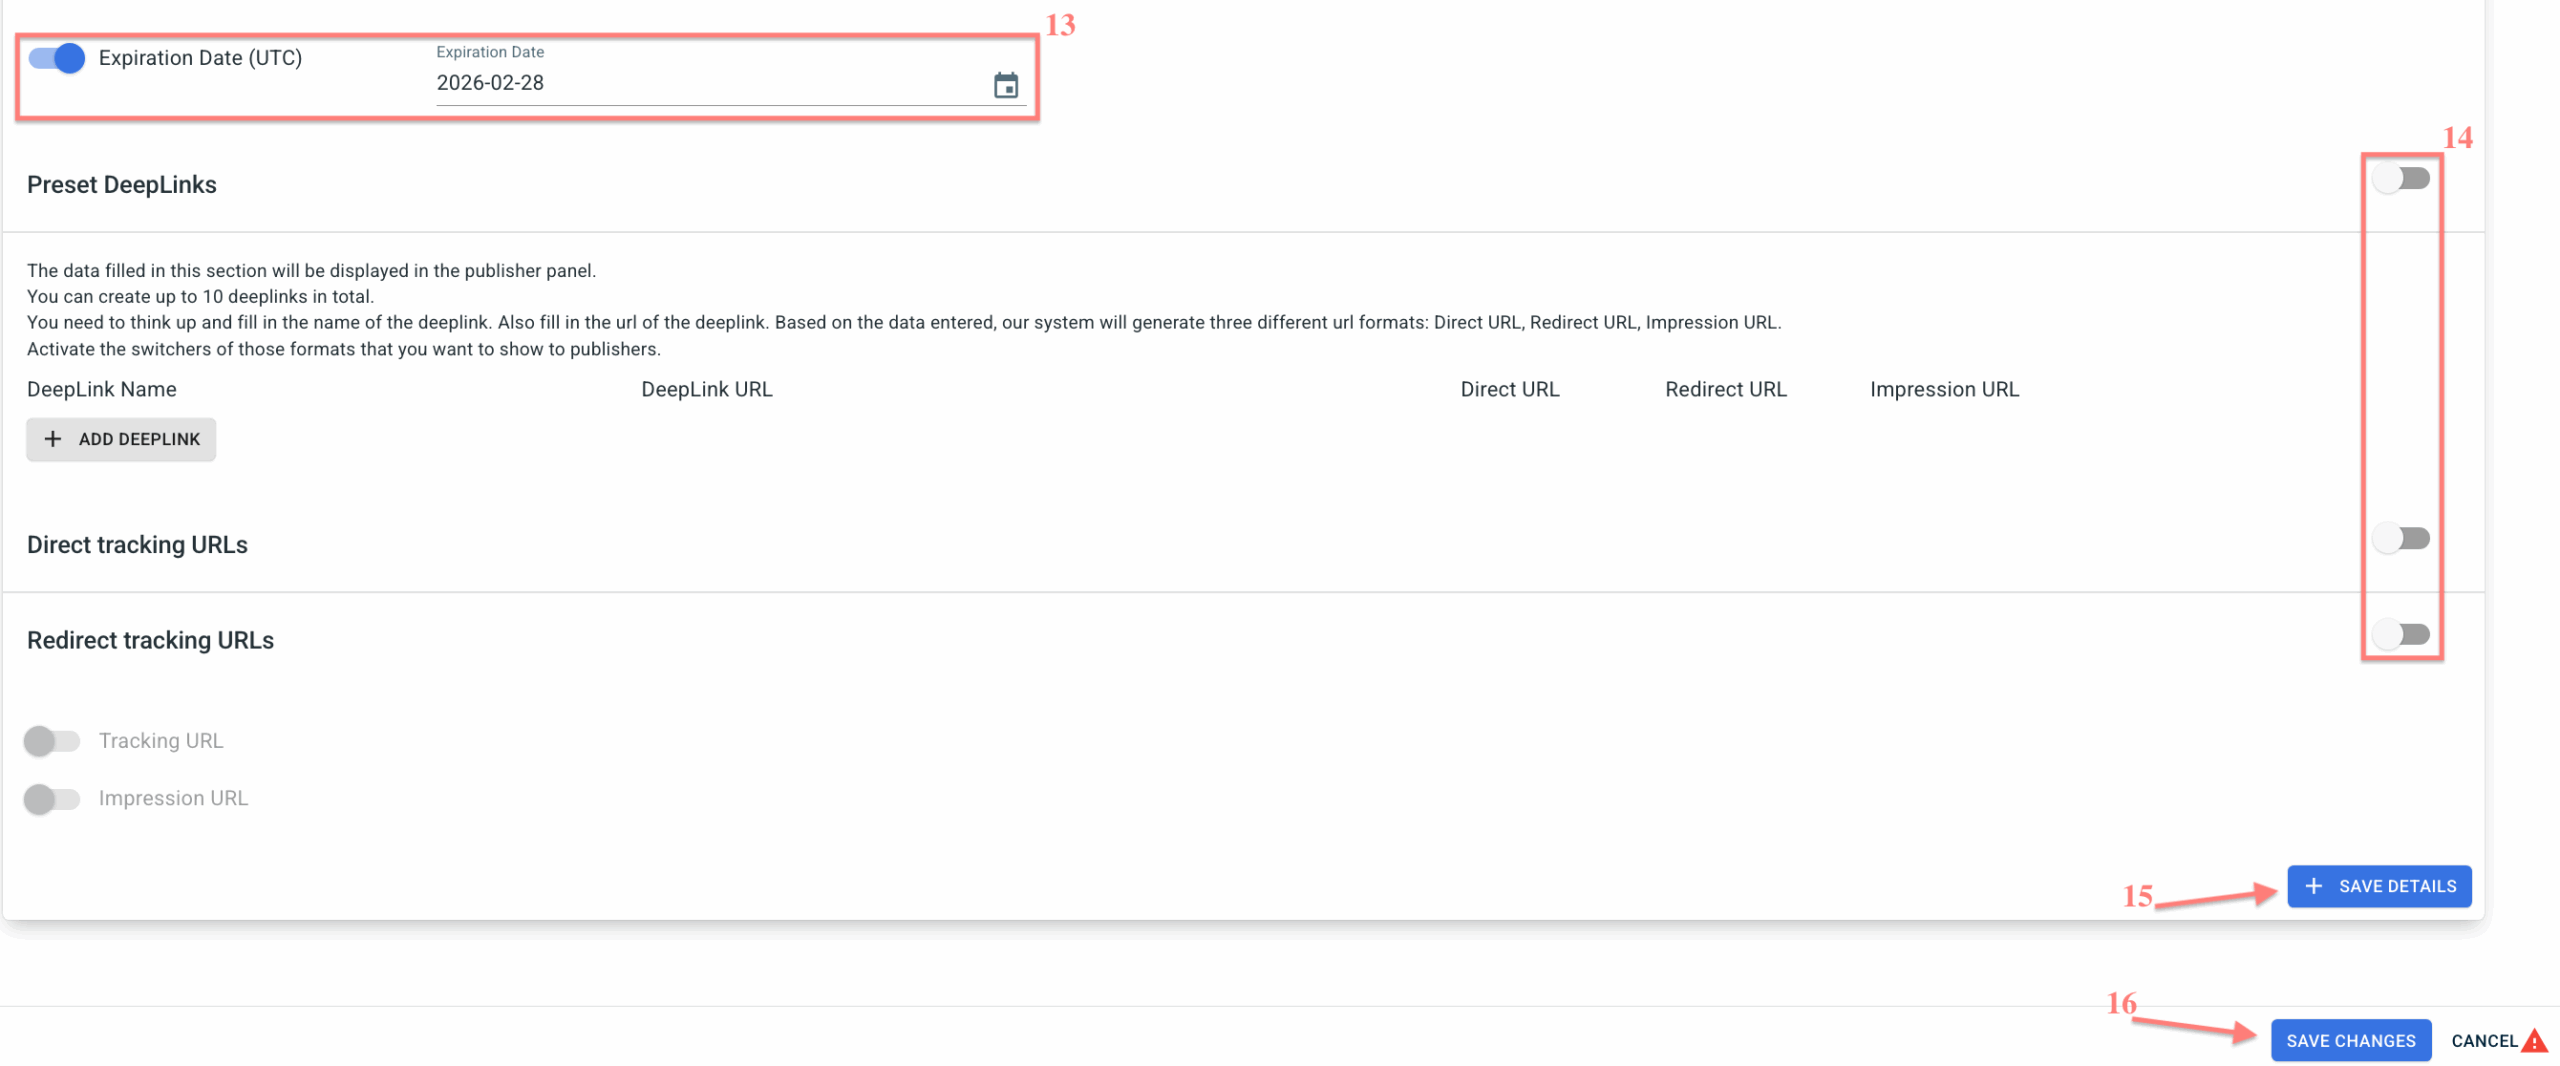
13. Expiration Date toggle allows you to set the date when you stop charging commission to publishers. After this date, the campaign continues to accept postbacks (conversions), but the commission is no longer charged to publishers.
14. Preset Deeplinks and Direct Tracking URLs allow you to control which tracking links are available to publishers. For more details, go here.
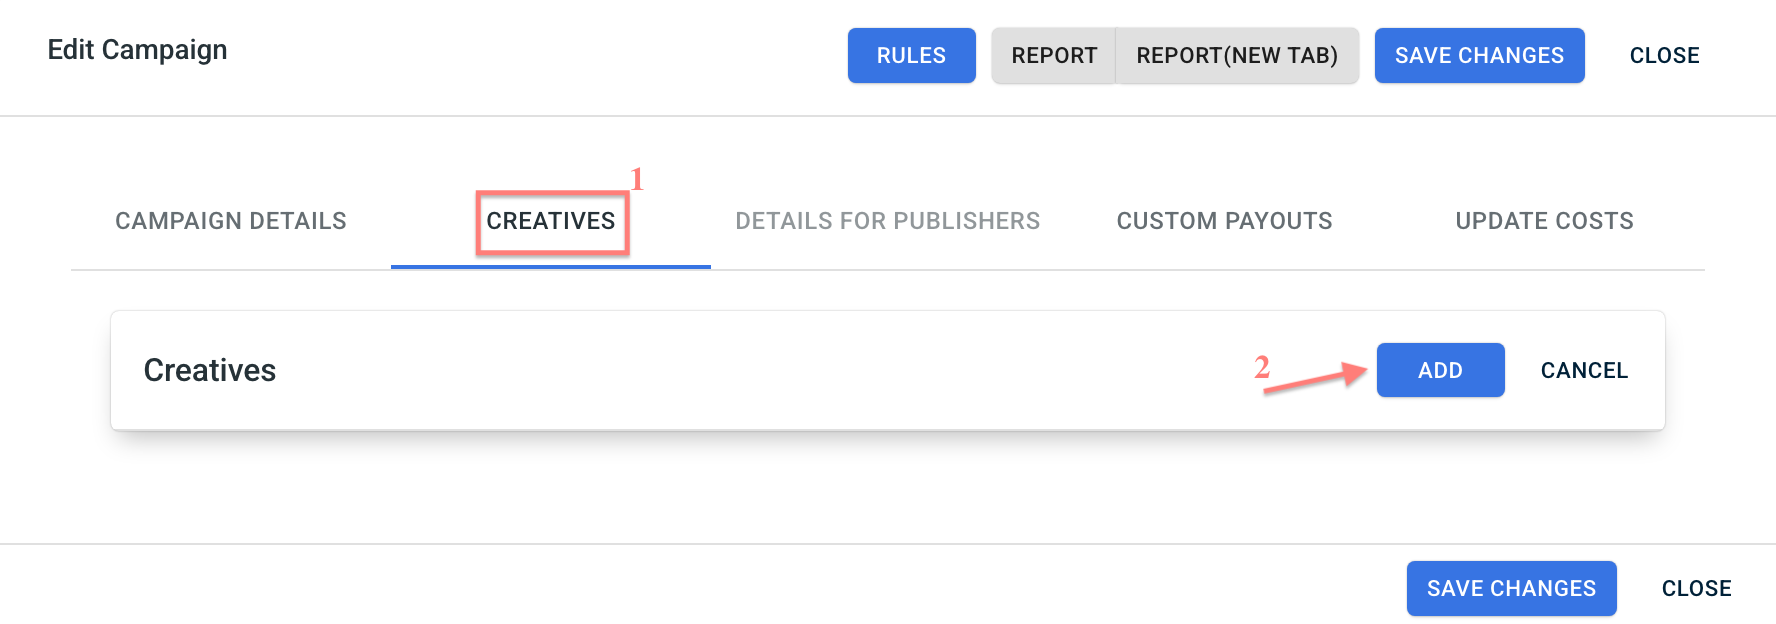
6. (optional) Add creatives
1. Go to the Creatives tab → Add → set the Title and Description → click Drop Creative Here and add your creative → Save → Save changes:

7. (optional) Set custom payouts
1. Go to the Custom Payouts tab if you need to set publisher-specific payouts:
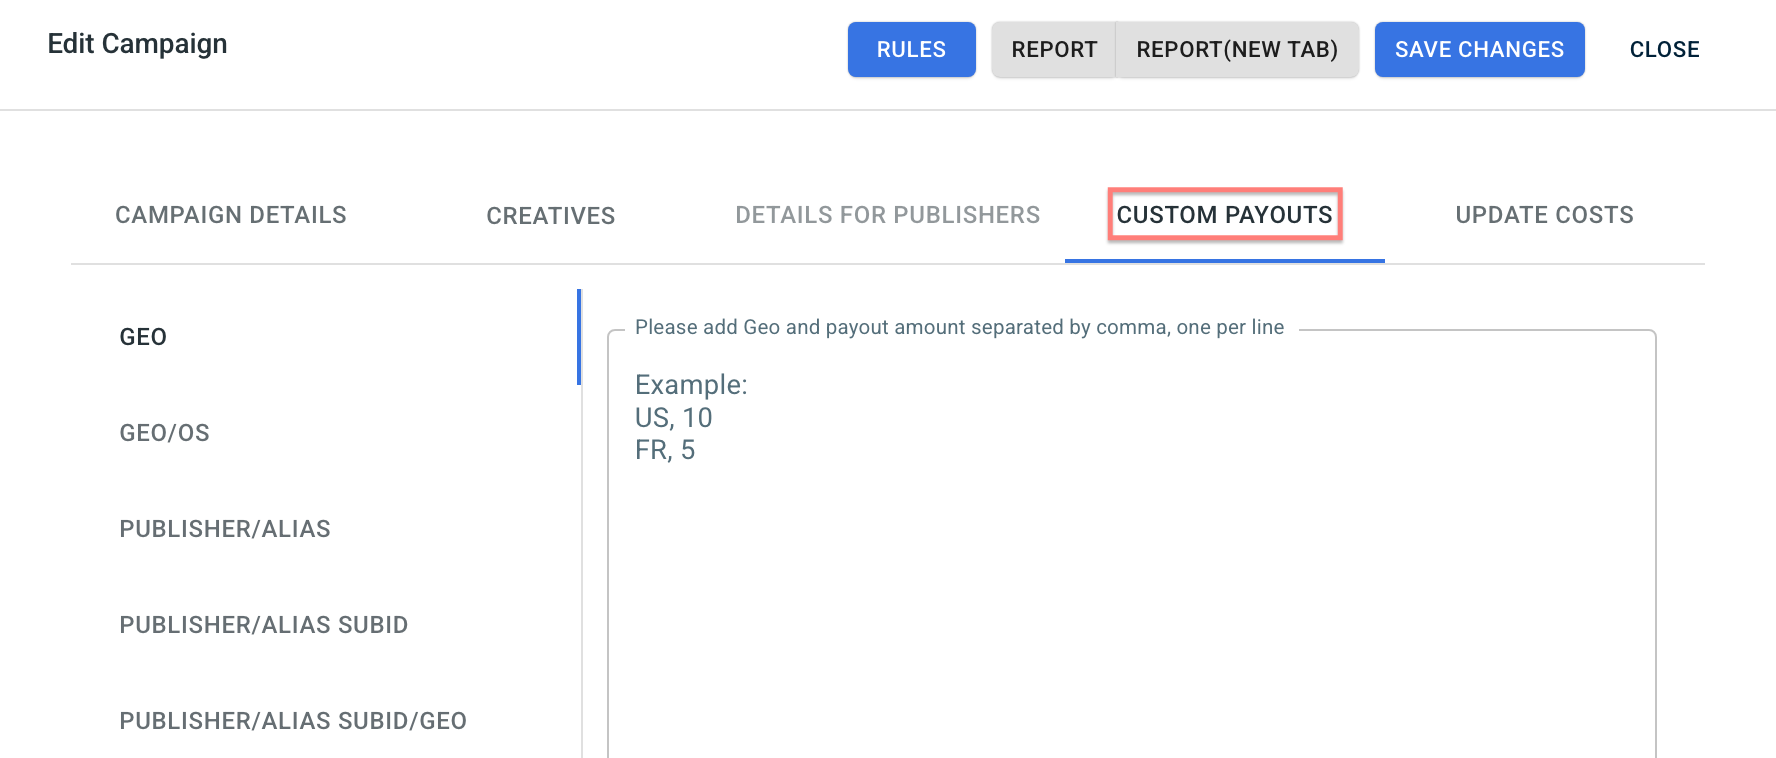
For detailed instructions, see Partnership portal: Managing Payouts.