
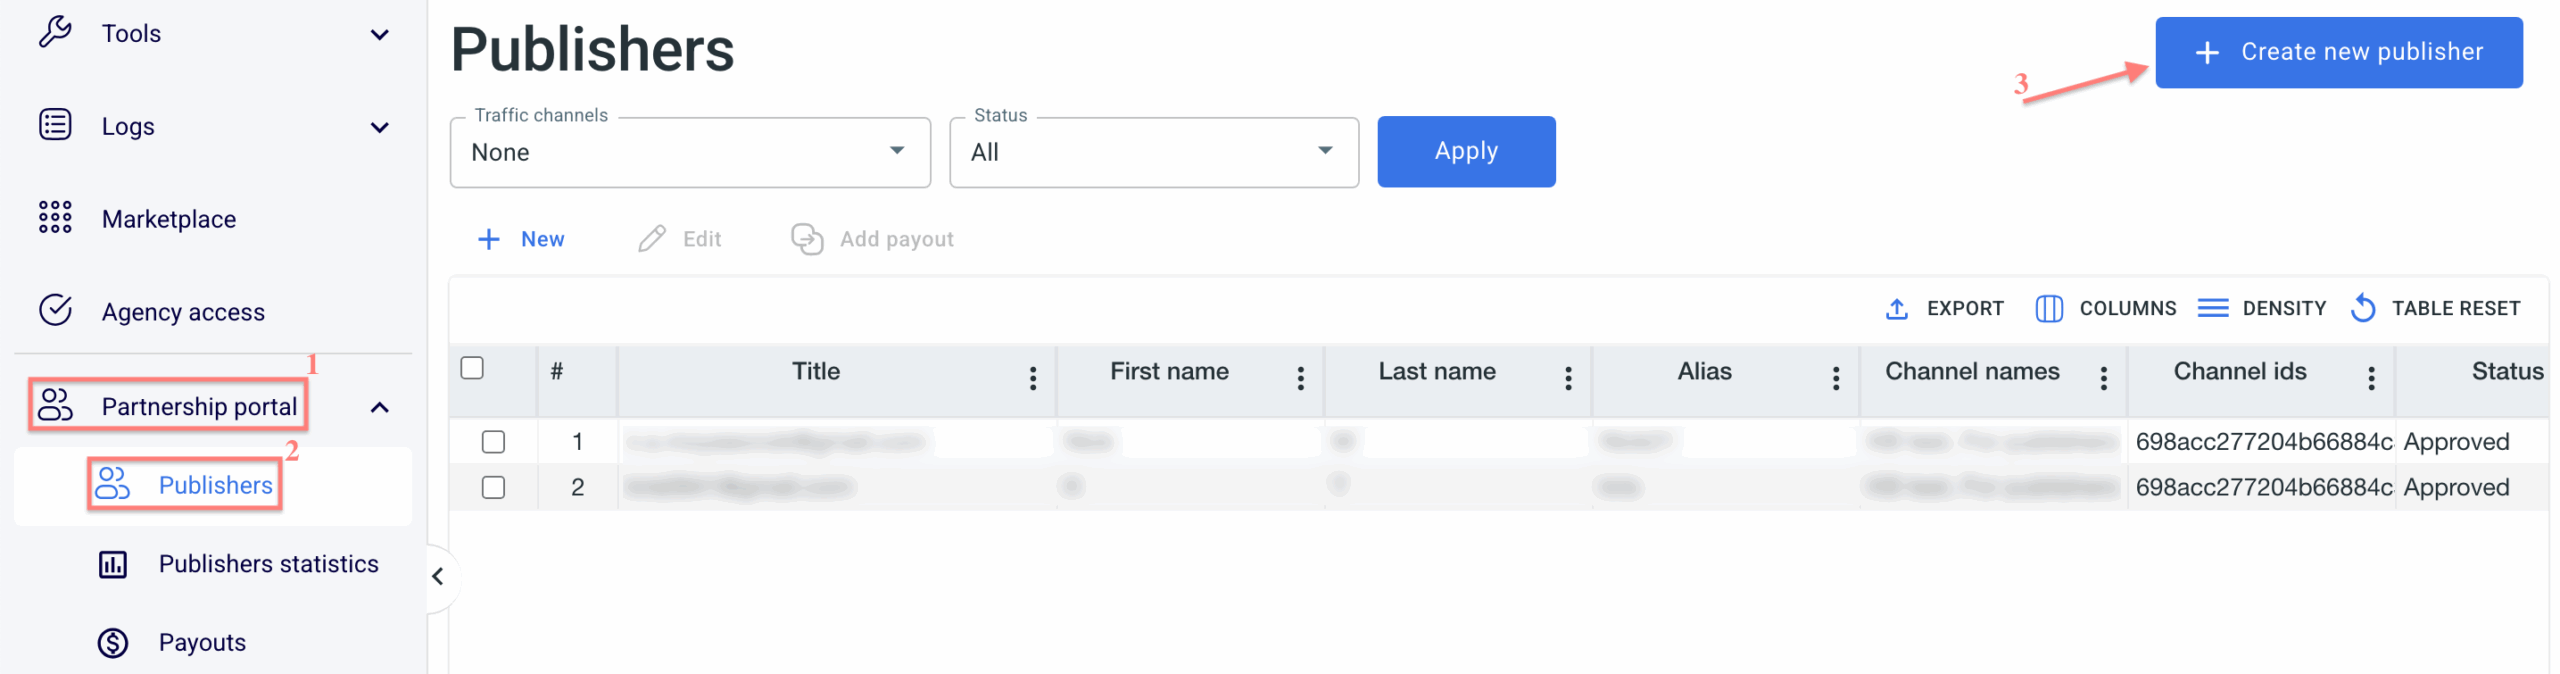
Partnership portal: adding partners/publishers
A publisher is a partner who promotes your campaigns and receives commission for conversions. In the Publishers section, you can add new publishers, configure their settings, and approve or decline their access to the portal.
Before you proceed with adding a publisher, make sure to have the following already added:
1. Create a New Publisher.
Go to Partnership portal → Publishers → Create new publisher → fill in the fields → Save:
Publisher Form – Field Explanation:
General section
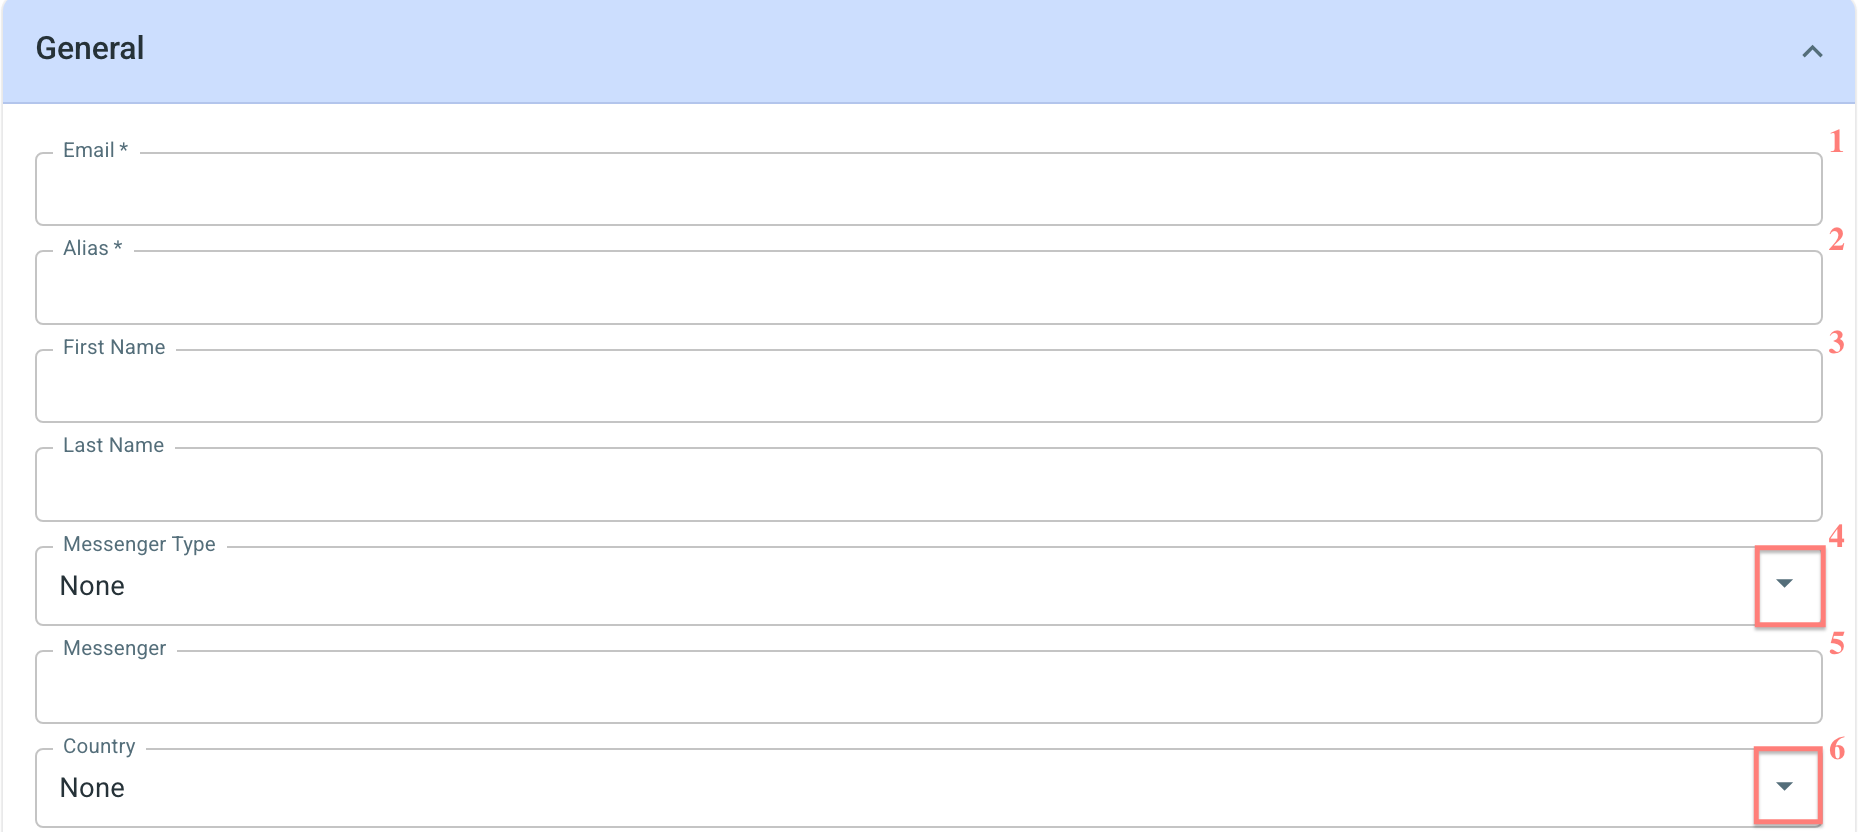
- Email – publisher’s login email and primary contact address.
- Alias – unique identifier used for tracking and attribution.
- First Name / Last Name – contact person’s name.
- Messenger Type – select the preferred communication channel.
- Messenger – enter the publisher’s messenger ID or username.
- Country – publisher’s country of operation.
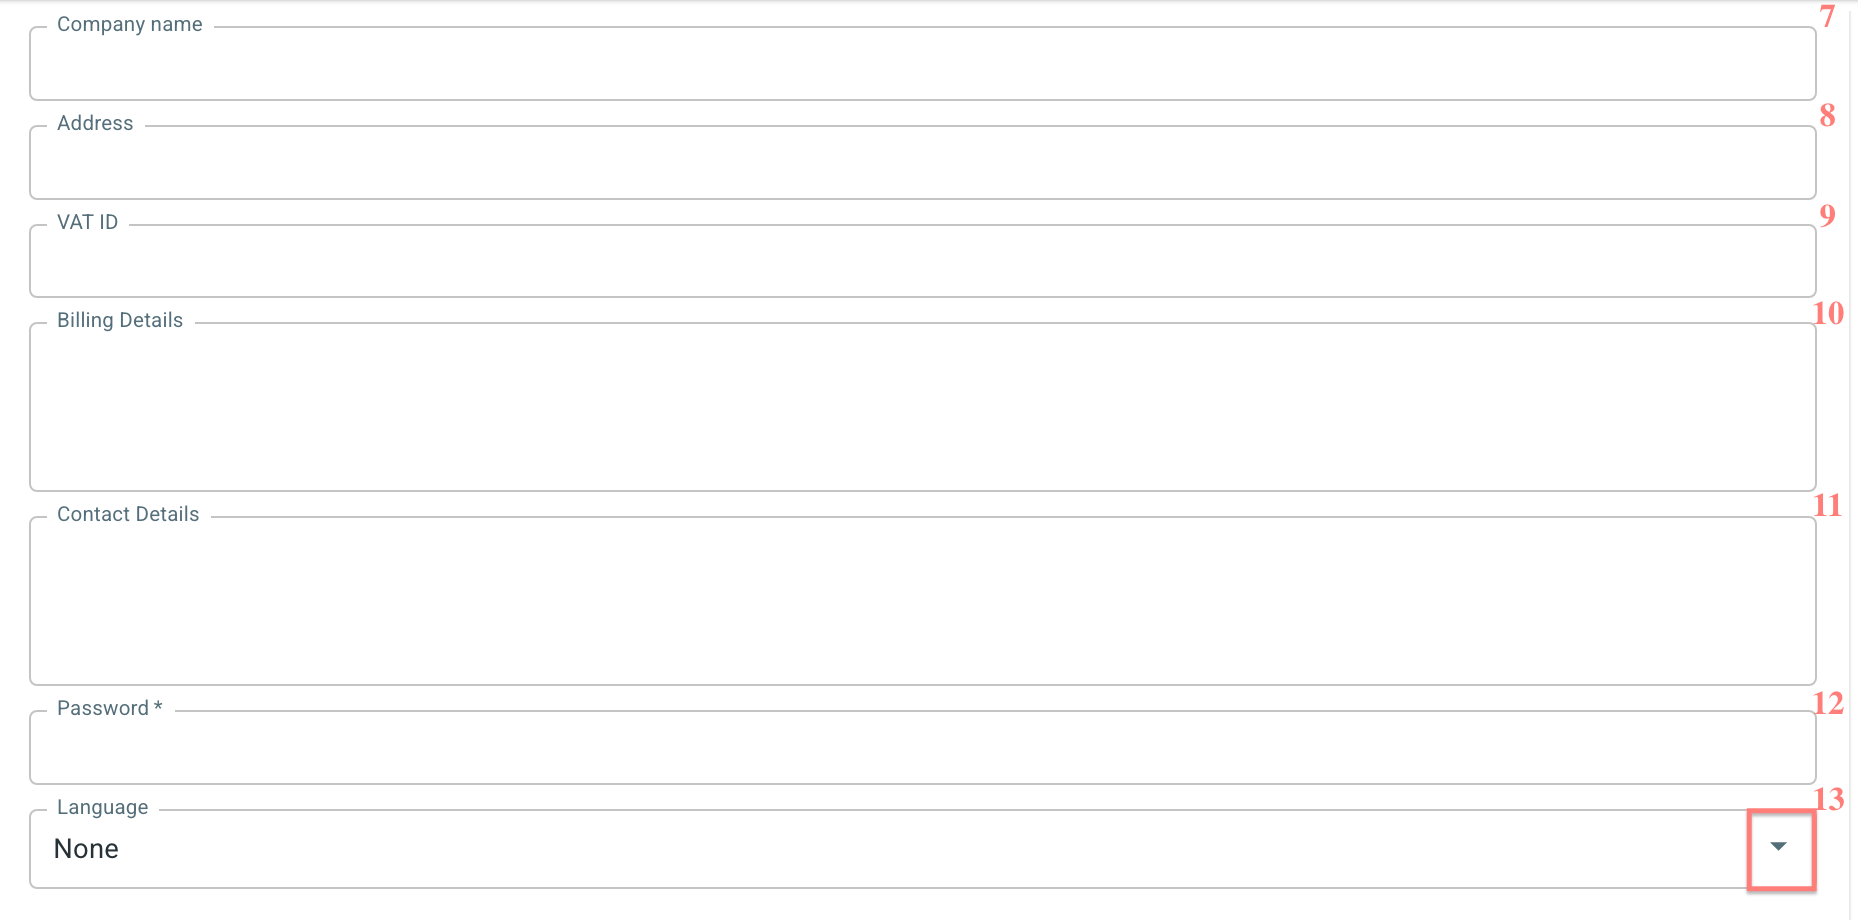
- Company Name – legal company name.
- Address – company or contact address.
- VAT ID – tax identification number (if applicable).
- Billing Details – payment details for commission payouts.
- Contact Details – additional contact information.
- Password – set the password for your publisher so he can log in to the branded portal (the publisher can change it later).
- Language – select the interface language for the publisher panel.
Settings section
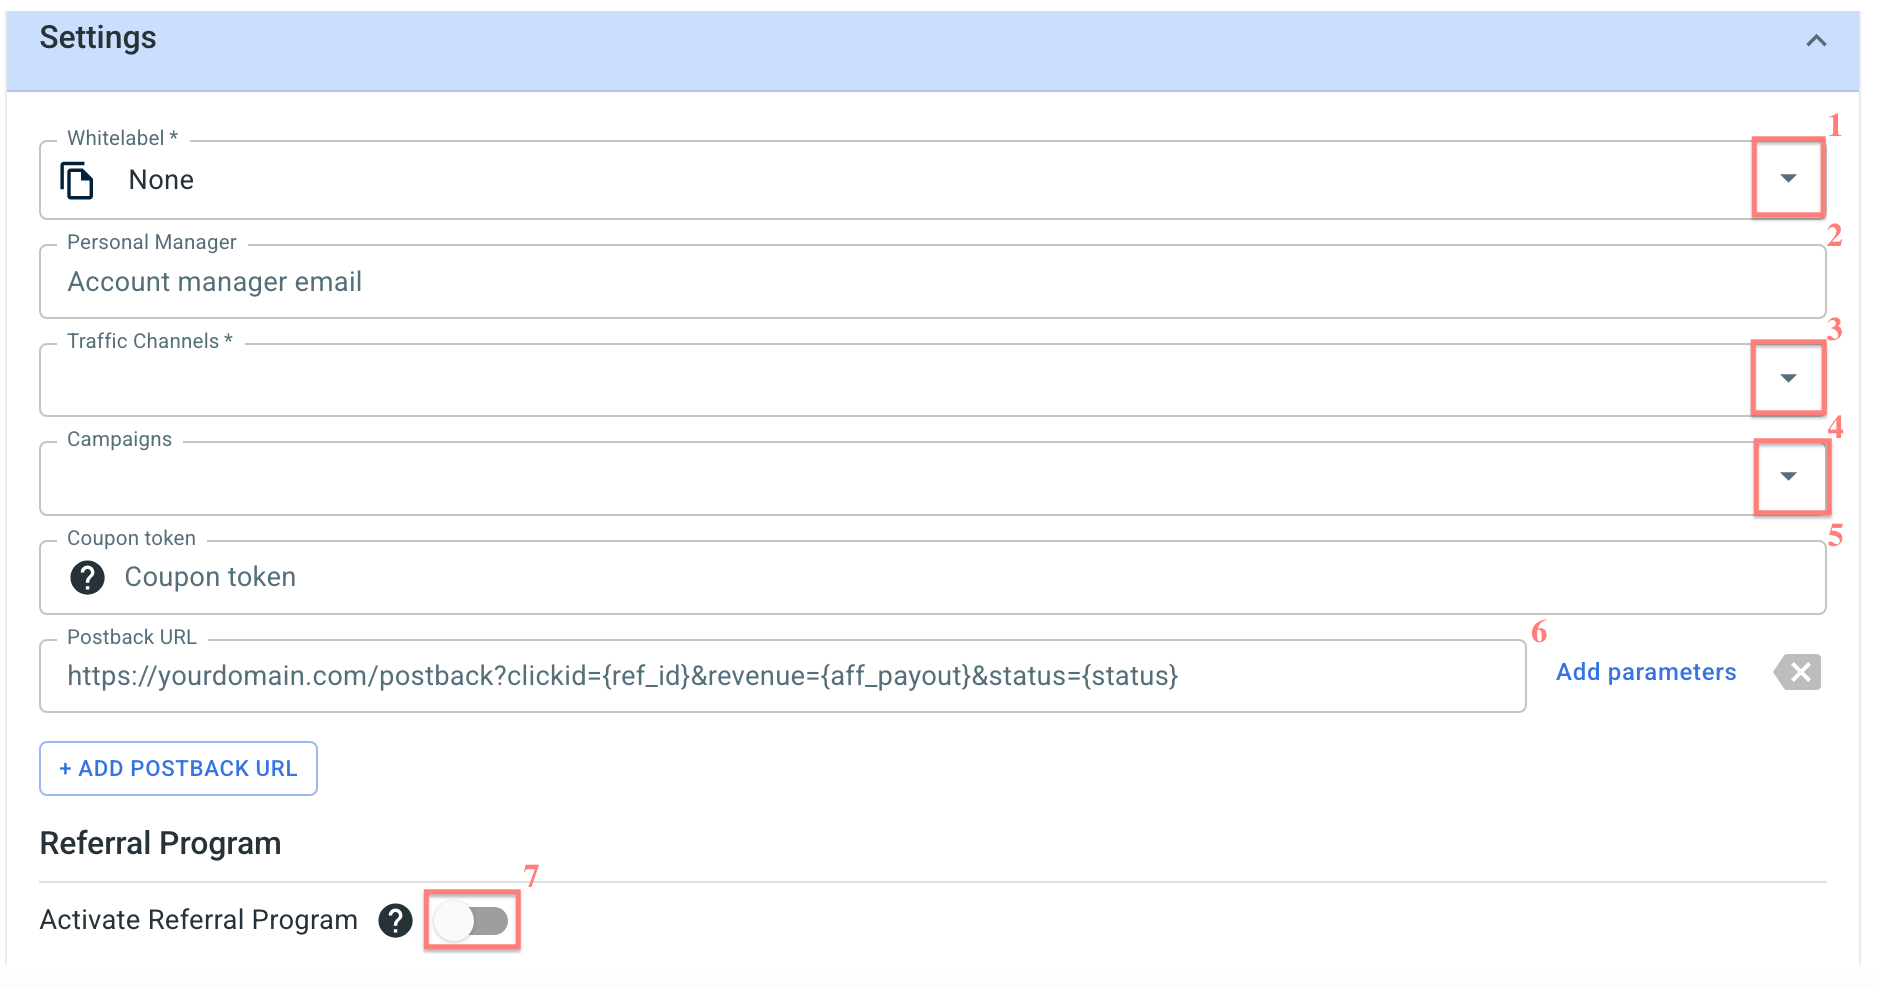
- Whitelabel – select the branded portal that the publisher will have access to.
- Personal Manager – email of the account manager assigned to this publisher.
- Traffic Channels – define which campaigns the publisher can access.
- Campaigns – restrict access to specific campaigns (optionally).
- Coupon Token – used for coupon-based tracking. The campaign coupon value, combined with the publisher’s coupon token, will create a unique Coupon. For more details, go here.
- Postback URL – set the URL where conversion data will be sent to the publisher. Once set, it will be automatically available in the publisher’s account. It will automatically be displayed inside the publisher/partner account. For more details, go here (Multiple Postbacks section).
- Activate the Referral Program – enable it so publishers can earn additional commission from referrals they attract to the system. For more details, go here.
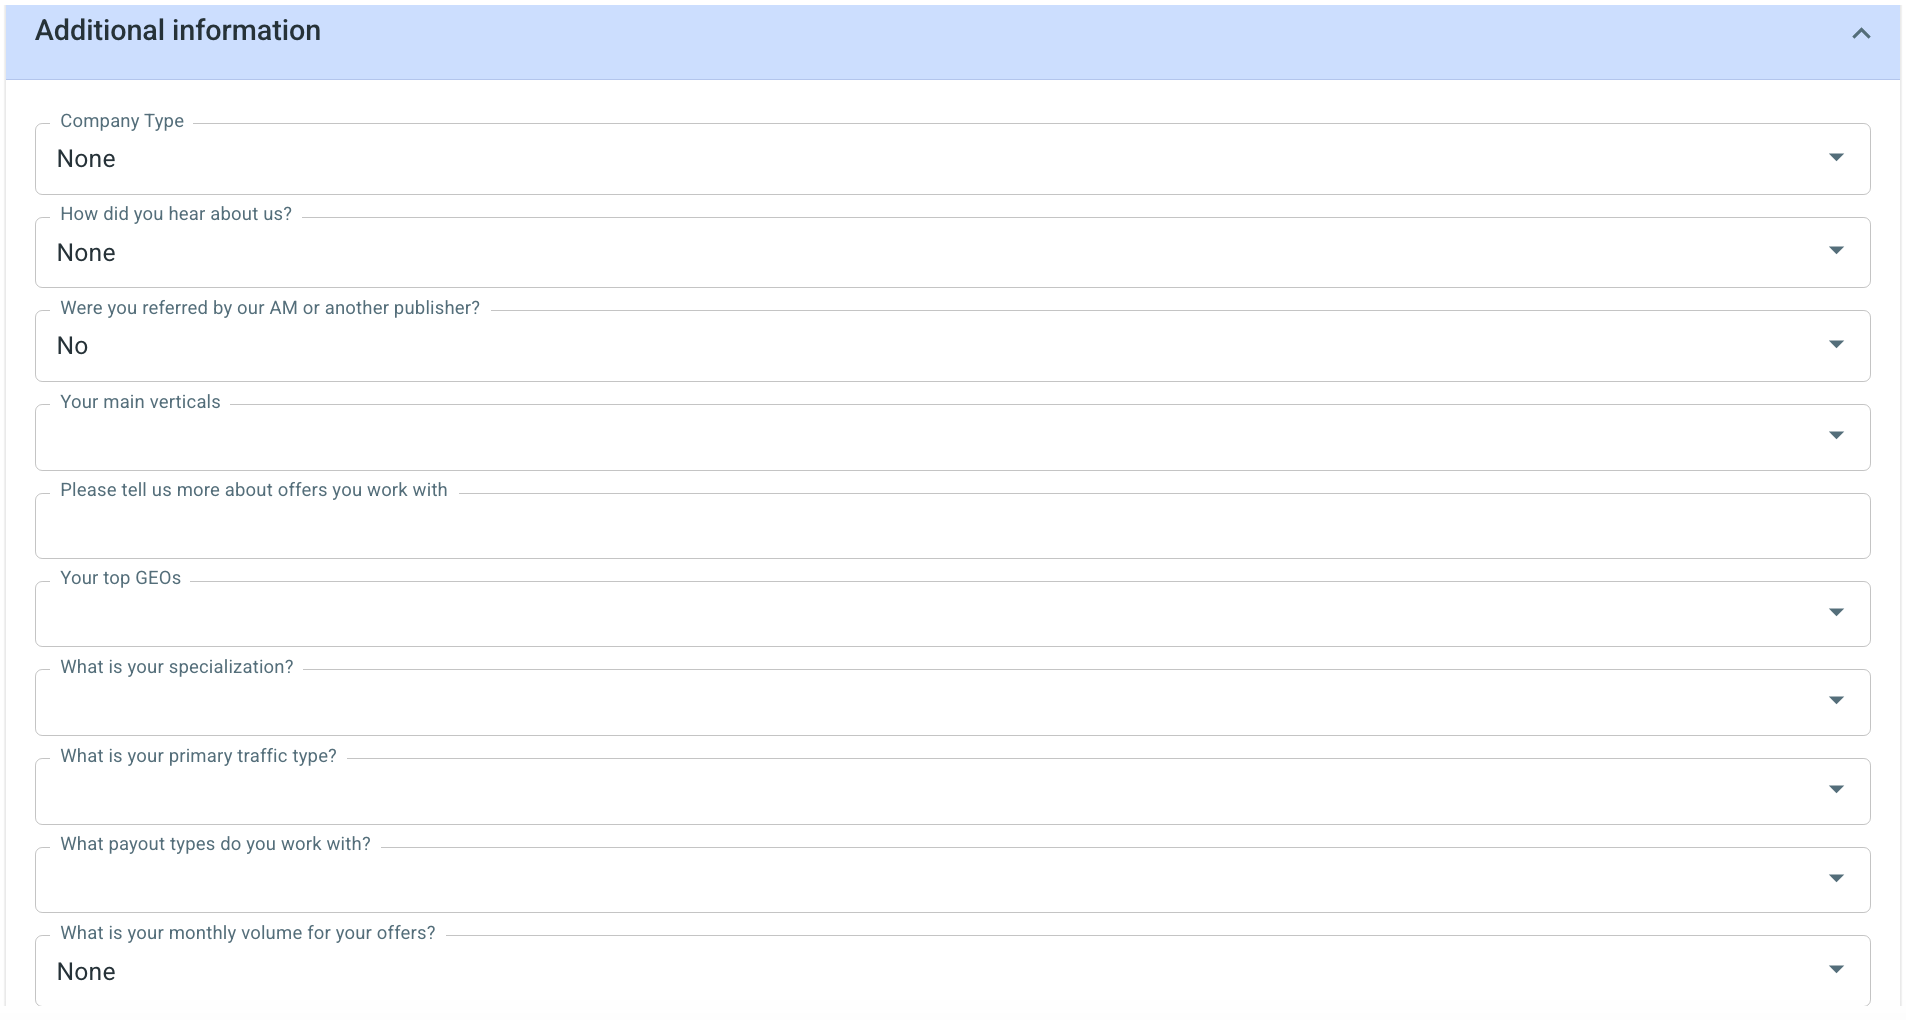
Additional information section
This section collects optional business information about the publisher:
2. Approve or Decline the Publisher.
After creating the publisher, you can approve or decline their access by pressing the needed button:

- If Approved, the publisher can log in to the portal and will have the status Approved:

After approval, a publisher can be set to Paused. In this status, traffic and revenue from the publisher can be restricted without permanently disabling the account.
- If Declined, the publisher will receive an email notification, and their status will be marked Declined:
