Adding Brand and Website
What is brand and website?
Brand is an element in RedTrack, which is your product name (shop, website). It is the essential element in the Campaign creation flow.
Website is the link to the exact product/shop you are promoting.
How to add a brand and a website
1. Before you start
Before you start adding Brand and Website make sure you already have the following elements added:
2. Brand
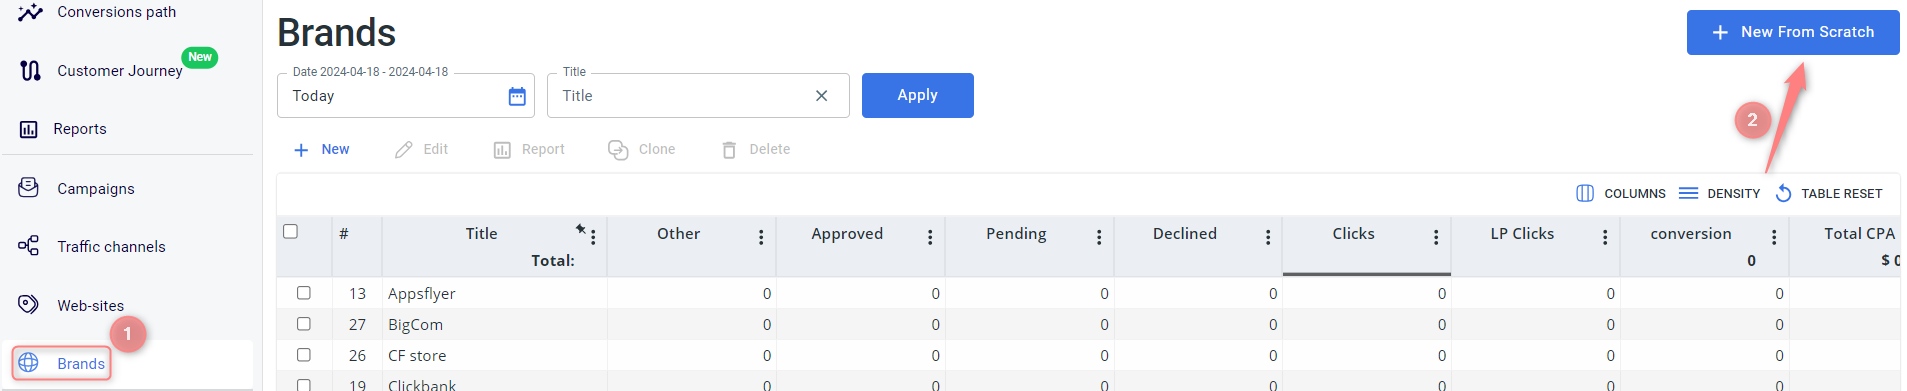
1. Brands → New from scratch:
2. Fill in the mandatory fields in the form → Save the template:
- Give your brand a name.
- Click expiration: check Click expiration for more details.
- Duplicate postback settings: can be useful if you receive several conversion types with the same click ID and want to exclude duplicated ones. Duplicate postback settings in the conversion types will be checked and applied first, so consider setting the postback mode there. Refer to this guide for details.
- Multi-currency: if you are receiving the payouts and costs in different currencies and want to transform them into your account currency based on the European Central Bank rate. Check the multi-currency support guide for more details.
The rest of the fields are optional, and you will need them only if your partner works with the S2S postbacks on the other side.
3. Website
1. Websites → Create new website:

2. Fill in the info in the Main, Scripts, CAPI (Maximize signals) tabs as per the hints below:
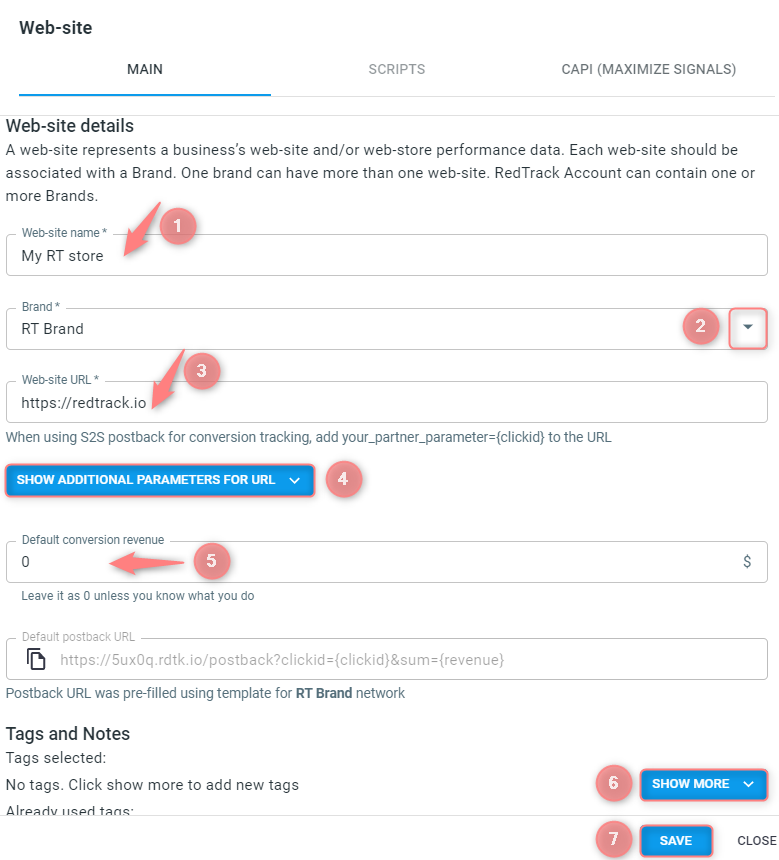
1. Website name: type in the name of your website here.
2. Brand: choose from the drop-down the brand you added earlier.
3. Website URL: this is the link to the product.
4. Show additional parameters for URL: in this section, you can find additional parameters for your URL (if needed).
5. Default conversion revenue: fill in if you want to receive the payout data statically, the same for each conversion.
6. Show more: press this button if you want to add tags to your websites. The guide on Tags has more details about this feature.
7. Save to apply the changes and move on to the next tab.
– a default traffic channel for the unattributed traffic is created.
– a default Campaign with this channel is created.
– you are redirected to the Scripts tab to proceed with the script generation.
Values for the universal tracking script
- Script name: give your script a name;
- Script tracking domain: choose the custom tracking domain you have added to your RedTrack account;
- Default tracking campaign: by default, this field is filled in with the unattributed traffic campaign;
- Attribution setting: defines the conversion attribution model;
- Attribution window: is relevant for first click / last paid click attribution models;
- Script cookie domain: a domain for the cookie. Use the website domain.
– can be found in Tools → Scripts.
– cannot be deleted, and only certain fields in such scripts can be edited. It is important for you to have it ready to be used all the time.
E-com integrations
If you use Shopify or WooCommerce, you can also find all the needed tracking scripts. Follow the steps in Shopify and WooCommerce guides for details.
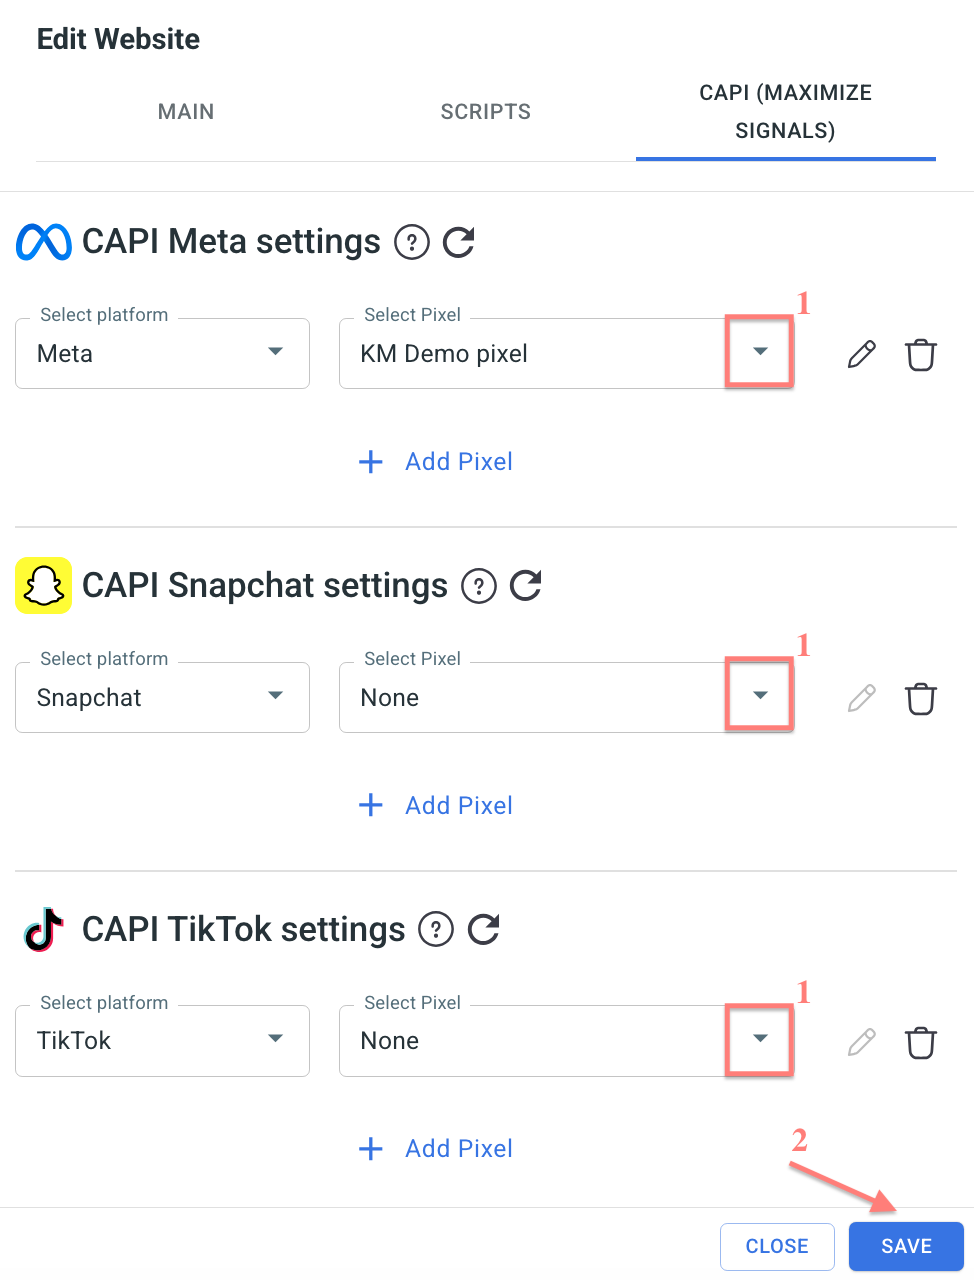
This tab allows you to configure Conversion API (CAPI) integrations for Meta, Snapchat, and TikTok. It enables RedTrack to send conversion events directly to the selected advertising platforms. For each platform, you can connect one or multiple pixels.
To assign a pixel, select the platform → Select Pixel → click Save: