Adding offer source and offer
Offer source is your affiliate network, your partner, direct advertiser, or your own products – someone who gives you the offers to promote.
Offer is the link you are promoting (affiliate link, partner link, hoplink, etc.). Offer source and Offer are the essential elements in the Campaign creation flow.
How to add
Offer source
Offer source templates include already preset data. They are used when your Offer source is an Affiliate Network / Partner. To add one:
1. On the main RedTrack menu go to Offer sources → New From Template:

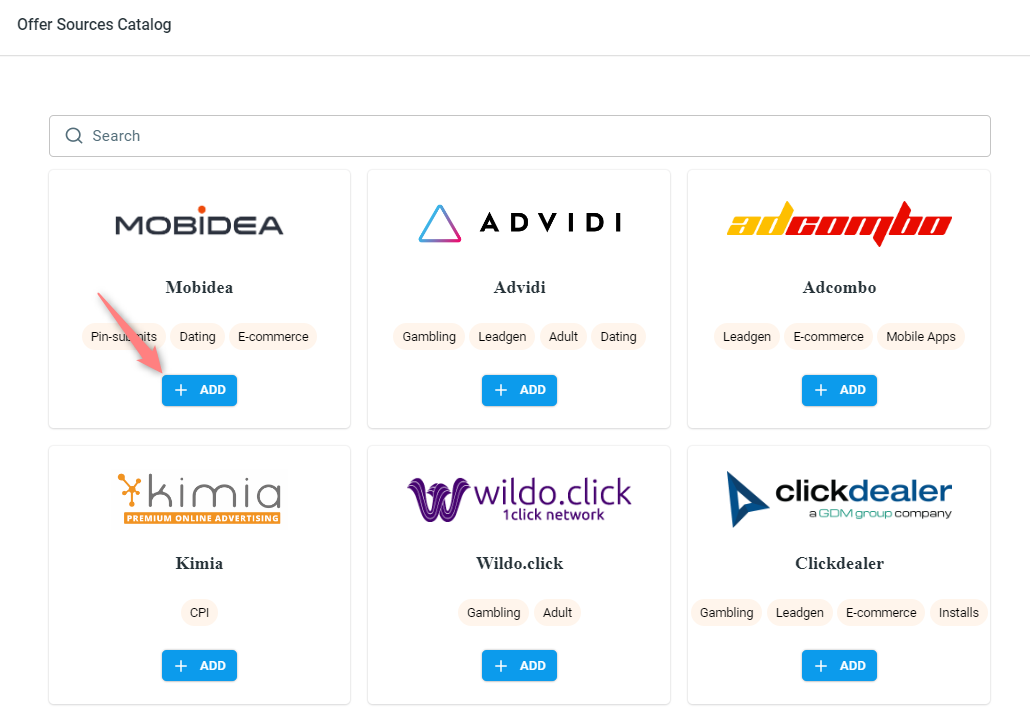
2. Choose the needed Offer source from the Catalog → press ADD:
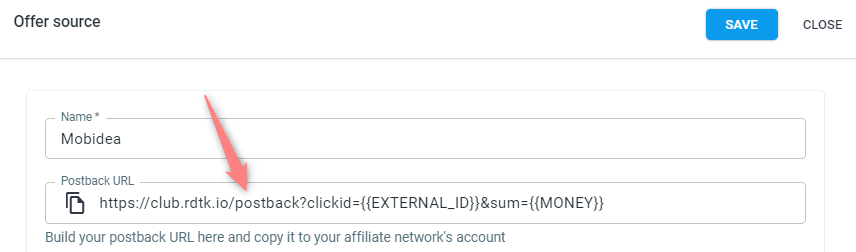
3. Once the template is added, you can see that all the essential tracking parameters have already been filled in and the Postback URL has been generated:
4. Adjust other settings the way you need → press Save to apply the changes to the template:
- Set click expiration if you need to filter out irrelevant conversions from your tracking report. Refer to the Click expiration article for details.
- Set Postback protection and Whitelisted IPs if you need to protect your link from fraudulent conversions in your CPA campaigns. Refer to the Protecting your postback article for details.
- Set duplicate postback settings if you receive several different conversion types with the same clickid and exclude duplicated ones. Refer to the Duplicate postback settings in Offer sources article for details.
- Enable the multi-currency feature if you want to receive the payouts and costs in different currencies and transform them into your account currency based on the European Central Bank rate. Refer to the Multi-currency support article for details.
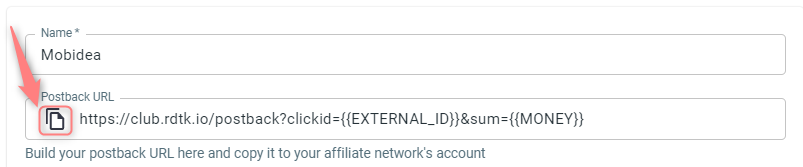
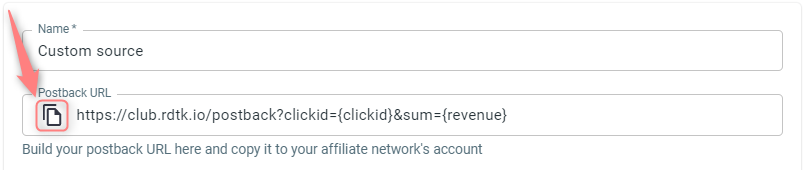
5. Once you’ve saved your Offer source, copy the generated Postback URL and paste it to your Affiliate Network’s global postback settings:

In case your Affiliate Network is missing from the templates list, you can add it in a custom manner:
1. On the main RedTrack menu, go to Offer sources → New From Scratch:
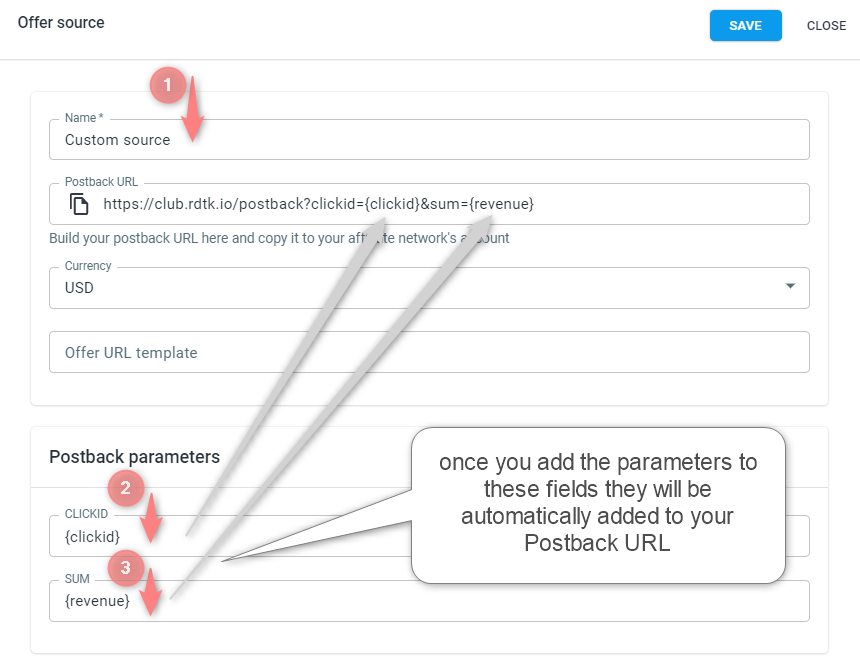
2. Fill in the required fields. The most important ones are:
- name of your Affiliate Network
- the parameters your Affiliate Network supports, which should be added to the fields CLICKID and SUM in the Postback parameters section. Once you add the parameters to these fields, they will be added to your Postback URL:
3. Adjust other settings the way you need → press Save to apply the changes to the template:
- Set click expiration if you need to filter out irrelevant conversions from your tracking report. Refer to the Click expiration article for details.
- Set Postback protection and Whitelisted IPs if you need to protect your link from fraudulent conversions in your CPA campaigns. Refer to the Protecting your postback article for details.
- Set duplicate postback settings if you receive several different conversion types with the same clickid and exclude duplicated ones. Refer to this article for details.
- Enable the multi-currency feature if you want to receive the payouts and costs in different currencies and transform them into your account currency based on the European Central Bank rate. Refer to the Multi-currency support article for details.
4. Once you’ve saved your Offer source, copy the generated Postback URL and paste it into your Affiliate Network’s global postback settings:
Offer
1. Go to Offers → Create new offer:

2. Fill in the info in the Main, Caps, CAPI (Maximize signals) tabs as per the hints below:
In the Main tab, you give the general info about your Offer:
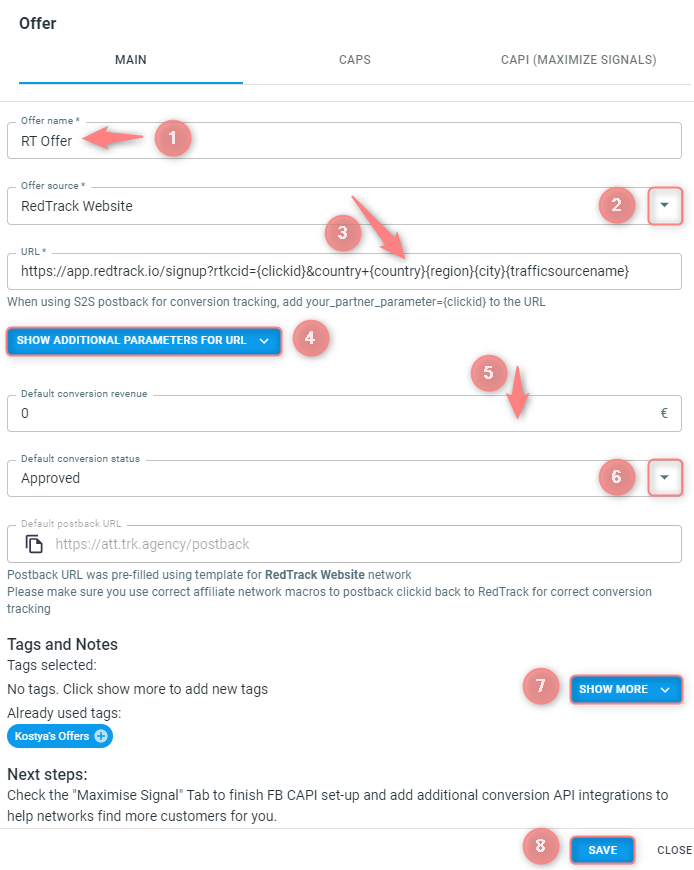
1. Offer name: your offer name.
2. Offer source: choose from the drop-down the offer source you added earlier.
3. URL: this is where you should place the affiliate link. If you use S2S postback for conversion tracking, you should add your_partner_parameter={clickid} to the end of the URL.
4. Show additional parameters for URL: in this section, you can find additional parameters for your URL (if needed).
5, 6. Default conversion revenue and default conversion status: fill in these fields if you want to receive data (payout and status) statically, the same for each conversion. Refer to this article for details on conversion types and statuses.
7. Show more: press this button if you want to add tags to your offers to have a better grouping in the offers list later. Refer to this article for details on Tags.
8. Save to apply the changes in your offer to move on to the next tab.
Caps are the limitations applied to your offer. It can be related to the conversion amount, unique visits, or clicks. When the cap is reached, the offer will be temporarily removed from the rotation, and RedTrack will stop sending traffic to it.
Unique visits
A unique visits cap allows you to limit the number of times each particular offer will be shown to the same visitor. If the visitor has exceeded the limit, they are a non-unique visitor and will be directed to the other offer within the same Campaign/Funnel. If only one offer is added to the Campaign, a non-unique visitor will be redirected to the fallback URL, or if there is none, the click will be ignored.
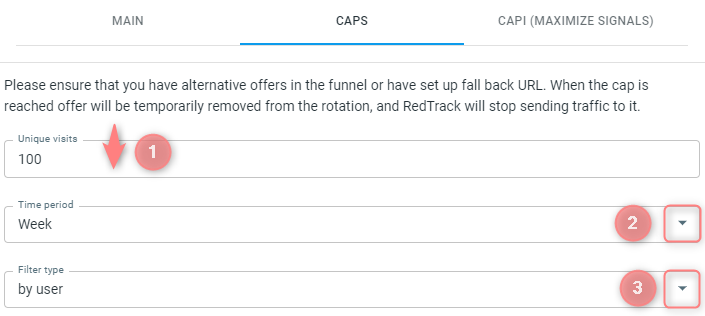
▸ Unique visits by users are tracked using browser cookies. Each cookie contains a timestamp of the user’s visit, stored under a key based on the offer’s ID. This allows RT to determine unique users and apply caps accordingly (by day, week, or month).
▸ Non-unique clicks will not be counted towards events included in your RedTrack plan.
Conversion cap
The conversion cap allows you to set a daily limit of conversions for a particular offer. When the limit of conversions is exceeded, the traffic will be automatically redirected to the other offer within the same Campaign/Funnel or to the fallback URL.

▸ The conversion cap sets a daily limit of conversions, which means that the traffic will be redirected automatically back to the main Offer after 24 hours.
Click cap
The offer click cap option can limit the number of clicks you want to receive for a particular offer. The same as with a conversion cap, when the limit of clicks is exceeded, the traffic will be redirected to the other offer within the same Campaign/Funnel or to the fallback URL.

▸ The click cap option also sets a daily limit of clicks, the traffic will be redirected automatically back to the main Offer upon a new day.
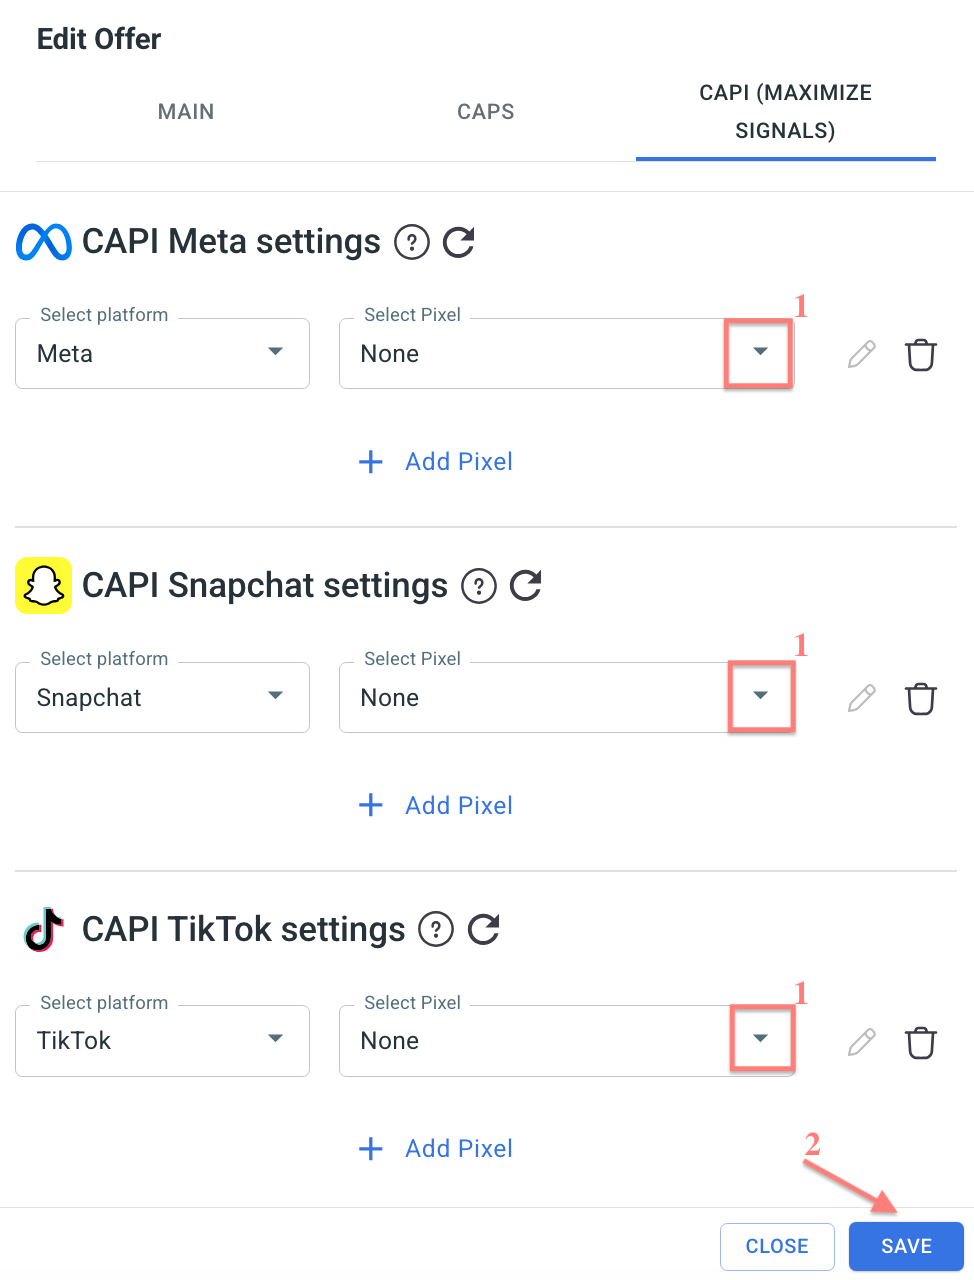
This tab allows you to configure Conversion API (CAPI) integrations for Meta, Snapchat, and TikTok. It enables RedTrack to send conversion events directly to the selected advertising platforms. For each platform, you can connect one or multiple pixels.
To assign a pixel, select the platform → Select Pixel → click Save: