
Multi-user access
The multi-user access feature allows several users to work in one RedTrack account. This is essential when you have a team where everyone needs access to edit the data or even different levels of access (for example, based on traffic channels). Each invited user will have access to your account (Admin account), and you (Admin) will be able to manage the performance of each shared user.
RedTrack allows you to add both existing users and those without a RedTrack account. The process varies slightly depending on the situation.
User has an account in RedTrack
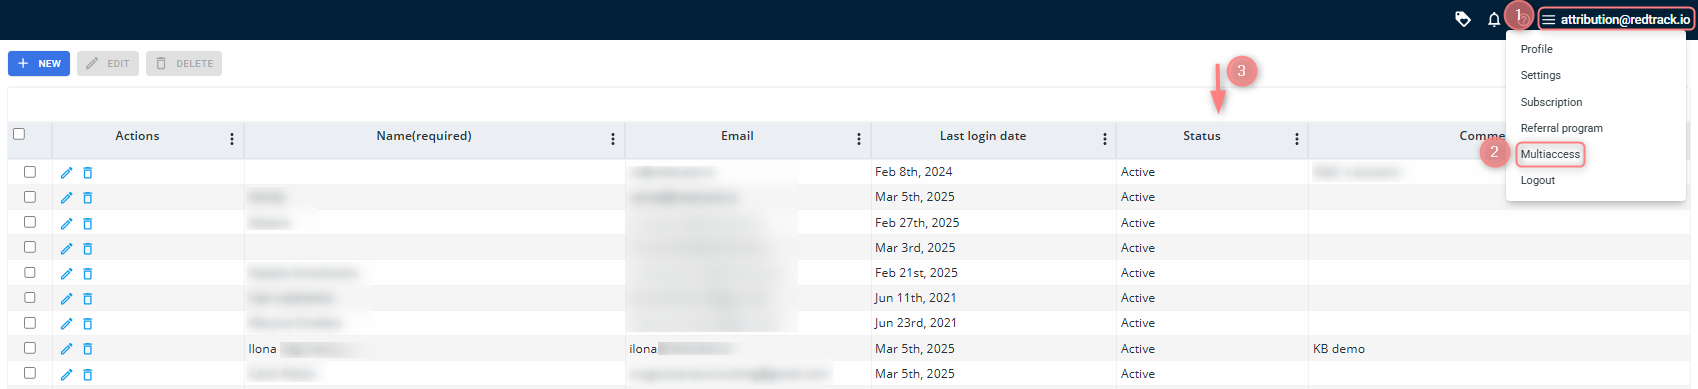
1. Navigate to the burger menu → Multiaccess → New:

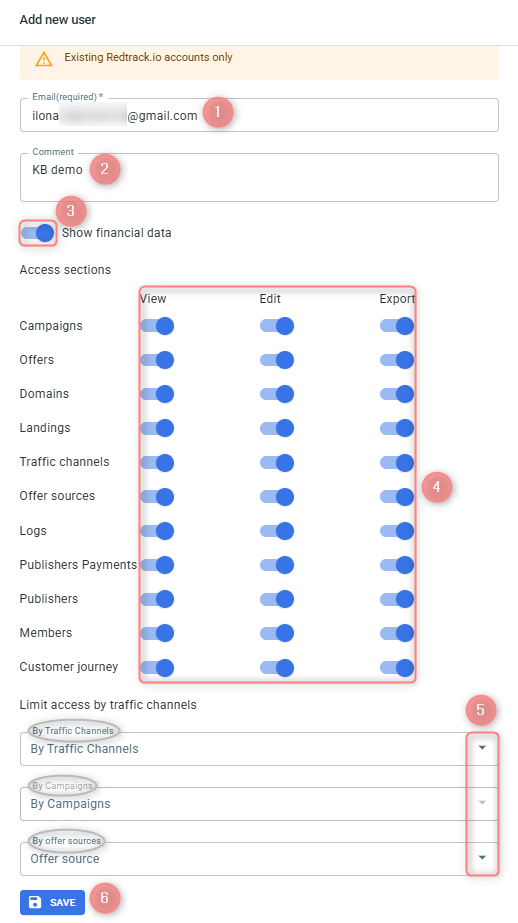
2. Enter the email for the shared user→ assign the needed permissions (give/limit access to certain sections and other data) → Save:
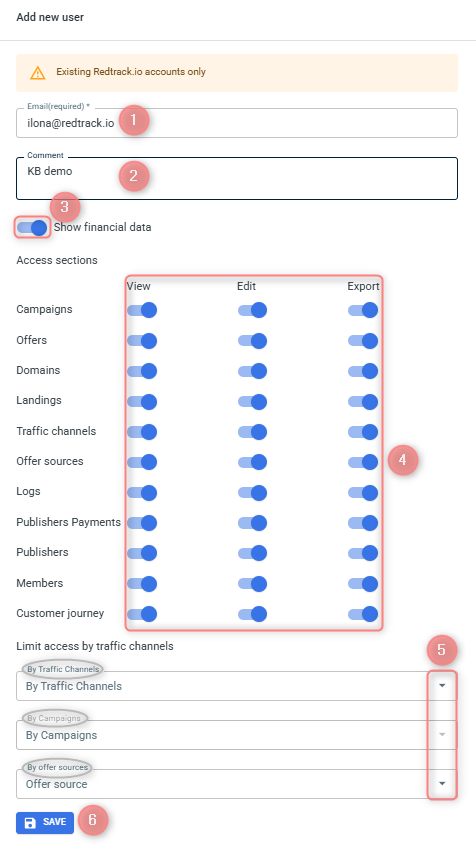
Fields explained:
Enter the email of the user you want to grant access to.
This field is optional.
Leave a comment to help distinguish this user from others.
Turn on the toggle Show financial data to reveal the financial data or turn the toggle off to hide it from this user.
Decide on the sections accessible to the shared user and select the types of actions (s)he can perform within these sections by enabling the corresponding toggle.
To allow users to work with specific Traffic channels, Campaigns, or Affiliate networks, you can restrict access accordingly.
Let’s break down the logic of the limited access based on the Traffic channels in the screenshot below:
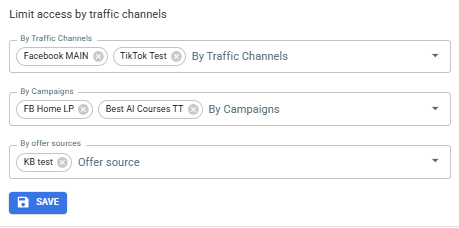
If you add Facebook and TikTok traffic channelsto the “By Traffic Channels” field, then in the “By Campaigns” field you can select only the Campaigns that were created with the added Traffic channels Facebook and TikTok:
- “By Campaigns” field depends on the “By Traffic Channels” field, so if you delete Facebook and TikTok channels from the “By Traffic Channels” field, then the Campaigns that refer to these traffic channels are also automatically deleted from the “By Campaigns” field.
- “By Traffic Channels” field does not depend on the “By Campaigns” field, so if you delete Campaigns that refer to Facebook ad TikTok from the “By Campaigns” field, they won’t be deleted from the “By Traffic Channels” field.
- “By Brand/Offer source” field is an independent field, so you can choose there any added Brand/Offer source regardless of the info selected in the “By Traffic Channels” or “By Campaigns” fields.
Save to apply the changes.
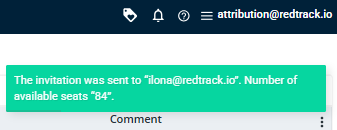
3. Once you’ve pressed Save:
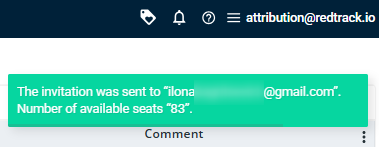
- An alert pops up stating that the invitation was sent off and informing you about the remaining number of available invitations for your account:
- An invitation is sent to the shared user for them to accept it:
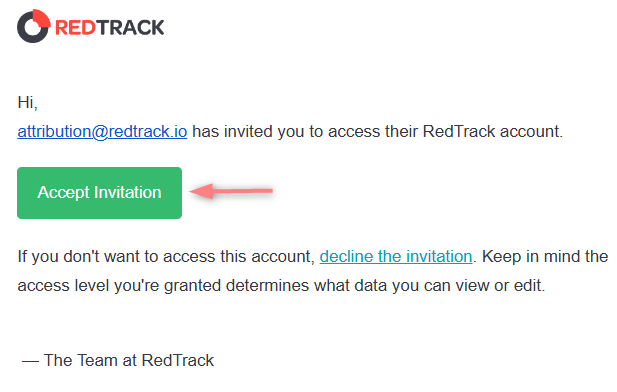

4. Course of actions from the invitee’s (potential shared user’s) side:
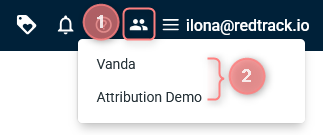
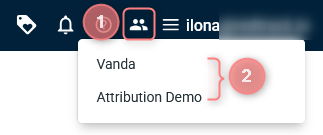
1. Once the invitation is accepted, the user is redirected to the RedTrack login page. To access the shared account, navigate to the upper right corner → press the Shared Access button → find the needed account name:
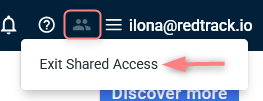
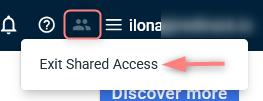
2. To exit the multiaccess account, click on the multiaccess button and press Exit Shared Access option:
If the invitation is declined, the user is removed from the list of shared users.
User doesn’t have an account in RedTrack
1. Navigate to the burger menu → Multiaccess → New:

2. Enter the email for the shared user→ assign the permissions (give/limit access to certain sections and other data) → Save:
Fields explained:
Enter the email of the user you want to grant access to.
This field is optional.
Leave a comment to help distinguish this user from others.
Turn on the toggle Show financial data to reveal the financial data or turn the toggle off to hide it from this user.
Decide on the sections accessible to the shared user and select the types of actions (s)he can perform within these sections by enabling the corresponding toggle.
To allow users to work with specific Traffic channels, Campaigns, or Affiliate networks, you can restrict access accordingly.
Let’s break down the logic of the limited access based on the Traffic channels in the screenshot below:
If you add Facebook and TikTok traffic channelsto the “By Traffic Channels” field, then in the “By Campaigns” field you can select only the Campaigns that were created with the added Traffic channels Facebook and TikTok:
- “By Campaigns” field depends on the “By Traffic Channels” field, so if you delete Facebook and TikTok channels from the “By Traffic Channels” field, then the Campaigns that refer to these traffic channels are also automatically deleted from the “By Campaigns” field.
- “By Traffic Channels” field does not depend on the “By Campaigns” field, so if you delete Campaigns that refer to Facebook ad TikTok from the “By Campaigns” field, they won’t be deleted from the “By Traffic Channels” field.
- “By Brand/Offer source” field is an independent field, so you can choose there any added Brand/Offer source regardless of the info selected in the “By Traffic Channels” or “By Campaigns” fields.
Save to apply the changes.
3. Once you’ve pressed Save:
- An alert pops up stating that the invitation was sent off and informing you about the remaining number of available invitations for your account:
- An invitation is sent to the potential shared user together with the password for their new account:
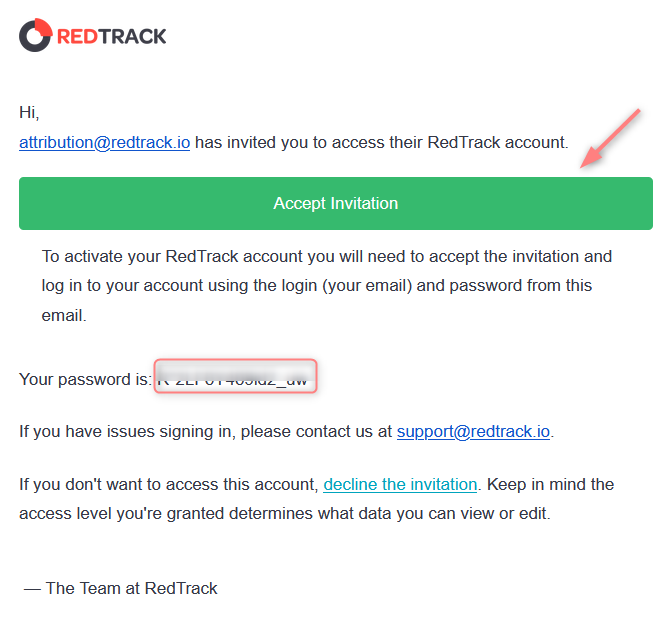
4. Course of actions from the shared user’s side:
1. Once the invitation is accepted, you’re redirected to the RedTrack login page. Log in with your email and the password provided in the invitation letter.
2. To access the shared account, navigate to the upper right corner → press the Shared Access button → find the needed account name:
3. To exit the multiaccess account, click on the multiaccess button and press Exit Shared Access option:
If the invitation is declined, the user is removed from the list of shared users.