

Facebook: custom conversions
– Set up Meta Pixel on your website.
– Created standard events or custom events on your website.
Otherwise, they will come only to the events manager, and you will not be able to optimise on them and show them in the ads breakdown.
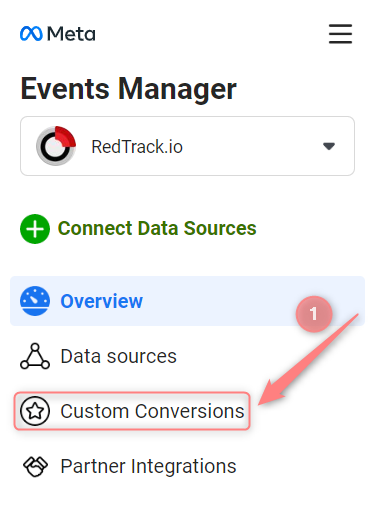
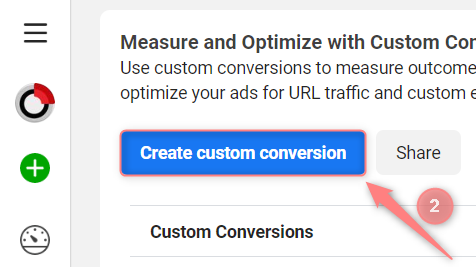
1. Events Manager → Custom conversions → Create custom conversion:
2. Fill in the fields in the pop-up window:
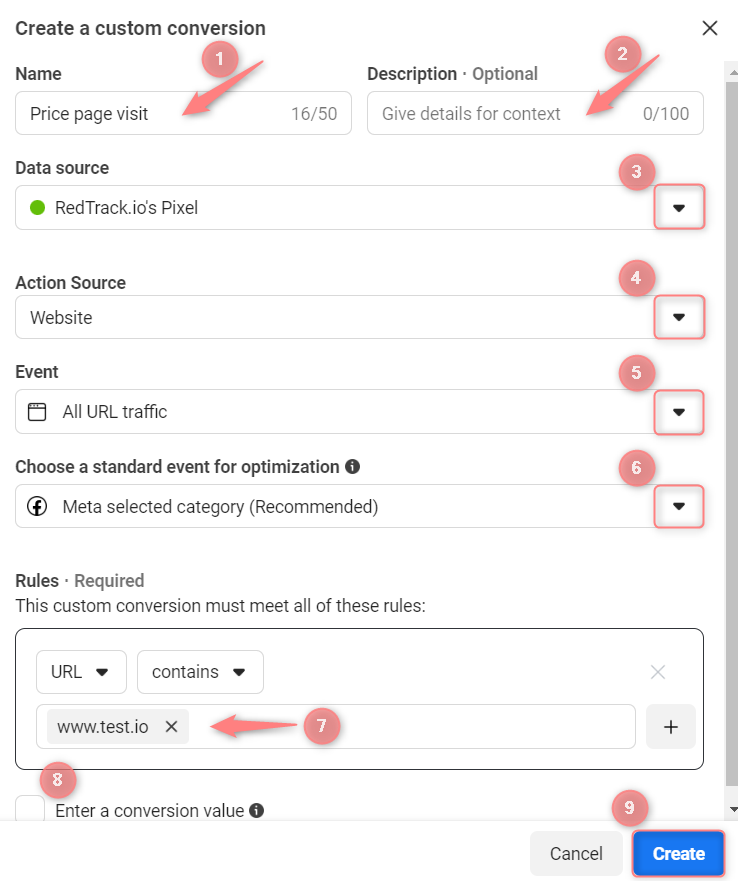
Name: give your custom conversion a name
Description: {optional} add a description to distinguish your custom conversion from others in the list
Data source: select the data source
Action source: select the action source to which your custom conversions are attributed (it should match with the one you will set inside RedTrack)
Event: select the event URL
Refer to this article for learning more about standard event categories in Facebook.
Rules: set the rules by URL or event parameters. You can select the parameters that you currently send with the event you selected. If you don’t see the parameter you want to choose, update your pixel or Conversions API setup to send the parameter with your event.
For example, if you create a custom conversion using a purchase event and type in Product A, Product B and Product C in the content_id parameter value, the custom conversion measures when someone purchases product A, B or C.
▸ Rules that follow the AND condition.
For example, if you create 3 separate rules for content_id equals A, content_id equals B, and content_id equals C, the custom conversion measures when all 3 events occur.
Refer to this article for more info about Rules within this setup.
Enter a conversion value: {optional} click to check the box next to Enter a conversion value, then enter your value. Only use this field if the events in your custom conversion don’t have a conversion value.
▸Filtering events in Meta Events Manager
▸Best practices for custom conversion setup in Meta Events Manager
▸How to edit custom conversions in Meta Events Manager
▸How to delete custom conversions in Meta Events Manager
3. Once you’ve created your custom conversion, to activate it, navigate to the page of your website it’s referencing to trigger it. Then get back to the Events Manager → Custom conversions tab and see if the added conversion changed its status to Active:
