
Publishers: adding partners/publishers
To add partners/publishers to your branded portal act as follows:
1. Since partner/publisher access to your Campaigns is restricted by the Traffic sources in your admin RedTrack account, you need to create at least one. For that purpose, RedTrack has a dedicated Traffic source template called For Publishers. Click here to check out how to add it (step 1). Once the “For Publishers” Traffic source has been added, proceed with step 2 below.
2. Add the publisher/partner
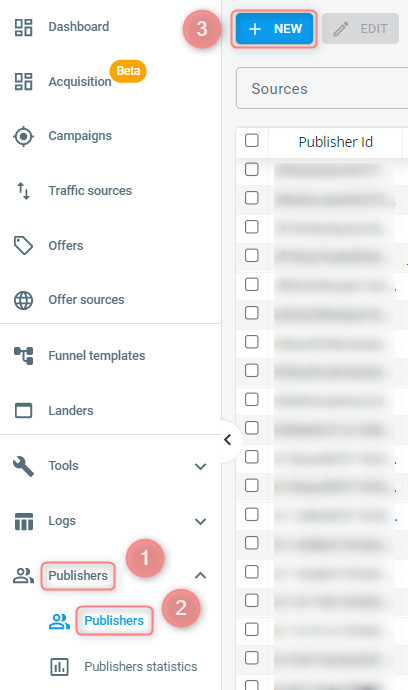
Expand to see how to add the publisher/partner2.1 on the main RedTrack menu navigate to the section Publishers->select Publishers->New:
2.2 fill in the necessary fields and press Save changes:
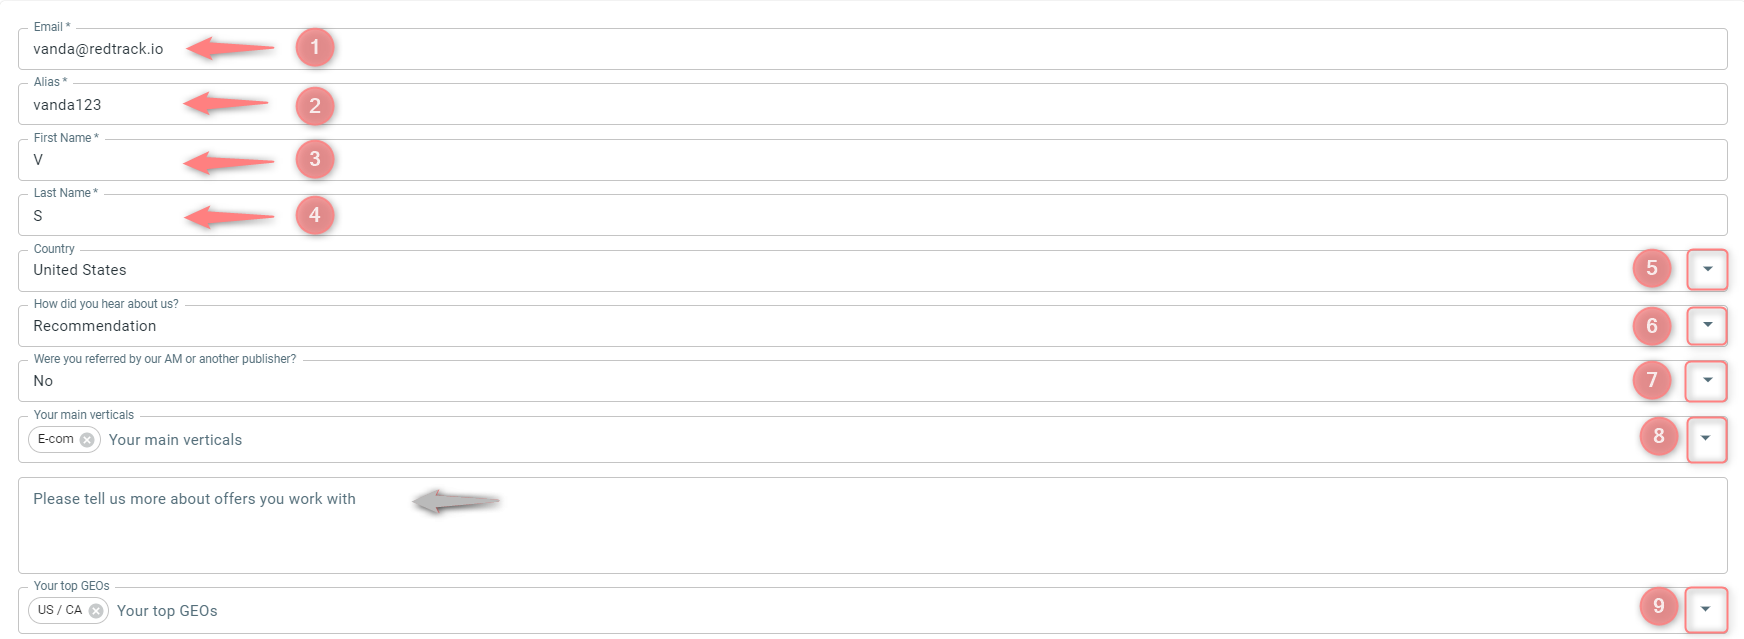
Values explained:
1. Email – your publisher/partner login email
2. Alias – set the publisher/partner alias
3,4. Specify your First and Last Name
5. Choose the Country from the drop-down
(optional) 6, 7. Choose from the dropdown how you heard about us and the way you were referred to use the branded portal.
8. Define Your main verticals (e-com, crypto, adults, etc.)
9. Select from the drop-down Your top GEOs
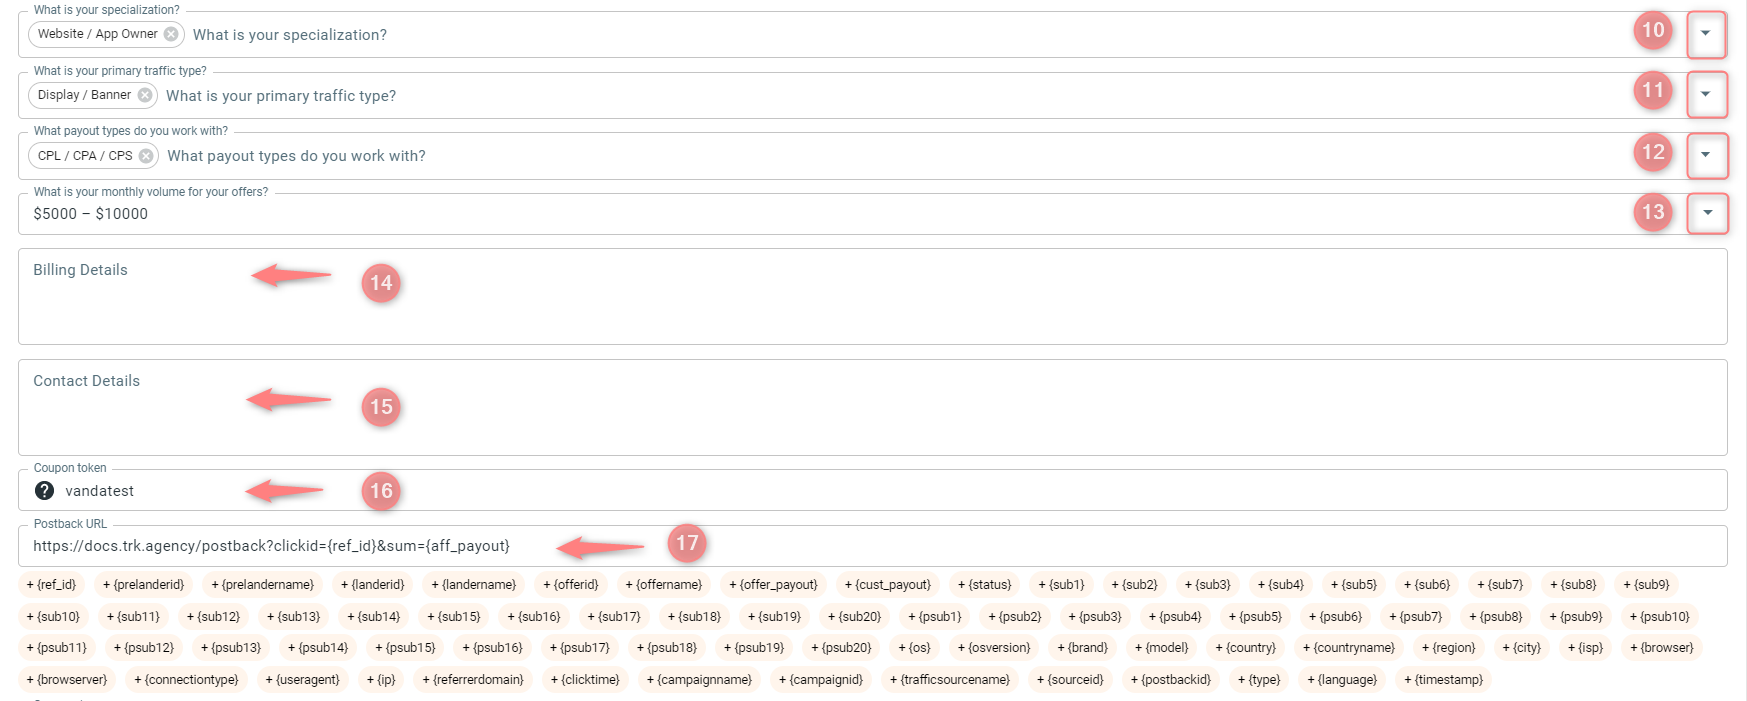
10, 11, 12, 13. Choose from the drop-downs your Specialization, Primary traffic type, Payout types you work with, and Monthly volume for your offers
14, 15. Specify Billing and Contact details
16. Coupon value of the Campaign combined with the coupon token of the publisher/partner will create a unique Coupon
17. Postback URL – you can set the postback for your publisher/partner on your side. It will automatically be displayed inside the publisher/partner account.
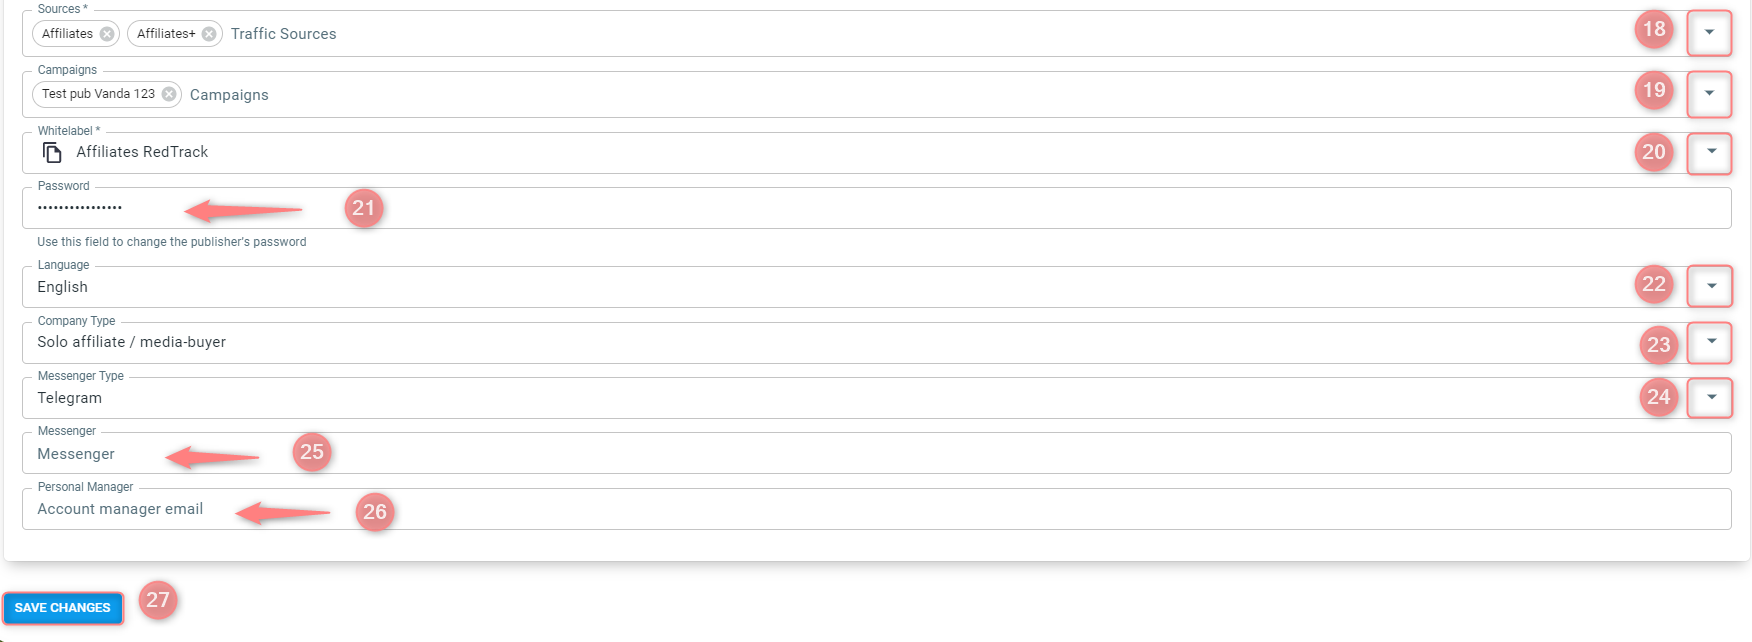
18. Sources – select the Traffic sources your publisher/partner will have access to
19. Campaigns – you can limit the access to some particular Campaigns under the target Traffic source
20. Select from the drop-down the added Whitelabel
21. Password – set the password for your publisher/partner so he can log in to the branded portal (can be changed by the publisher/partner later).
(optional) 22, 23, 24, 25. Language, company type, messenger type, messenger – those fields are mostly for your convenience.
26. Personal Manager – set the personal account manager (if any) email address
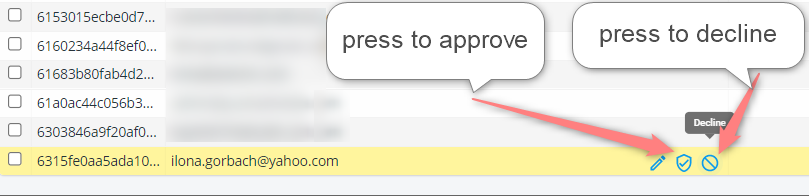
3. Once you’ve added the publisher/partner, you decide whether to approve or decline access to that publisher/partner by pressing the needed button:
4. The status will change accordingly:
- if the user is approved, the publisher/partner can log in to the panel and will be marked with the status Approved:

- if the publisher/partner is denied access, they will be notified about it by email, and their status will be marked Declined:
