Conversion tracking: S2S, script, API
RedTrack offers you the following methods of conversion tracking:
- API
- S2S
- Pixel/script
API
API conversion tracking method is based on the integration of the RedTrack API with the platform storing your conversion data (affiliate network, CRM, shop, website, etc.). This is the most reliable conversion tracking method because it happens on the backend of both platforms. When a conversion occurs, this platform pings RedTrack with all the necessary information. However, since this method requires a lot more development work on both sides, it is not very common in affiliate marketing, and not all the systems support it.
API method in a nutshell:
- It’s the most reliable method of passing the conversion. It does not need cookies to work.
- It’s a “set it and forget it” method. Once you complete the integration, you won’t need to configure anything. Conversions will be shared along with additional information such as payout.
- It can be challenging to implement.
These are the platforms RedTrack has the API integration with:
S2S
Server-to-server (S2S) postback is a very accurate method of receiving and sending conversion data. S2S tracking saves the information about the user ID directly to the server of all the systems involved in the flow. When a user clicks on an ad, this click is recorded and gets a newly generated unique ID for this session. If a user buys or orders something, RedTrack receives a message from another system about the conversion that happened. This is a standard option available for everyone. No additional settings are required.
- It provides slightly accurate tracking and accurate statistics. This tracking method does not rely on cookies. Therefore, it works even if the visitor has blocked the collection of cookie data in their web browser. That is why it is considered one of the most reliable tracking methods.
- Postback tracking must be supported by your affiliate network/shop/CRM.
S2S tracking is the most common for Affiliate Networks. Depending on the network you work with, the process of integrating it with RedTrack differs:
Your affiliate network has a preset template
1. Add the Offer source template to RedTrack → Save it:
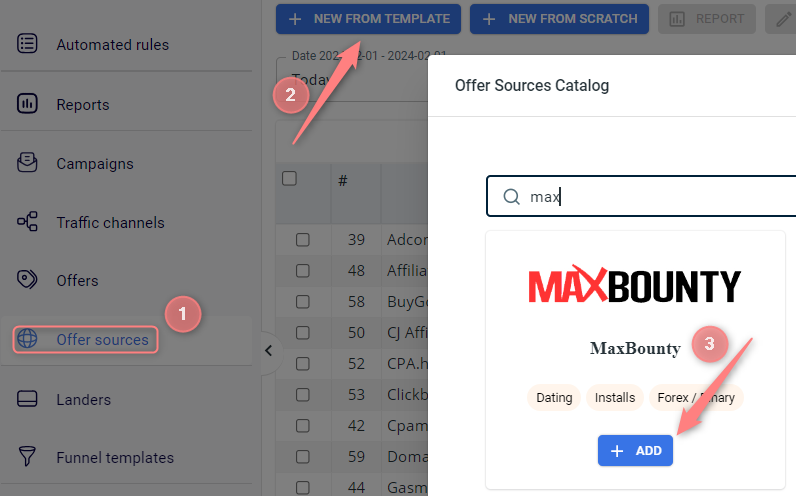

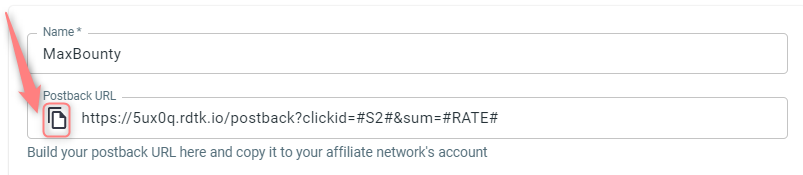
2. Copy the Postback URL from the settings:
3. Paste the copied Postback URL to your affiliate network account under the postback settings
Your affiliate network has no preset template
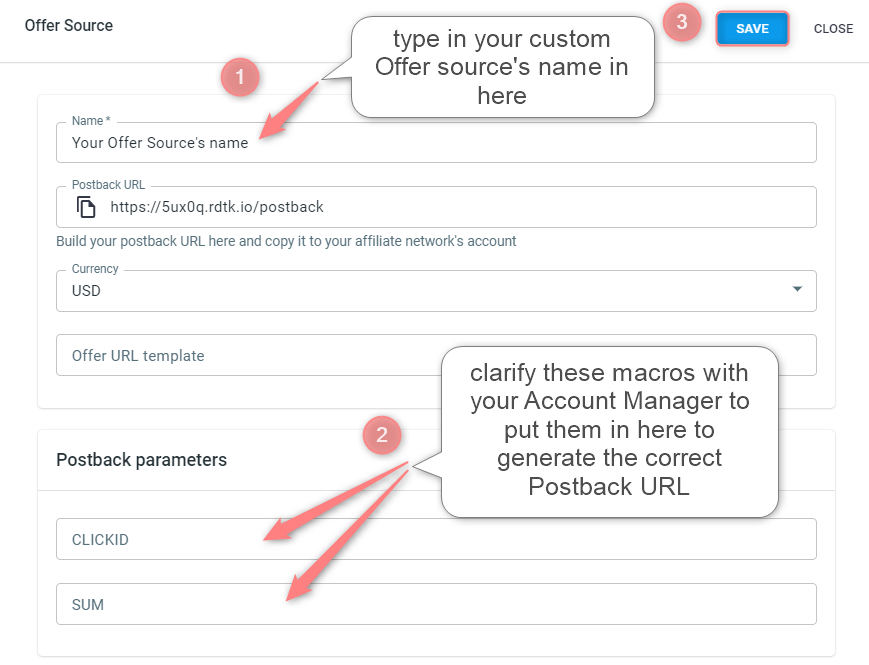
1. Offer sources → new from scratch:
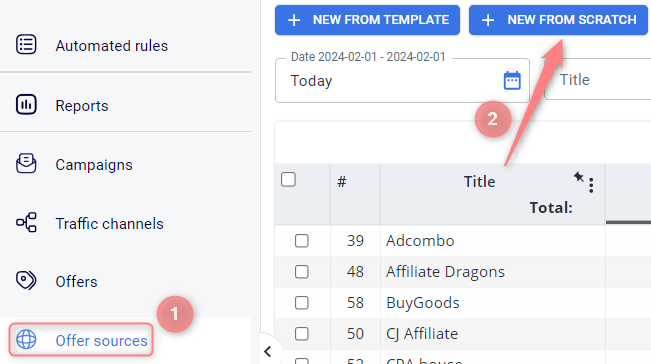
2. Give your custom Offer source a name, and clarify the correct CLICKID and SUM macros essential for tracking. Once you’ve added them, press Save:
3. Copy the generated Postback URL:
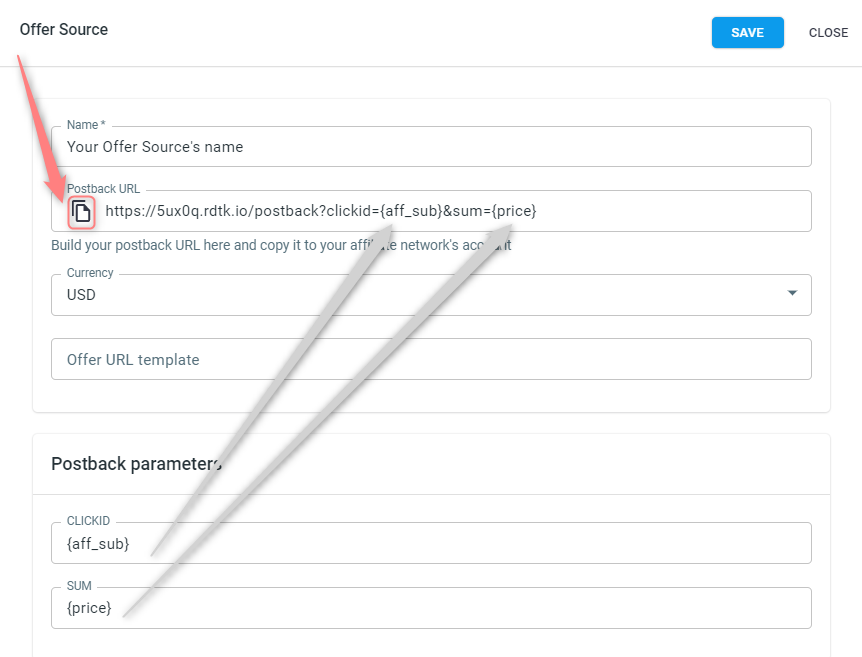
4. Paste it to your affiliate network/advertiser account under the postback settings
The following CRM systems are possible to integrate with RedTrack via the S2S postbacks:
Pixel/postback script
Conversion tracking using pixel/postback script is the simplest and least accurate method. You place a piece of code on your “Thank you” page and each time the visitor opens this page, the conversion is fired with the help of the script. That means the same visitor can refresh the page and the pixel will then be fired once again so you may receive a duplicate.
Pros:
- You can use it if the S2S option is not available.
- It’s the ultimate solution when you don’t have many technical resources and have your own “thank you page”.
- Pixel/postback script is simple and fast to implement and use, so there is no need to be a technical expert. You copy the pixel from the tracker and paste it into the code of the last page that the user sees after the conversion has occurred.
Cons:
- Sometimes pixels may not work. One reason for this could be the user clearing the cache between clicking a link on the landing page and the actual conversion. In this case, the conversion will simply not be tracked
- Apple has implemented Smart Tracking Protection 2.0 in Safari, preventing websites from tracking user activity without permission. Currently, the website can request tracking permission, but the user must specifically register. Even if the user consents to be tracked by Safari on their own, after 30 days all data and cookies will be permanently deleted. In general, pixel tracking is a fairly complex process when working with Safari
- Google has announced that its Chrome web browser will no longer support third-party cookies from 2022, which will, of course cause pixel tracking issues and make a simple pixel/script a solution only for the redirect tracking
The script has to be added at the end of the body section. Otherwise, it might fail to trigger correctly.
A simple solution for a third-party cookie (redirect)
1. Go to the Conversion Tracking guide → select the method for adding your event names (Types/Statuses).
2. Conversion Tracking builder will generate the postback URL/pixel/script, which you’ll need to add to the page code or thank you page where the added conversion should be tracked.
Upgraded script for a first-party cookie
1. Use the Universal Tracking Script to capture the click data.
2. Adjust the script below.
It reads the first-party cookie value and adds it to the postback URL. Modify the postback URL → replace https://custom.tracking.domain with your custom tracking domain:
// Function to read a cookie by its name
function getCookie(cookieName) {
  var name = cookieName + "=";
  var decodedCookie = decodeURIComponent(document.cookie);
  var cookieArray = decodedCookie.split(';');

  for (var i = 0; i < cookieArray.length; i++) {
    var cookie = cookieArray[i];
    while (cookie.charAt(0) == ' ') {
      cookie = cookie.substring(1);
    }
    if (cookie.indexOf(name) == 0) {
      return cookie.substring(name.length, cookie.length);
    }
  }
  return "";
}

// Get the value of the "rtkclickid-store" cookie
var rtCookieValue = getCookie("rtkclickid-store");

// Construct the URL with the cookie value appended
var baseUrl = "https://custom.tracking.domain/postback"; // Replace with your actual URL
var urlWithCookie = baseUrl + "?clickid=" + encodeURIComponent(rtCookieValue);

// Make a request to the URL
fetch(urlWithCookie)
  .then(response => {
    if (response.ok) {
      // Handle the response if needed
      return response.text();
    } else {
      throw new Error("Request failed with status: " + response.status);
    }
  })
  .then(data => {
    // Process the response data here
    console.log("Response data: " + data);
  })
  .catch(error => {
    // Handle any errors that occurred during the fetch
    console.error("Fetch error: " + error);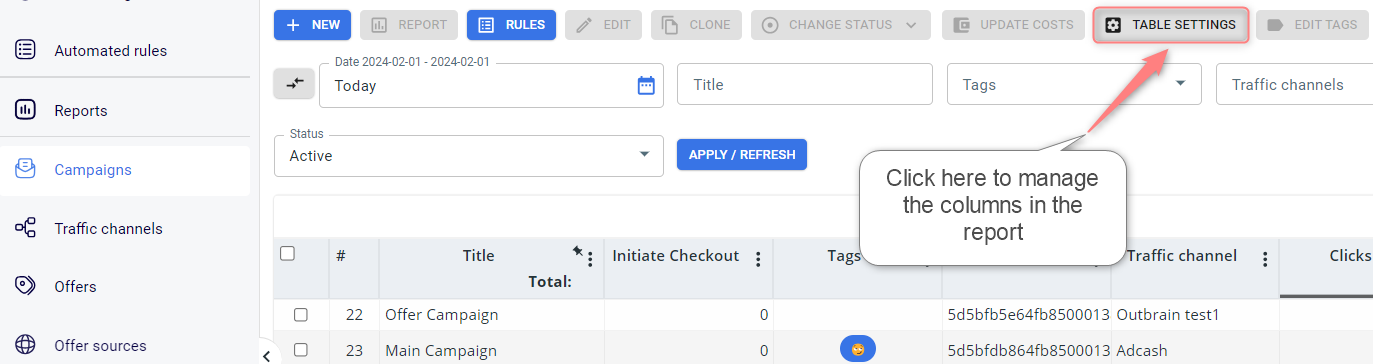
});Conversions in reports
Campaigns table → table settings → choose all the custom conversion types you are using→ save the columns: