
AppsFlyer and RedTrack
AppsFlyer is a mobile advertising attribution solution that helps marketers pinpoint their targeting, optimize their ad spend, and boost ROI. AppsFlyer helps you keep track of all app-related events that are generated by clients.
When working with AppsFlyer you should know that this tool:
- requires you to submit your app and install their SDK in your app. This piece of code will ping AppsFlyer and send data. There are two types of events recognized by AppsFlyer: app install and in-app events. The first one occurs when a visitor downloads and installs an app. The second event type occurs on occasions defined in the SDK, such as reaching a certain level in a game or making an in-app purchase.
- supports various media sources, such as Self-Reporting Networks (SRNs) (e.g. Google or Facebook), Owned media, and Attribution links.
- requires knowing some basics before integrating with another tool. Click here to learn more on how to get started with AppsFlyer.
Integration steps
Setup in AppsFlyer
1. Sign up with AppsFlyer → add the app to your AppsFlyer account.
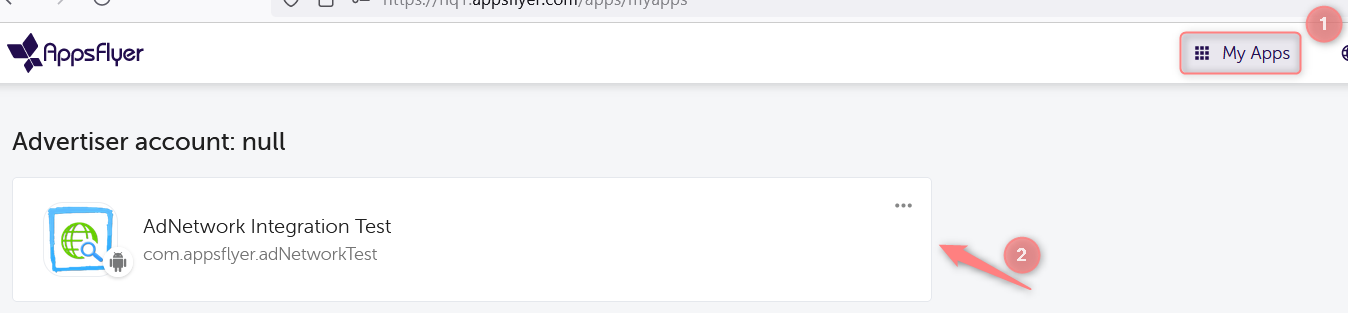
2. My Apps → choose the app to integrate:
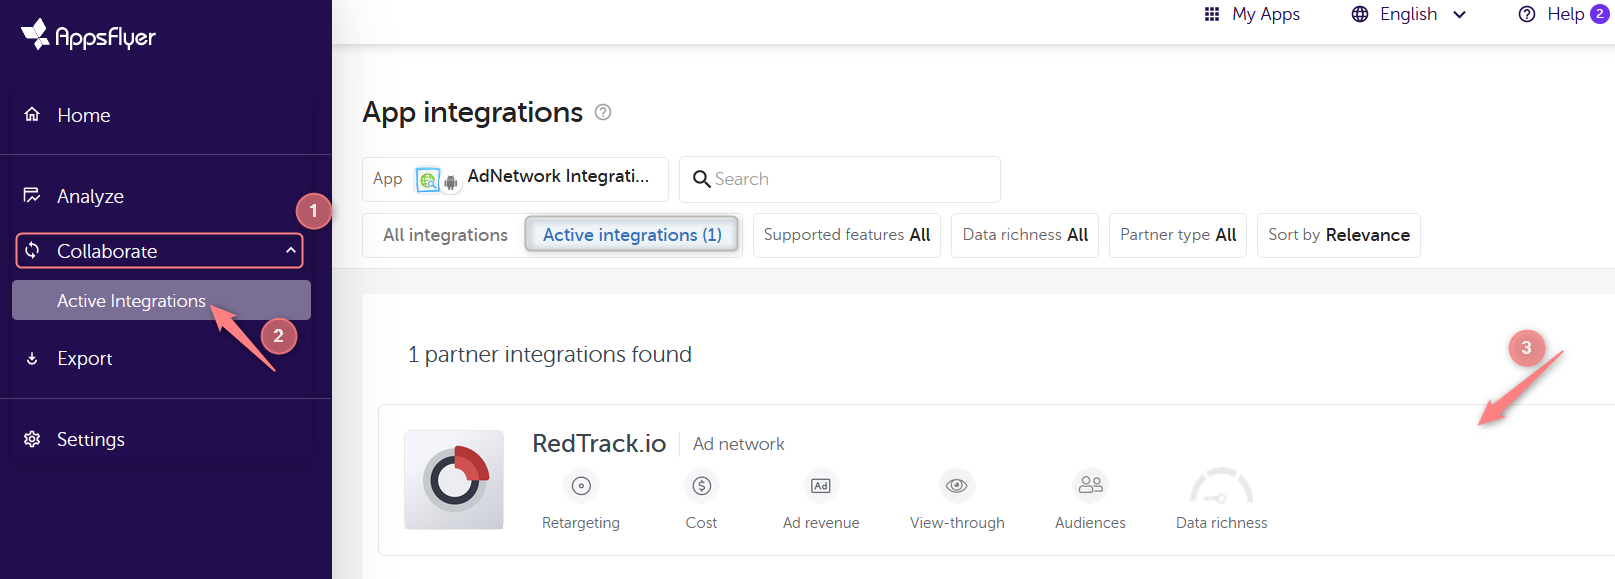
3. Collaborate → Active integrations → get to the app:
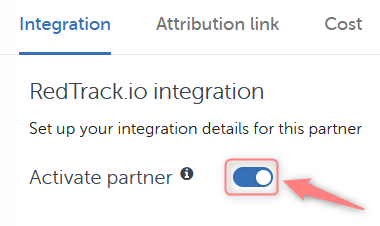
4. Turn on the needed toggles:
- Activate partner toggle to enable attribution and send postbacks:
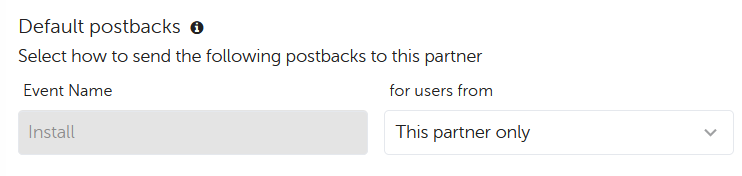
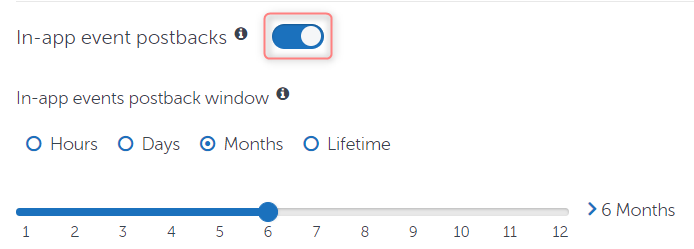
- In-app event postbacks toggle:
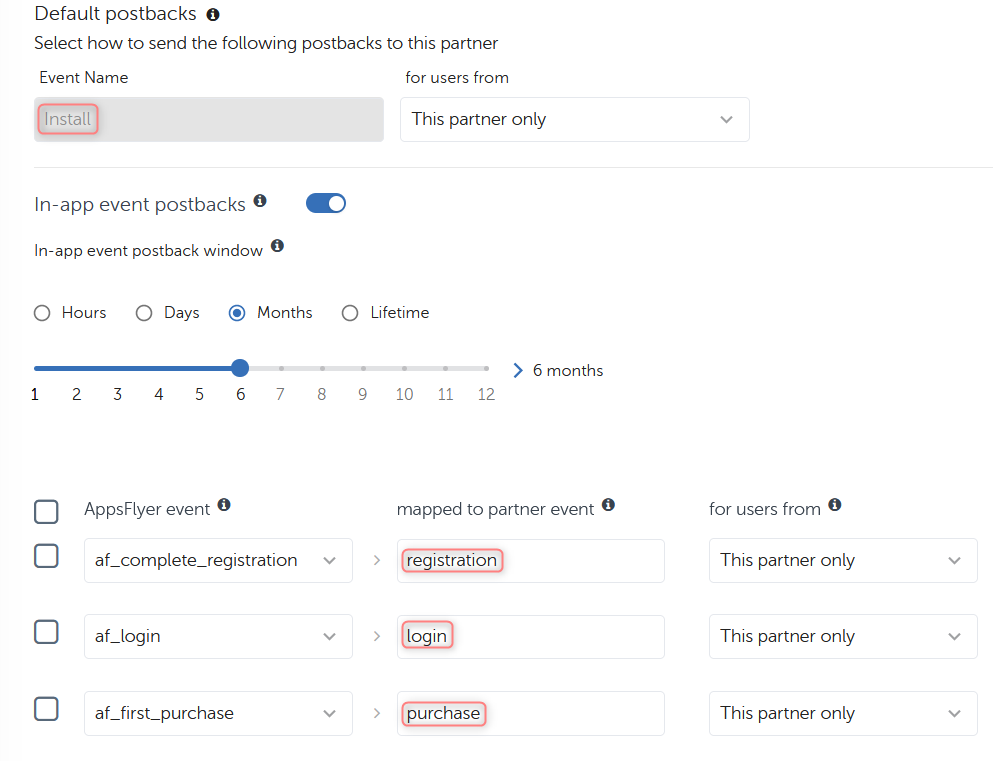
5. Scroll down to the end of the page and press the Add event button to map AppsFlyer events with the partner via postbacks:

6. Select the needed events and their values → Save Integration:
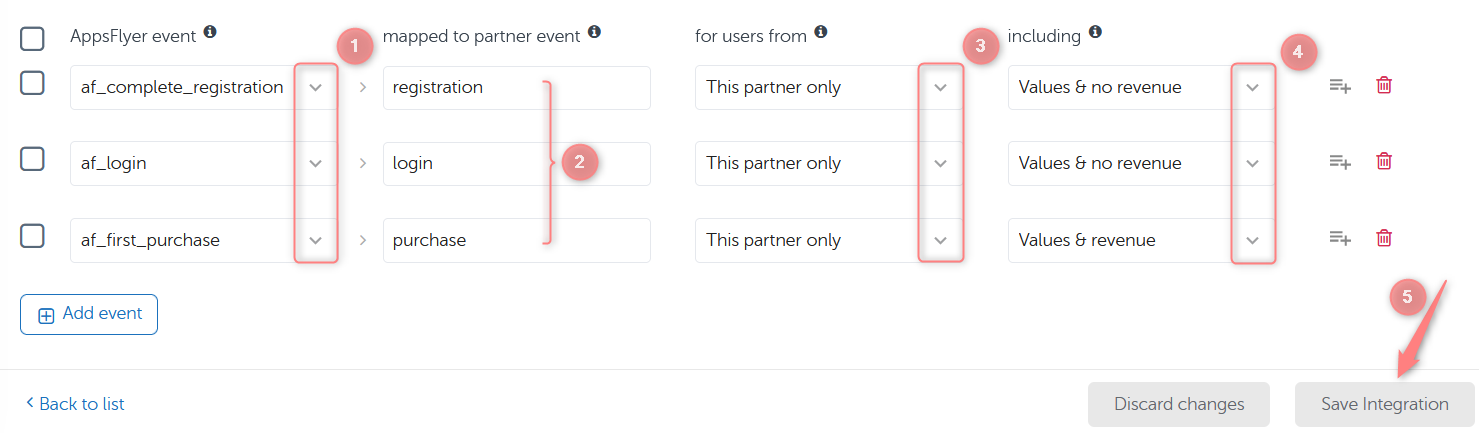
– mapped to partner event fields: select the unique name or ID of each event used by the partner.
– for users from fields: elect if postbacks are only sent for users attributed to this partner or if they’re sent for all media sources, including organic.
– including fields: select if event revenue or parameter values are sent to the partner in the postback, or if this data isn’t included.
Click here to learn more about in-app event postbacks.
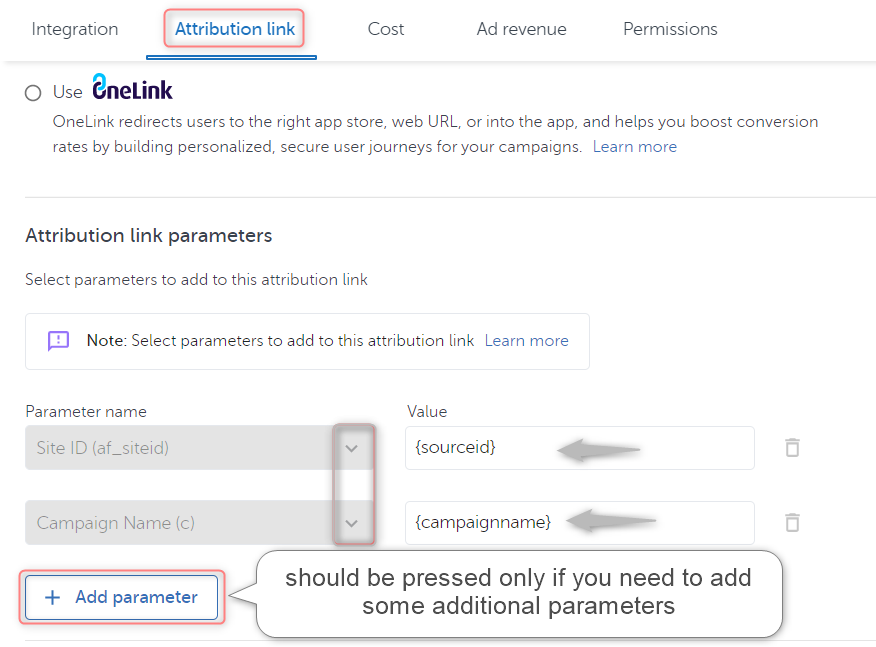
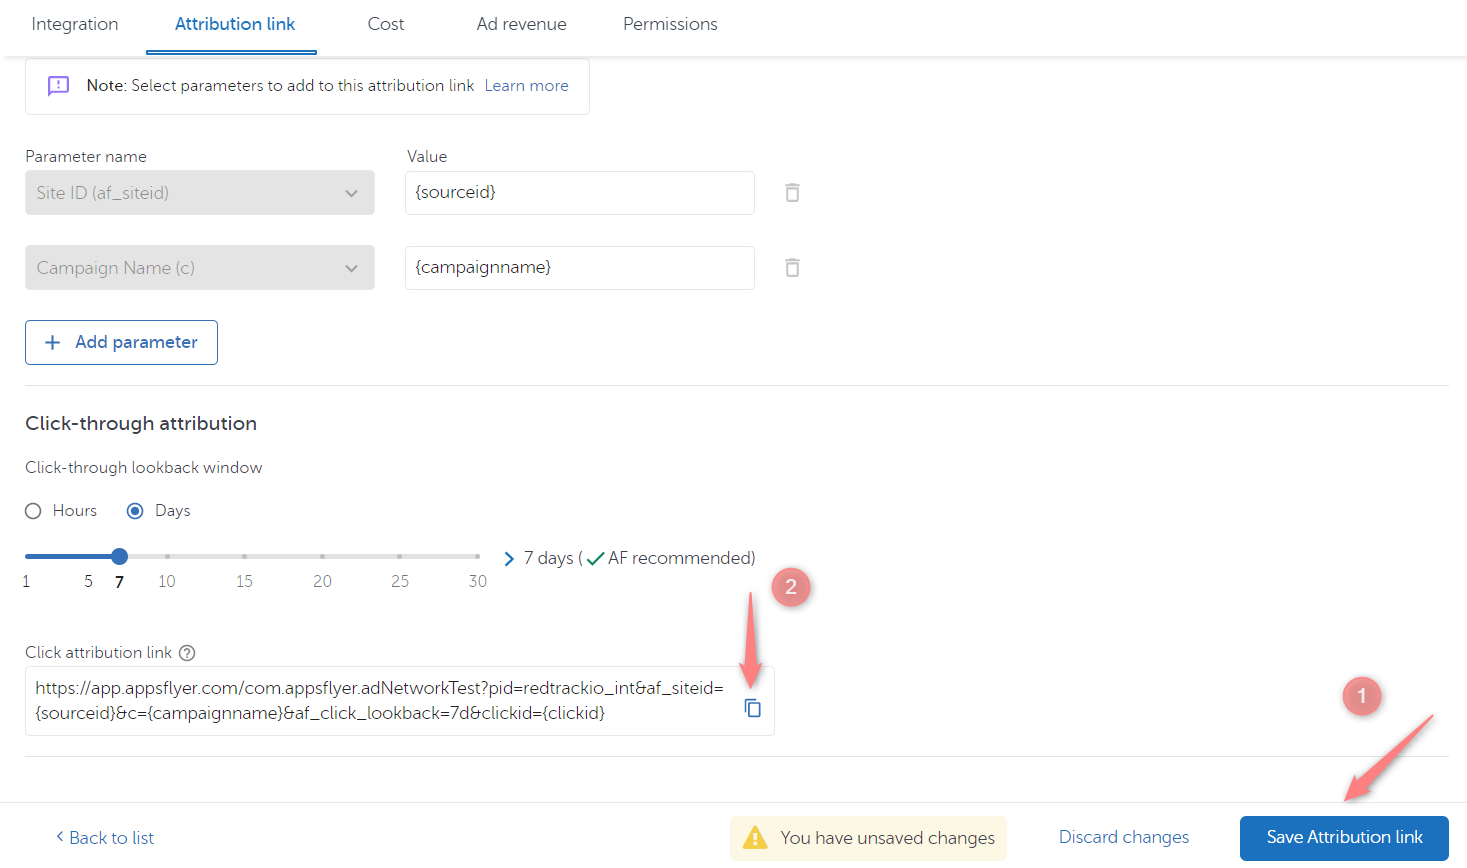
7. Attribution link tab → scroll down and pay attention to the parameters and their values (macros in RedTrack) next to them which form the Click attribution link. 2 main parameters: {sourceid} and {campaignname} have already been added and will be preset automatically, in case you need some additional parameters to be embedded to the link press the Add parameter button:
8. Press Save attribution link to apply the changes → copy the Click attribution link to paste it further in the RedTrack Offer template:
Setup in RedTrack
In your RedTrack account:
1. Offer sources → New from scratch → add AppsFlyer:
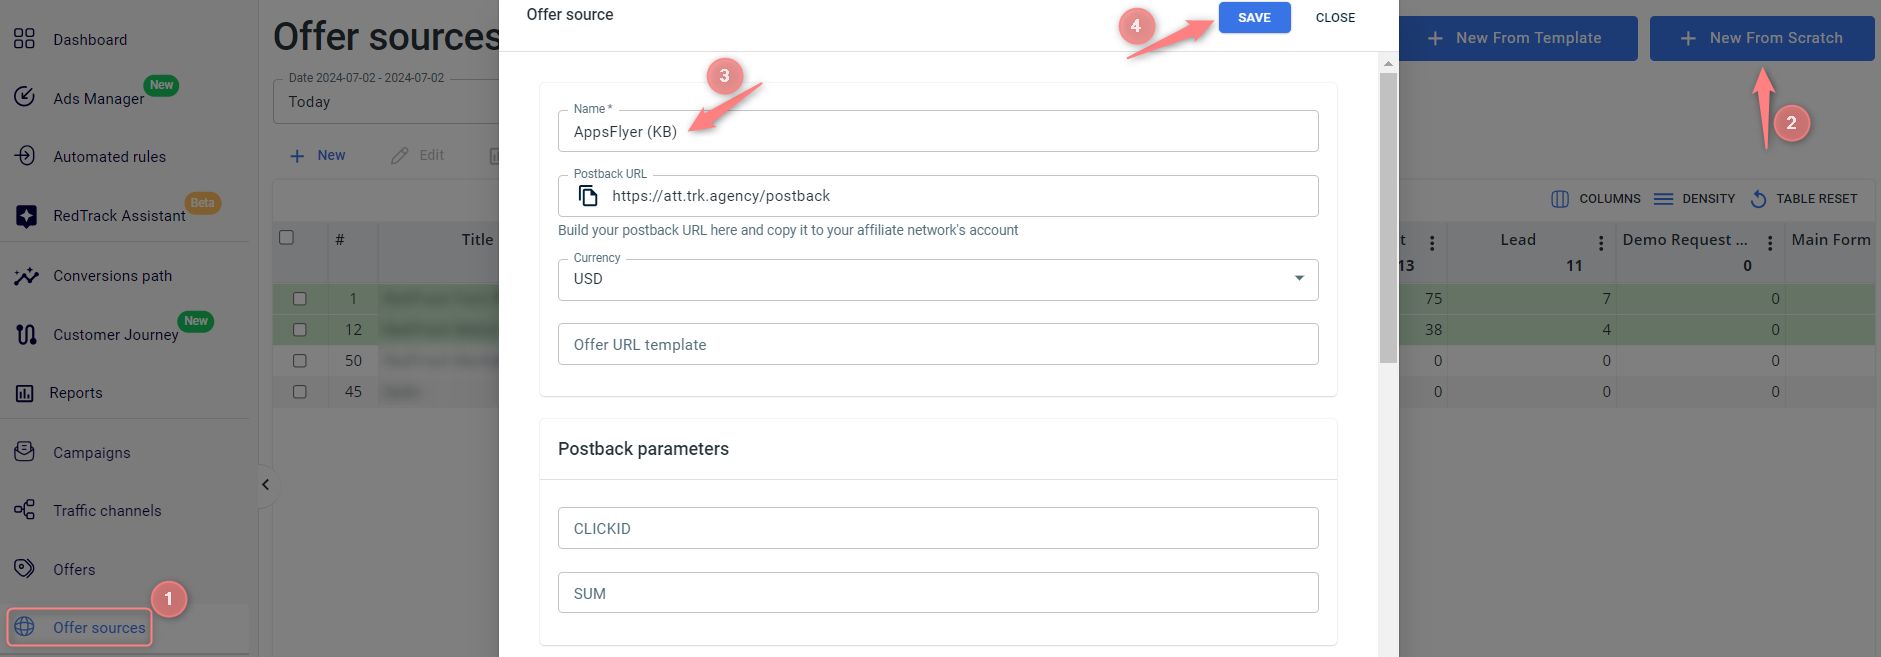
2. Offers → Create new offer → choose AppsFlyeradd the Appsflyer Offer → copy the Click attribution link (Setup in AppsFlyer → step 8) and paste the click attribution link (copied in Setup in AppsFlyer → step 8) to the URL of the Offer:

3. Set up the conversion types:
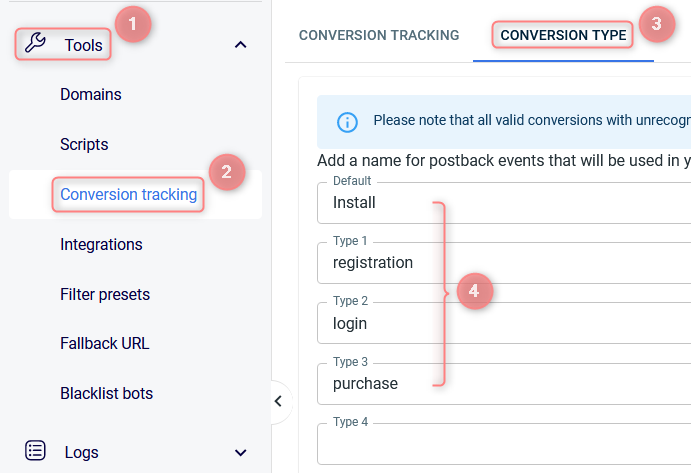
3.1 In your AppsFlyer account go to the Integration tab → copy the names of events from the mapped to partner event fields (created in Setup in AppsFlyer → step 6):
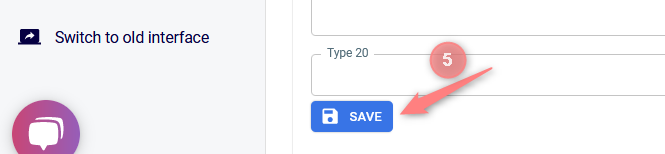
3.2 In your RedTrack account go to Tools → Conversion tracking → Conversion type → paste the copied events there → Save:
4. Add the needed traffic channel.
5. Campaigns → Create New Campaign using the created Offer in your campaign funnel.