ClickFunnels and RedTrack

ClickFunnels is an online tool for building high-converting websites and sales funnels.
To integrate ClickFunnels with RedTrack act depending on the type of integration and the funnel you have:
This type of integration is usually used by the affiliates as Clickfunnels provides the landing page creation functionality. Act as per steps below:
In RedTrack
1. Add your Offer and Offer source to RT.
1.1 Use this guide to help you add Offer sourсe and Offer
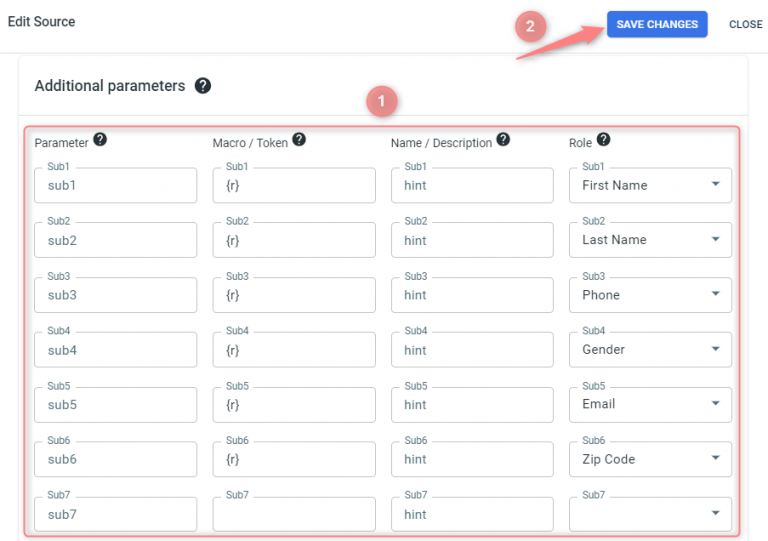
1.2 Go to the added Offer source settings → Additional parameters → add the following parameters and assign corresponding roles:
- First Name
- Last Name
- Phone
- Gender
- Zip Code
2. Add the needed Traffic channel to RT.
3. Add a custom tracking domain.
4. Create a Campaign in RT.
5. Create a universal tracking script.
6. The landing page URL is to be taken from Clickfunnels.
In Clickfunnels
Tracking
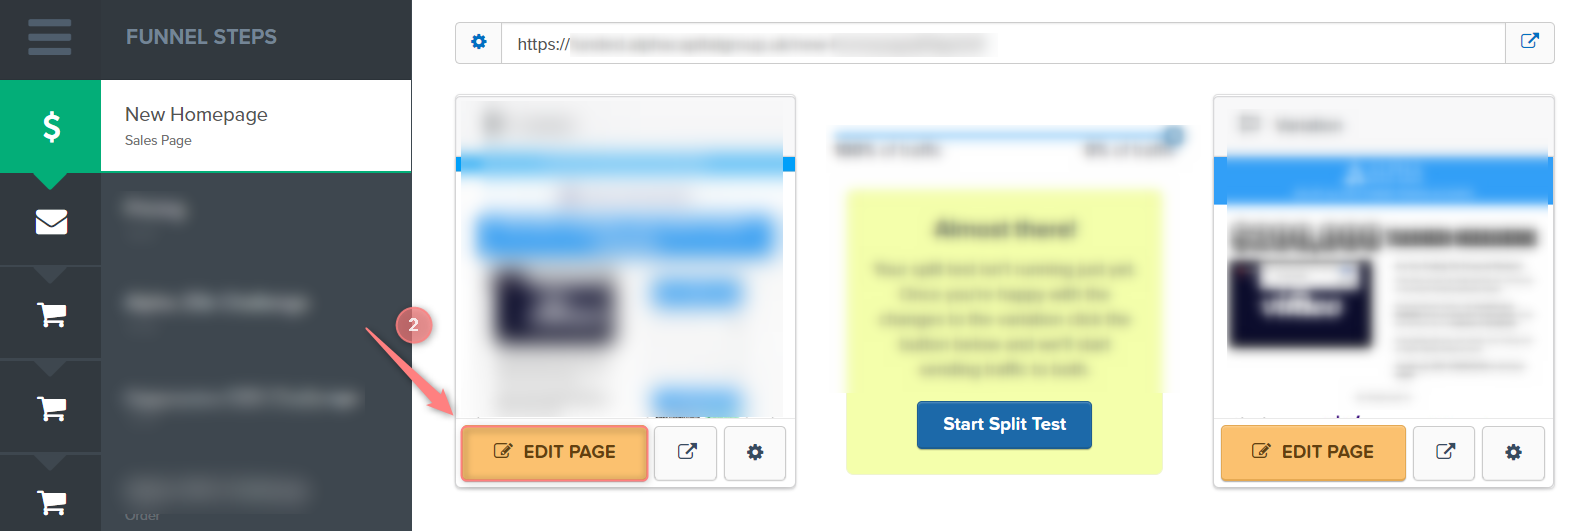
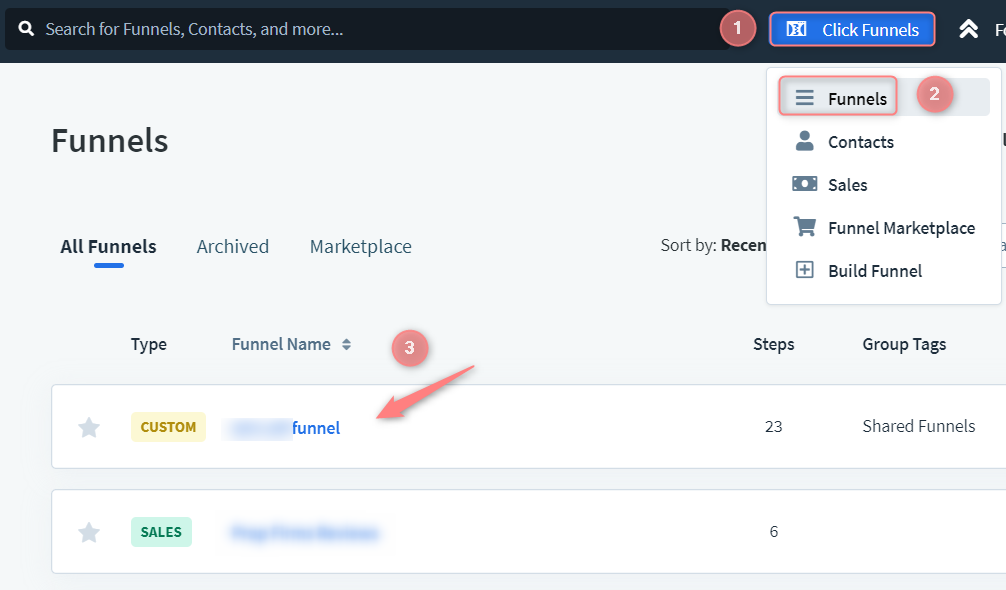
1. Go to the tab ClickFunnels → Funnels → choose the funnel:

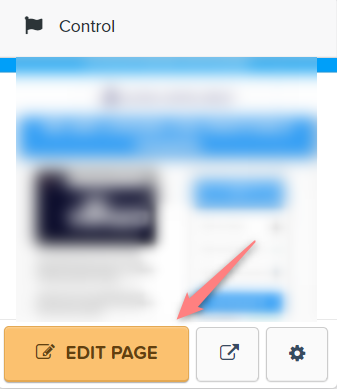
2. On the Sales page click Edit page:

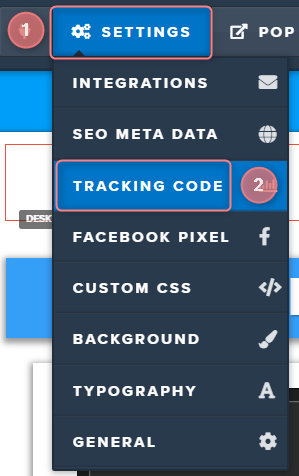
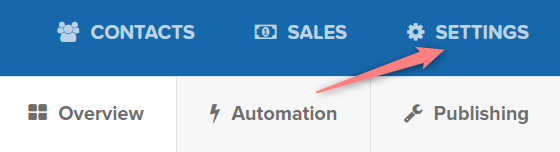
3. Go to Settings → Tracking code:
4. Add the tracking script from your RT Campaign here:
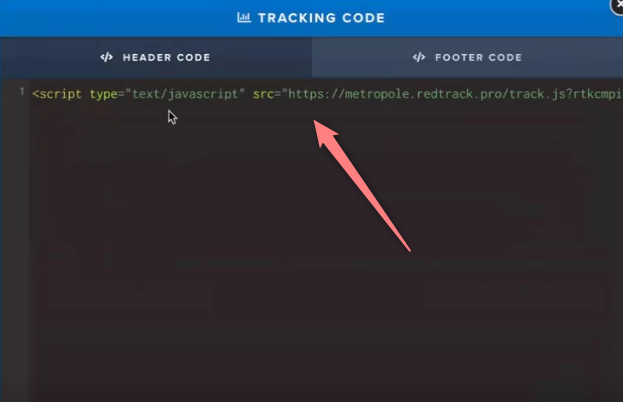
If you are using the universal tracking script instead, add it there as well.
CTA button
A. For a regular CTA button use the landing page click URL.
It can be found in Landers → Edit → scroll down to the Click URL section.
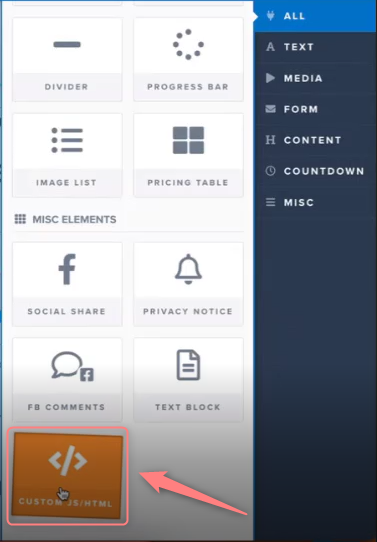
B. For an image CTA
1. Add the Custom JS/HTML element:
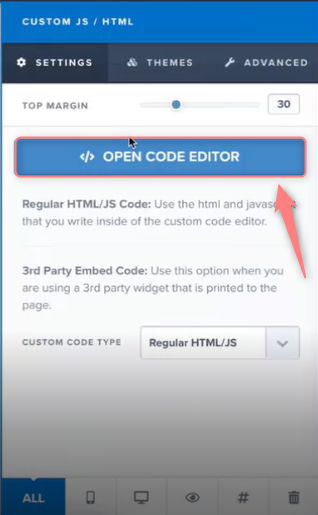
2. Once it’s added, navigate to this element → Settings:

3. Press Open code editor:
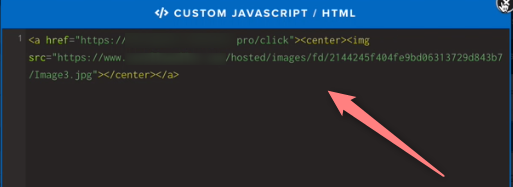
4. Paste the code of your picture in the following format, but replace the domain for /click URL link with your actual domain and add the actual image URL:
<a href=“https://trk.domain.com/click”><center><img src=“https://image.url/image-folder/Image1.jpg”></center></a>
A webhook integration can be useful if you are a direct advertiser or your flow is similar and you need Clickfunnels to fire the conversion data back to RedTrack. Act as per the steps below:
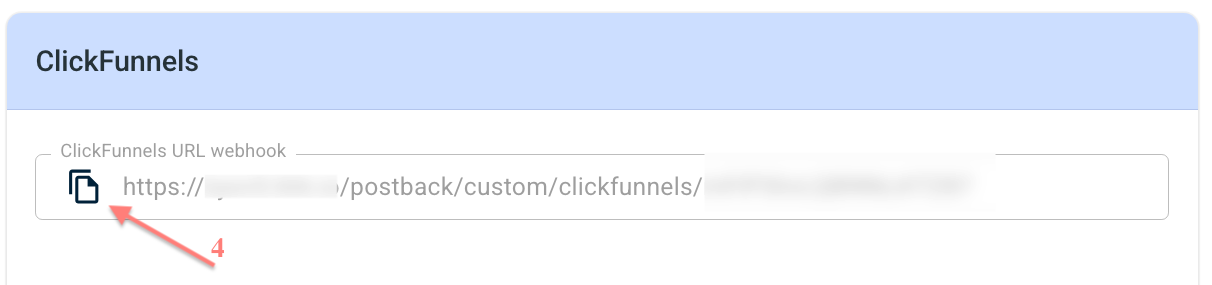
1. Connect your RedTrack account with the ClickFunnels account
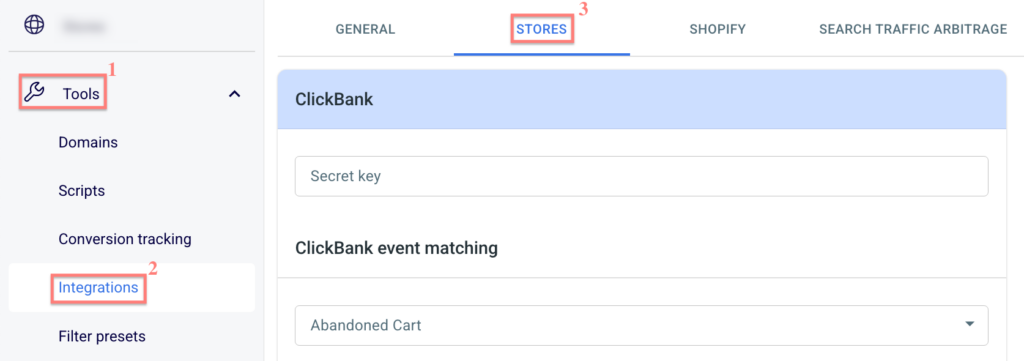
1. Your RedTrack account → Tools → Integrations → Stores/Offer sources → Clickfunnels url webhook → copy your webhook:

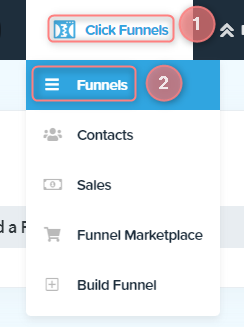
2. Go to your ClickFunnels account→ Click Funnels → Funnels:
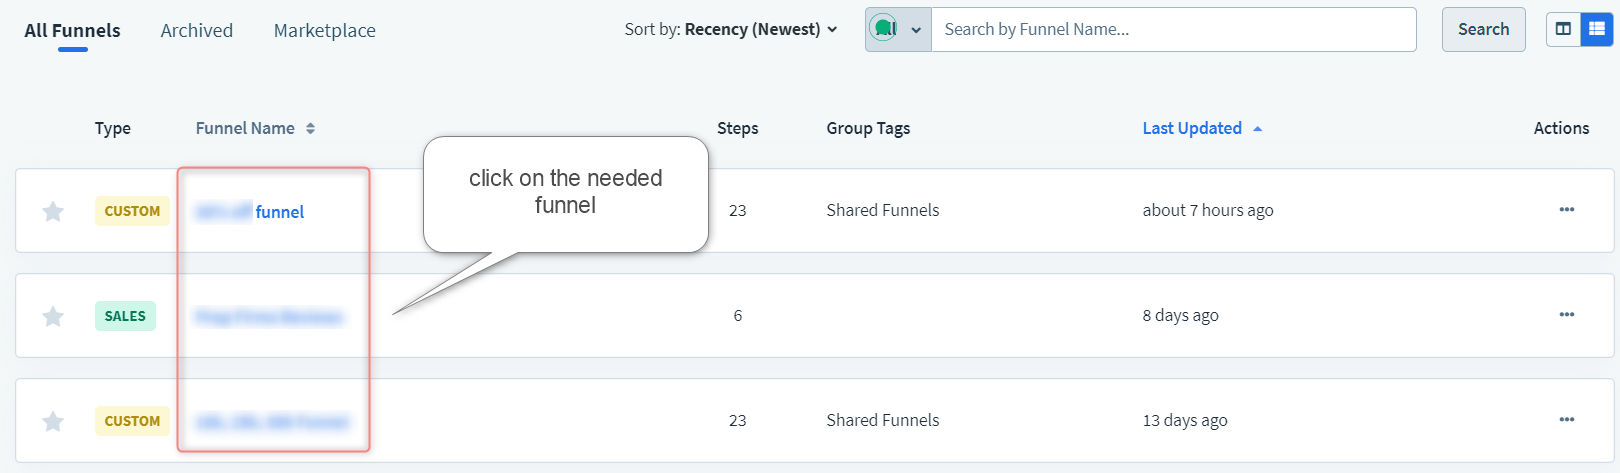
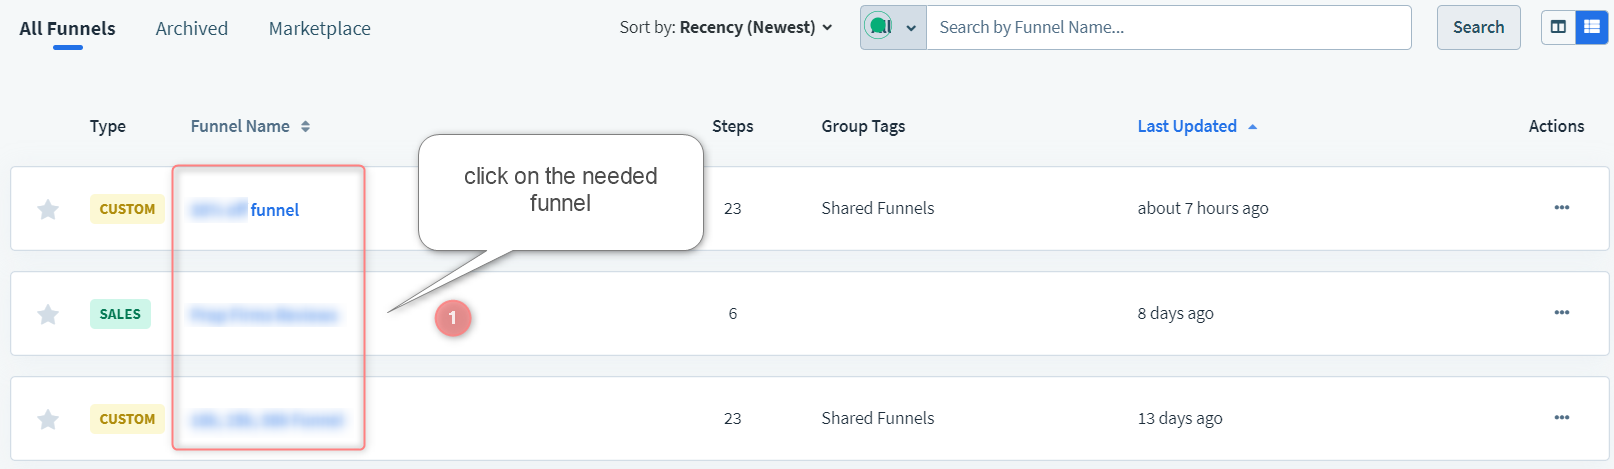
3. Choose the funnel where you need to place the webhook:
4. Settings → Webhooks → Manage You Funnel Webhooks:


5. New Webhook:

6. Fill in the form with the needed values and press Create Funnel Webhook:
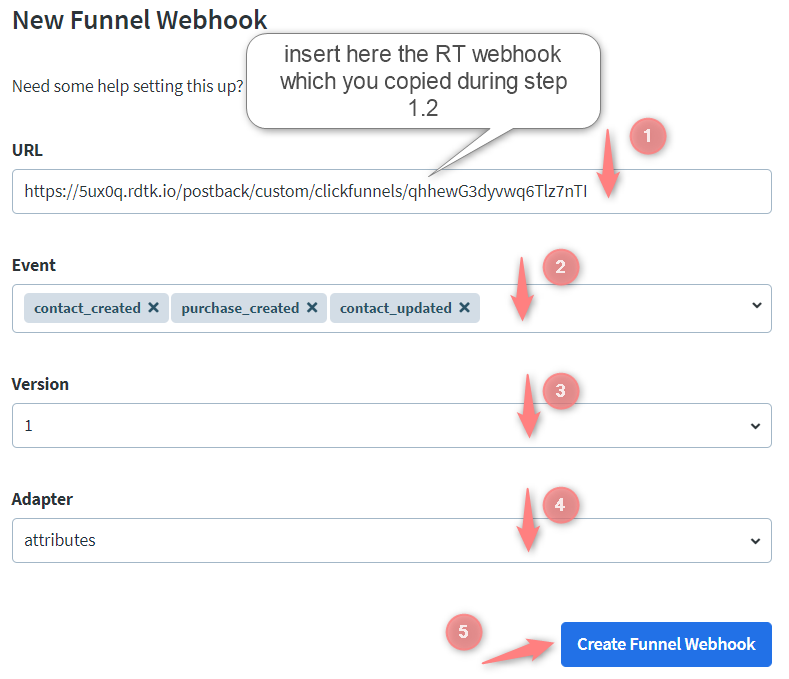
1. URL = Redtrack webhook URL (copied within step 1 above)
2. Event = contact_created, purchase_created, purchase_updated
3. Version = 1
4. Adapter = attributes
1. Create a test webhook URL = your domain. Move it to the archive.
2. After that, create a webhook for RedTrack.
For more information on how to troubleshoot this error, please click here.
2. Add {clickid} value to ClickFunnels
1. In your ClickFunnels account go to ClickFunnels → Funnels:

2. Choose the funnel → Edit page button on the preview of the sales page you want to edit:
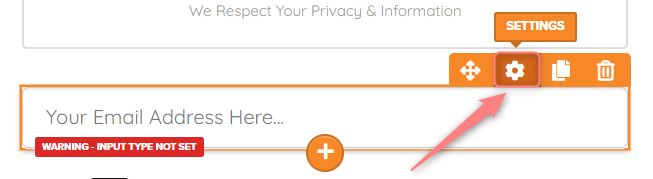
3. Elements tab → Add element → Form → drag the Input element to the needed place on the form:

4. Press Settings to edit the added element:
5. Fill in the following fields in the Settings window and save the changes:
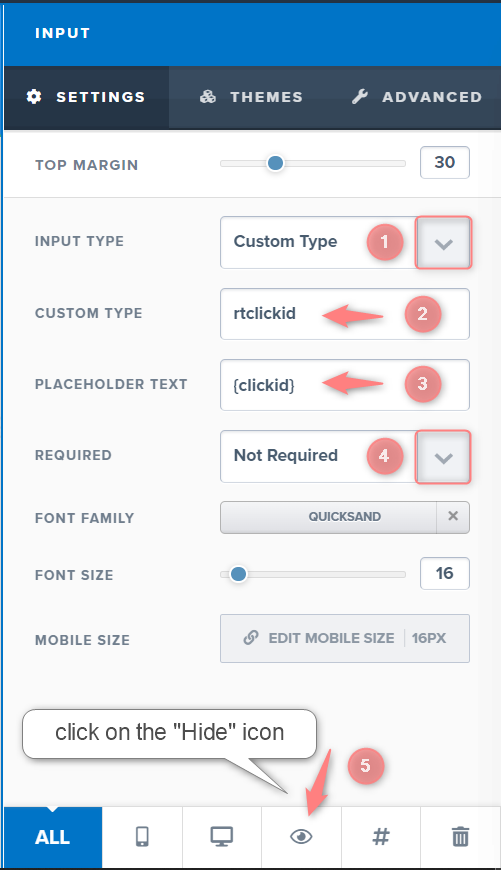
1. Input Type = Custom Type
2. Custom Type = rtclickid
3. Placeholder text = {clickid}
4. Required = Not Required
6. press the “Hide” icon
3. Add a custom tracking domain
This is how you can add your custom tracking domain.
4. Add Store and Store tracking URL
1. Use this guide to help you add Store and Store tracking URL.
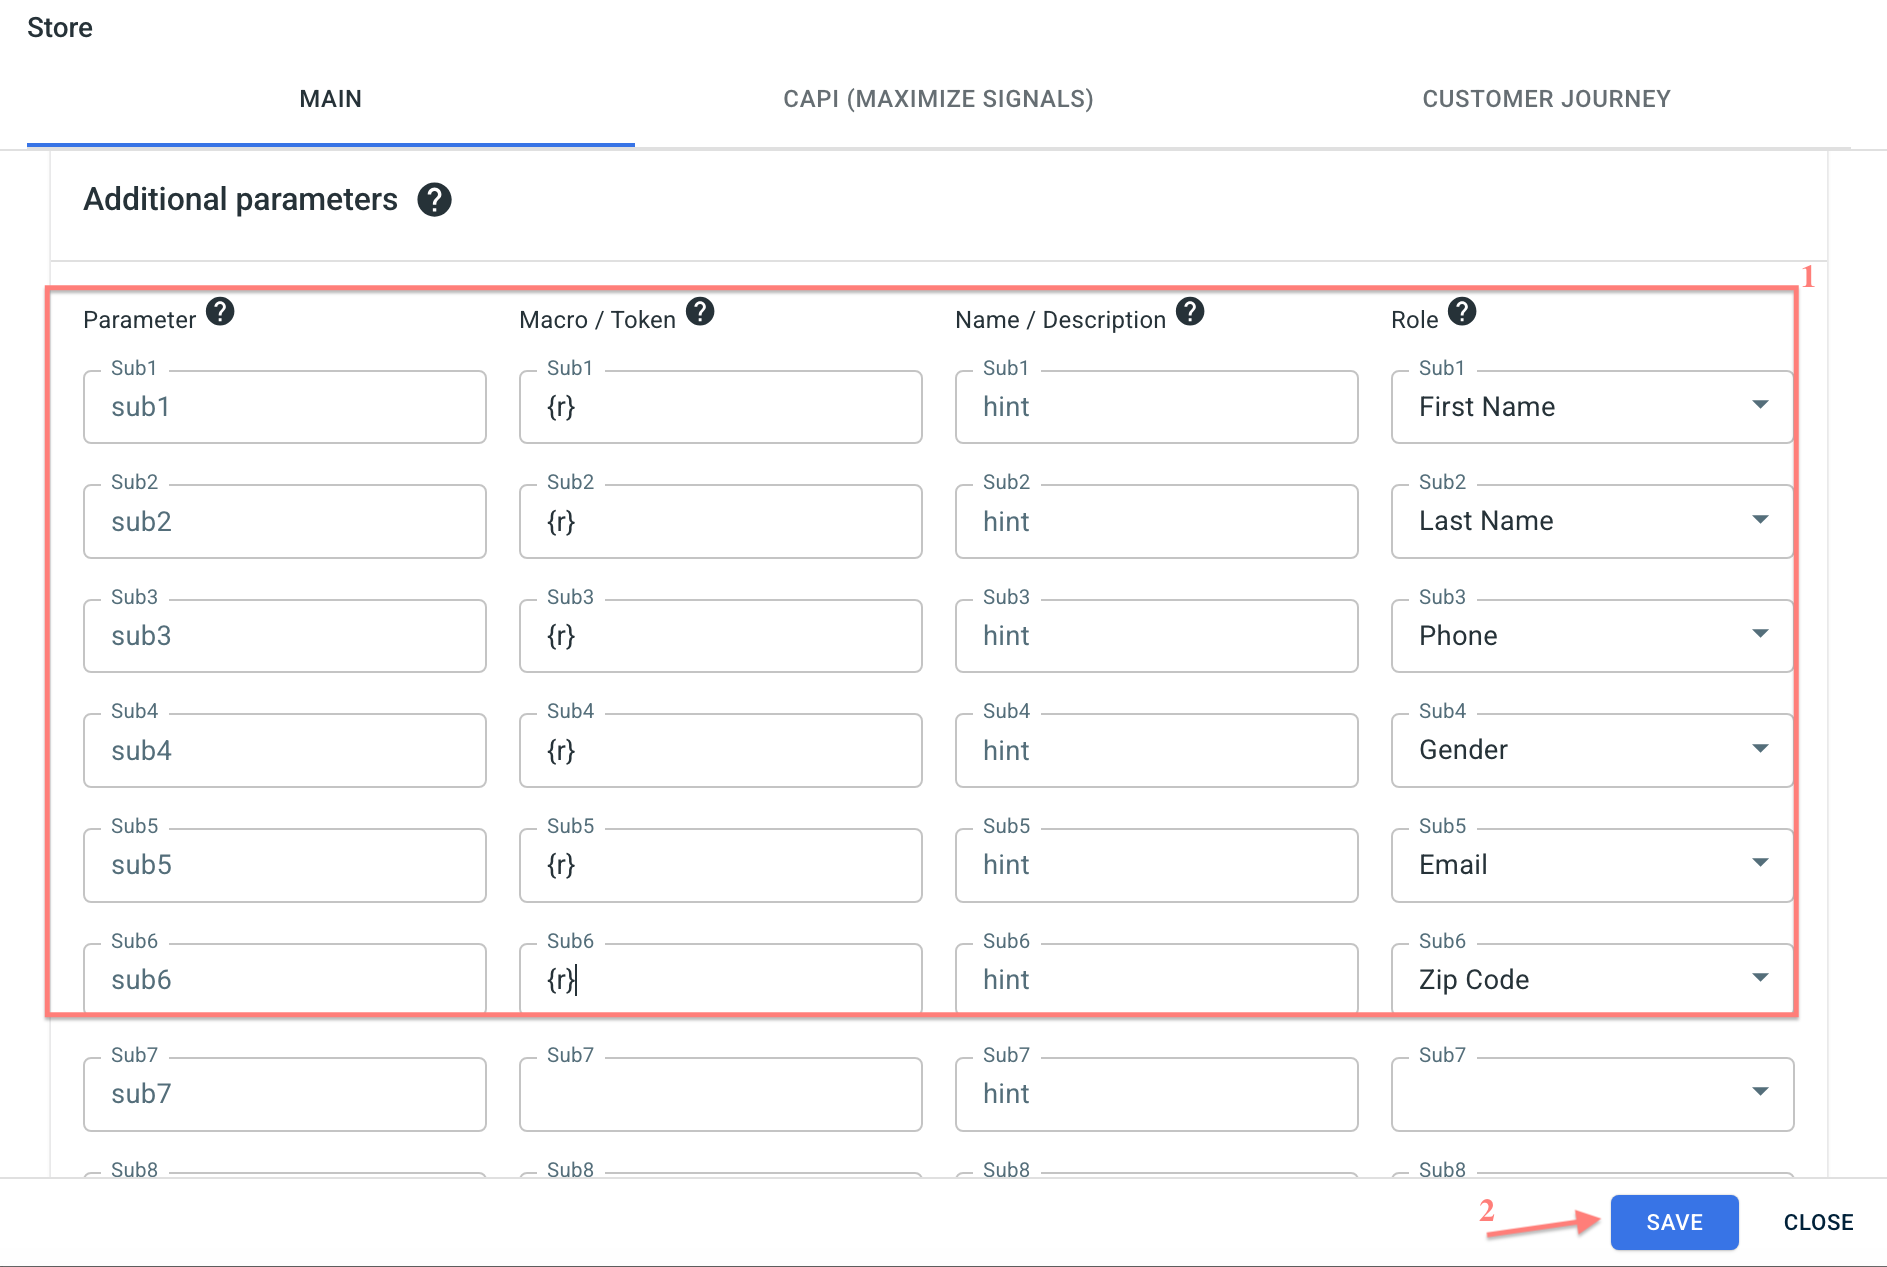
2. When adding your Store template go to Additional parameters → add the following parameters and assign corresponding roles:
- First Name
- Last Name
- Phone
- Gender
- Zip Code
5. Add the Traffic channel to RedTrack
Here is how you can add your traffic channel to RT.
6. Create a campaign/ ad tracking in RedTrack
To create a campaign/ad tracking in RT refer to:
- this guide for Advertisers.
- this guide for Affiliates.
7. GTM setup
– For Affiliates: use this guide to help you with the universal tracking script.
– For Advertisers: a universal tracking script was created automatically once you had added your Store tracking URL.
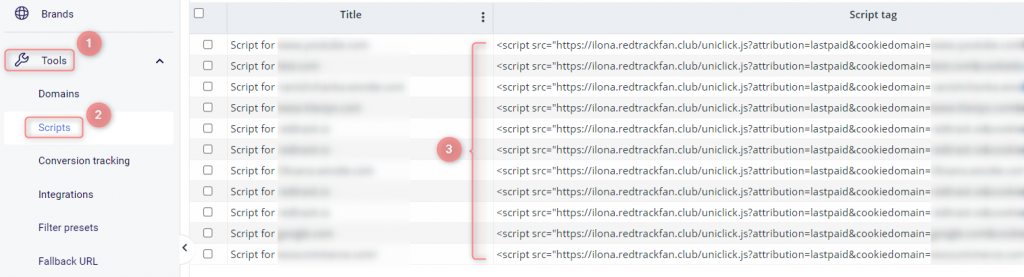
Both Affiliates and Advertisers can find the generated universal tracking script in Tools → Scripts:
1. Integrate GTM with RT and add the needed tags.
Create 2 types of Tags:
Elements:
- Tag = Custom HTML
- Triggering = All Elements (All Clicks)
Script:
<script type='text/javascript'>
function setFormClickIdValue(clickid) {
document.querySelectorAll('input').forEach(function(el) {
if (el.placeholder.indexOf('{clickid}')>-1) {
el.value = clickid
}
});
}
function getCookie(name) {
var value = '; ' + document.cookie;
var parts = value.split('; ' + name + '=');
if (parts.length == 2) return parts.pop().split(';').shift();
}
if (getCookie('rtkclickid-store') !== null && getCookie('rtkclickid-store') !== undefined && getCookie('rtkclickid-store') !== 'undefined') {
setTimeout(function(){
setFormClickIdValue(getCookie('rtkclickid-store'))
}, 3000)
}
</script>
Elements of the Tag:
- Tag = Custom HTML
- Triggering = All Pages (Page view)
Script:
You should add your universal tracking script from RT:
- For Affiliates: use this guide to help with the universal tracking script.
- For Advertisers: a universal tracking script was created automatically once you had added your Store tracking URL.
Both Affiliates and Advertisers can find the generated universal tracking script in Tools → Scripts:

2. Install GTM on the funnel in ClickFunnels.
2.1 ClickFunnels → Funnels → choose the needed funnel:
2.2 Once you’re in the funnel go to the Settings and scroll down a bit:
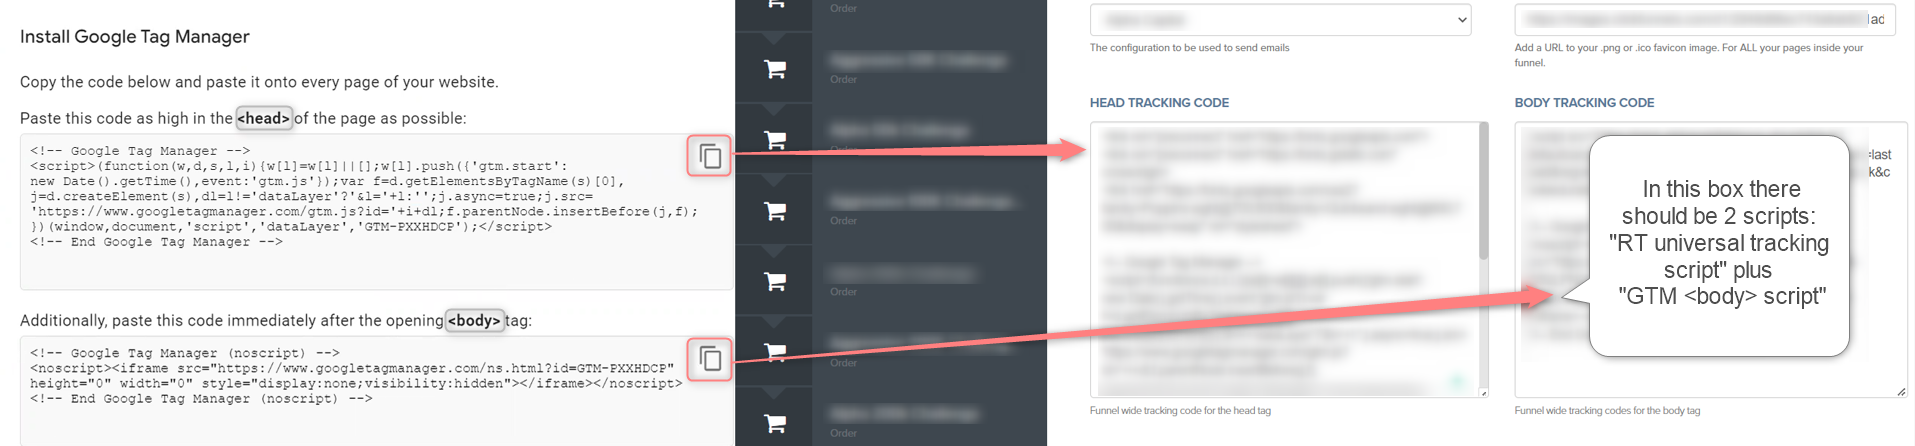
2.3 Copy the script from GTM <head> script and place it in the box Head Tracking Code in ClickFunnels → copy the universal tracking script from RT → place it in the box Body Tracking Code in ClickFunnels and under this script place the GTM <body> script:
2.4 Once the scripts are added, scroll down this page and press Save And Update Settings to apply the changes:

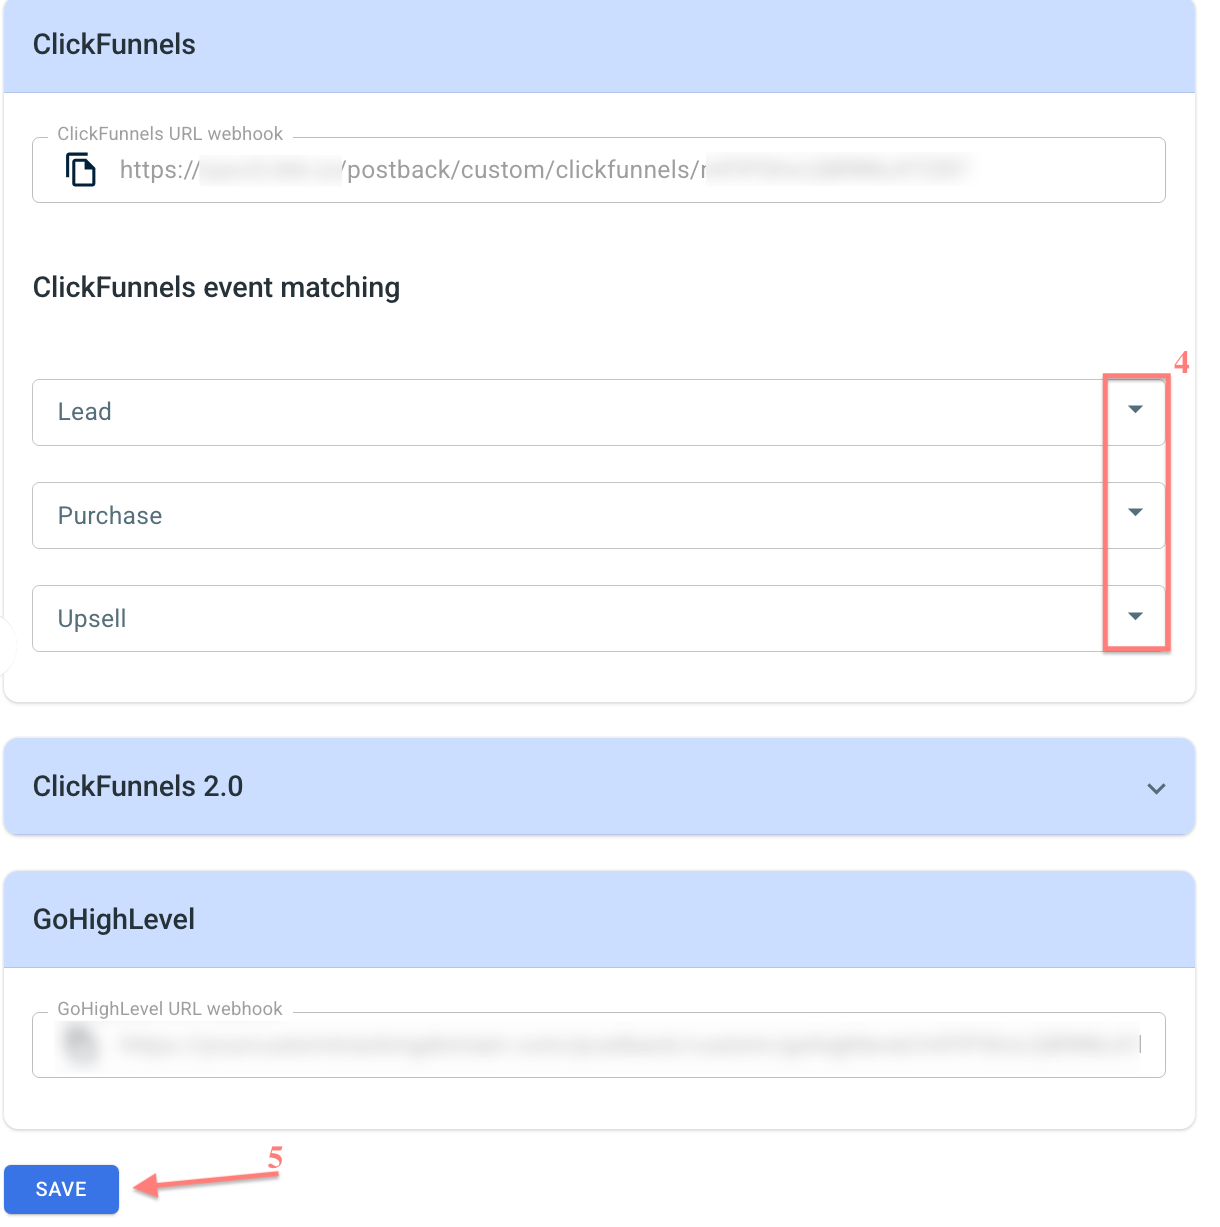
8. Create and match conversion events
Lead – in this event ClickFunnels passes the conversion when the user has filled in and sent his contacts in the form;
Purchase – in this event, ClickFunnels sends the conversion when the user has paid for the purchase;
Upsell – in this event, ClickFunnels sends the conversion when the user paid for the upsell. This applies only to forms that ClickFunnels offers for upsells.
1. RedTrack → Tools → Conversion tracking → Conversion type → use this guide to help you set the needed events.
2. Tools → Integrations → Stores → scroll down to the sections Clickfunnels event matching and match the events:
3. (optional) If the ClickFunnels supported are not enough for you, you can add more events via one of the 2 ways:
Please follow the steps in the guide Google Tag Manager integration with RedTrack.
1. In ClickFunnels go to the tab ClickFunnels → Funnels → choose the needed funnel:

2. On the needed Sales page click Edit page:
3. Go to Settings → Tracking code:

4. Add this script to the page settings in the tracking code section:
<script>
function getCookie(name) {
var value = "; " + document.cookie;
var parts = value.split("; " + name + "=");
if (parts.length == 2) return parts.pop().split(";").shift();
}
var rtCookie = getCookie('rtkclickid-store')
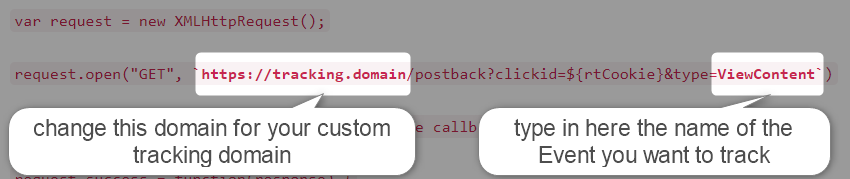
//create request with its properties (you can add to the postback &type=transaction &status= &event= &sum= like in custom image postback)
var request = new XMLHttpRequest();
request.open("GET", `https://tracking.domain/postback?clickid=${rtCookie}&type=ViewContent`)
//optional - to read our response code :create callback for success containing the response
request.success = function(response) {
console.log(response);
};
//optional - to read our response code : and a fail callback containing the error
request.fail = function(error) {
console.log(error);
};
//and finally send it away
request.send();
</script>