
Cartpanda and RedTrack

Cartpanda is an e-commerce platform for merchants based in Brazil. It enables smaller sellers, including creators and entrepreneurs, to sell and promote their digital goods, services, events, and physical items with an online store solution, checkout, and payment gateway.
Integration checklist
For RedTrack
1. Add a custom tracking domain
1. Add a CNAME record pointing to your RedTrack default domain in your domain registrar.
2. On the left menu, go to Tools → Domains → Create new domain.
3. Add the integrated domain to your RedTrack account and activate the Free SSL option.
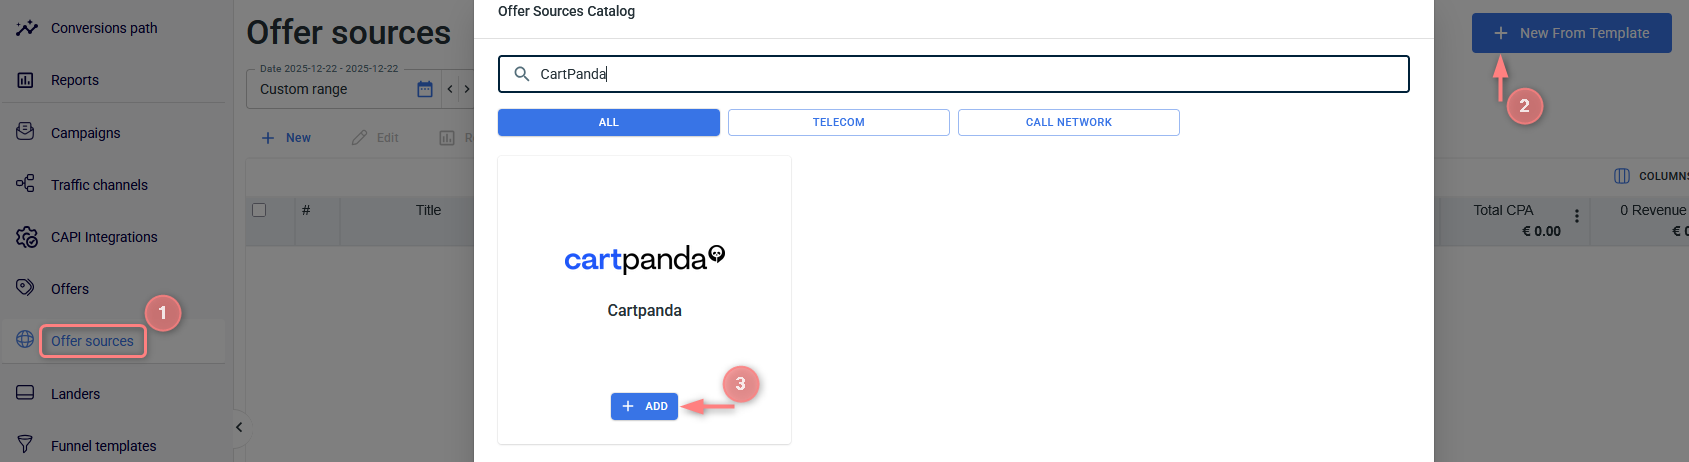
2. Add CartPanda as an offer source in RedTrack
Offer sources/Brands → New From Template → Search for CartPanda → Add → fill in the mandatory fields → copy the postback URL → Save:
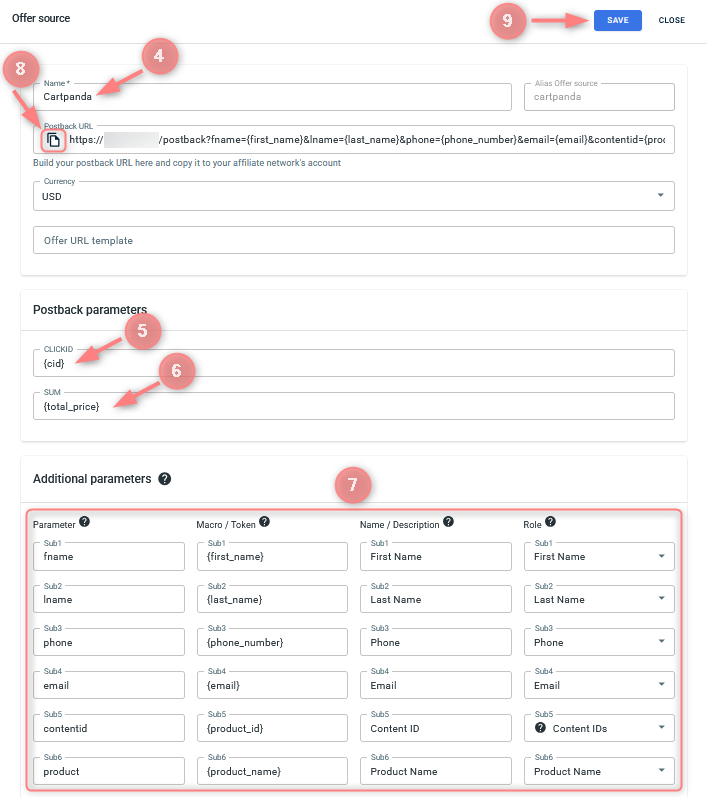
Values for the fields as per the numbers on the picture above:
Give your offer source a name, Cartpanda, to distinguish it from the other added offer sources.
CLICKID = {cid}
SUM = {total_price}
In the Additional parameters section add extra parameters for the PII data enhancement:
Parameter | Macro / Token | Role |
fname | {first_name} | First Name |
lname | {last_name} | Last Name |
phone | {phone_number} | Phone |
email | {email} | Email |
contentid | {product_id} | Content IDs |
product | {product_name} | Product Name |
Copy the Postback URL to set it up later in Cartpanda.
Click Save to apply the changes.
3. Add CartPanda offer URL to RedTrack
1. Get the Cartpanda offer URL.
The offer link in Cartpanda is labeled “Promolink”.
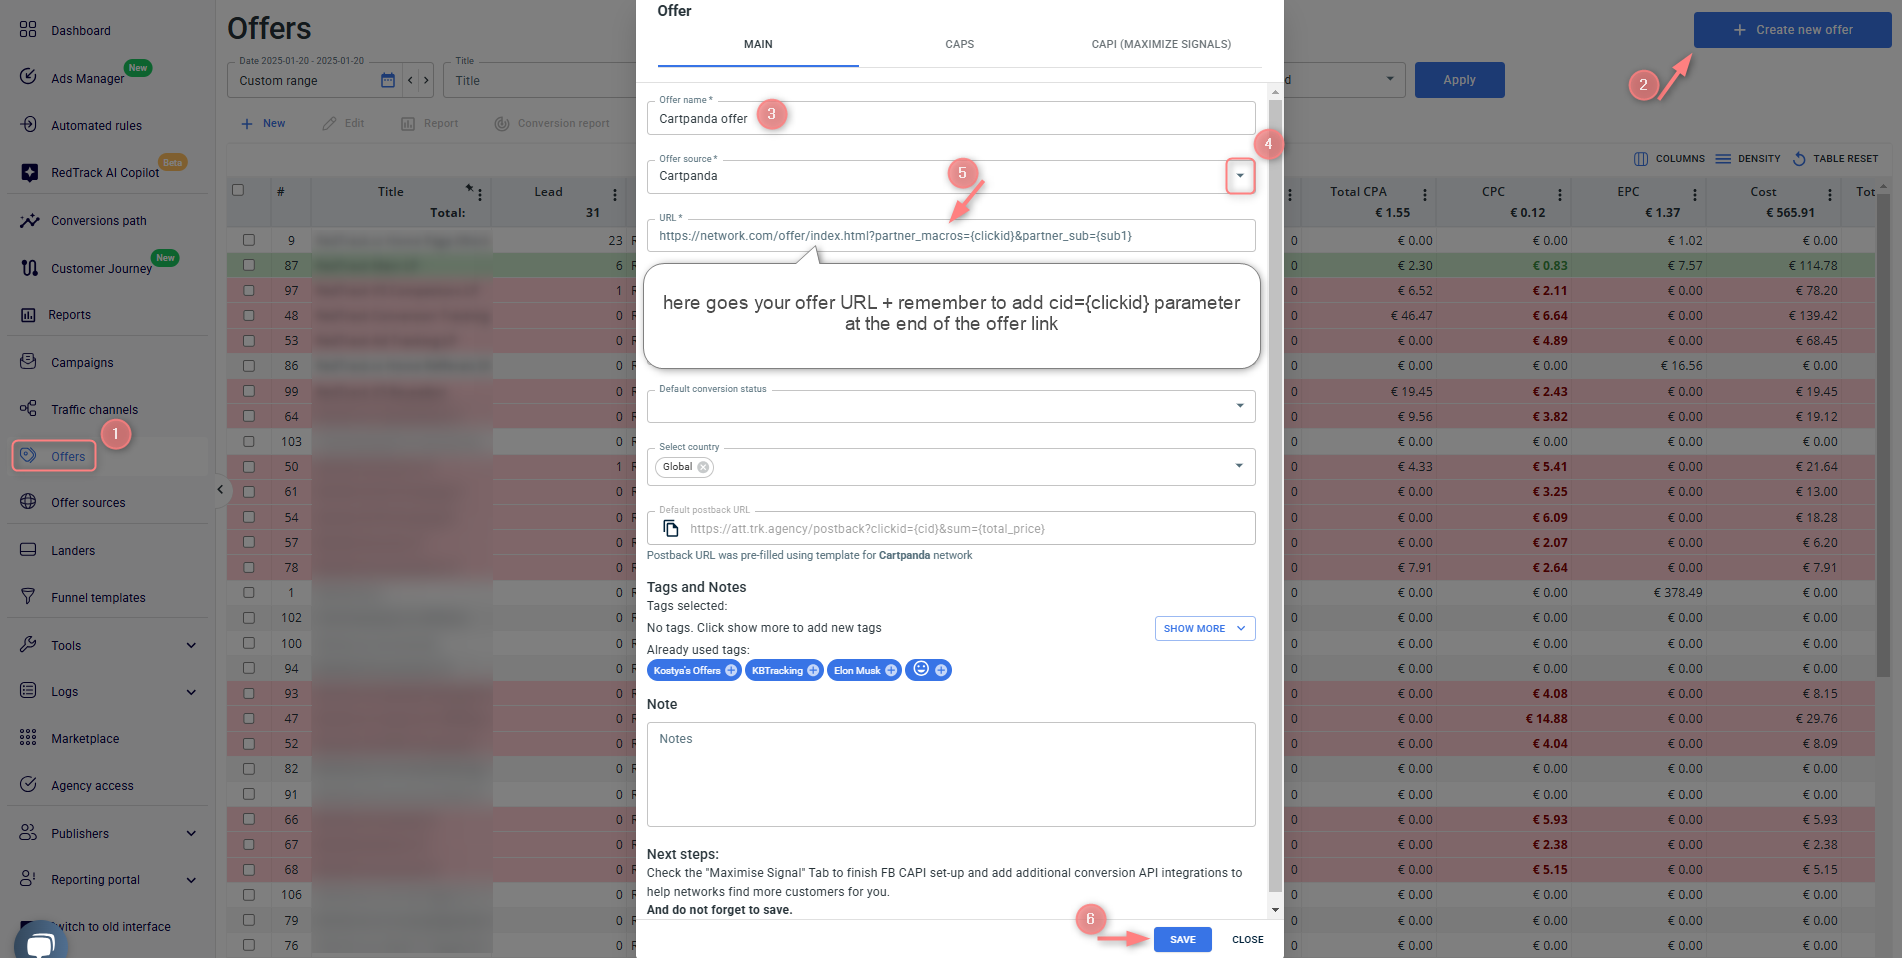
2. Add Cartpanda Offer to RedTrack.
RedTrack → Offers → Create new offer → give the offer a name and choose Cartpanda as the offer source → paste the Cartpanda offer link to the URL field → add cid={clickid} to the URL → Save:
4. Add your traffic channel
Traffic channels → New From template/New From Scratch → Add.
5. Create a campaign
Campaigns → Create new campaign → fill in the info in all the sections and tabs:
- General: Give it the name, and choose the traffic channel, tracking domain, and cost-tracking method.
- Funnels: Choose the type of funnel you are using and add the elements from the drop-downs.
- S2S postback: This field will be filled in automatically based on the data you have added to your traffic channel settings.
- Auto update costs: Remember to turn the toggle on if you are working with the API-integrated traffic channel.
– Campaign setup (guide for Affiliates)
– Campaign setup (guide for Advertisers)
For CartPanda
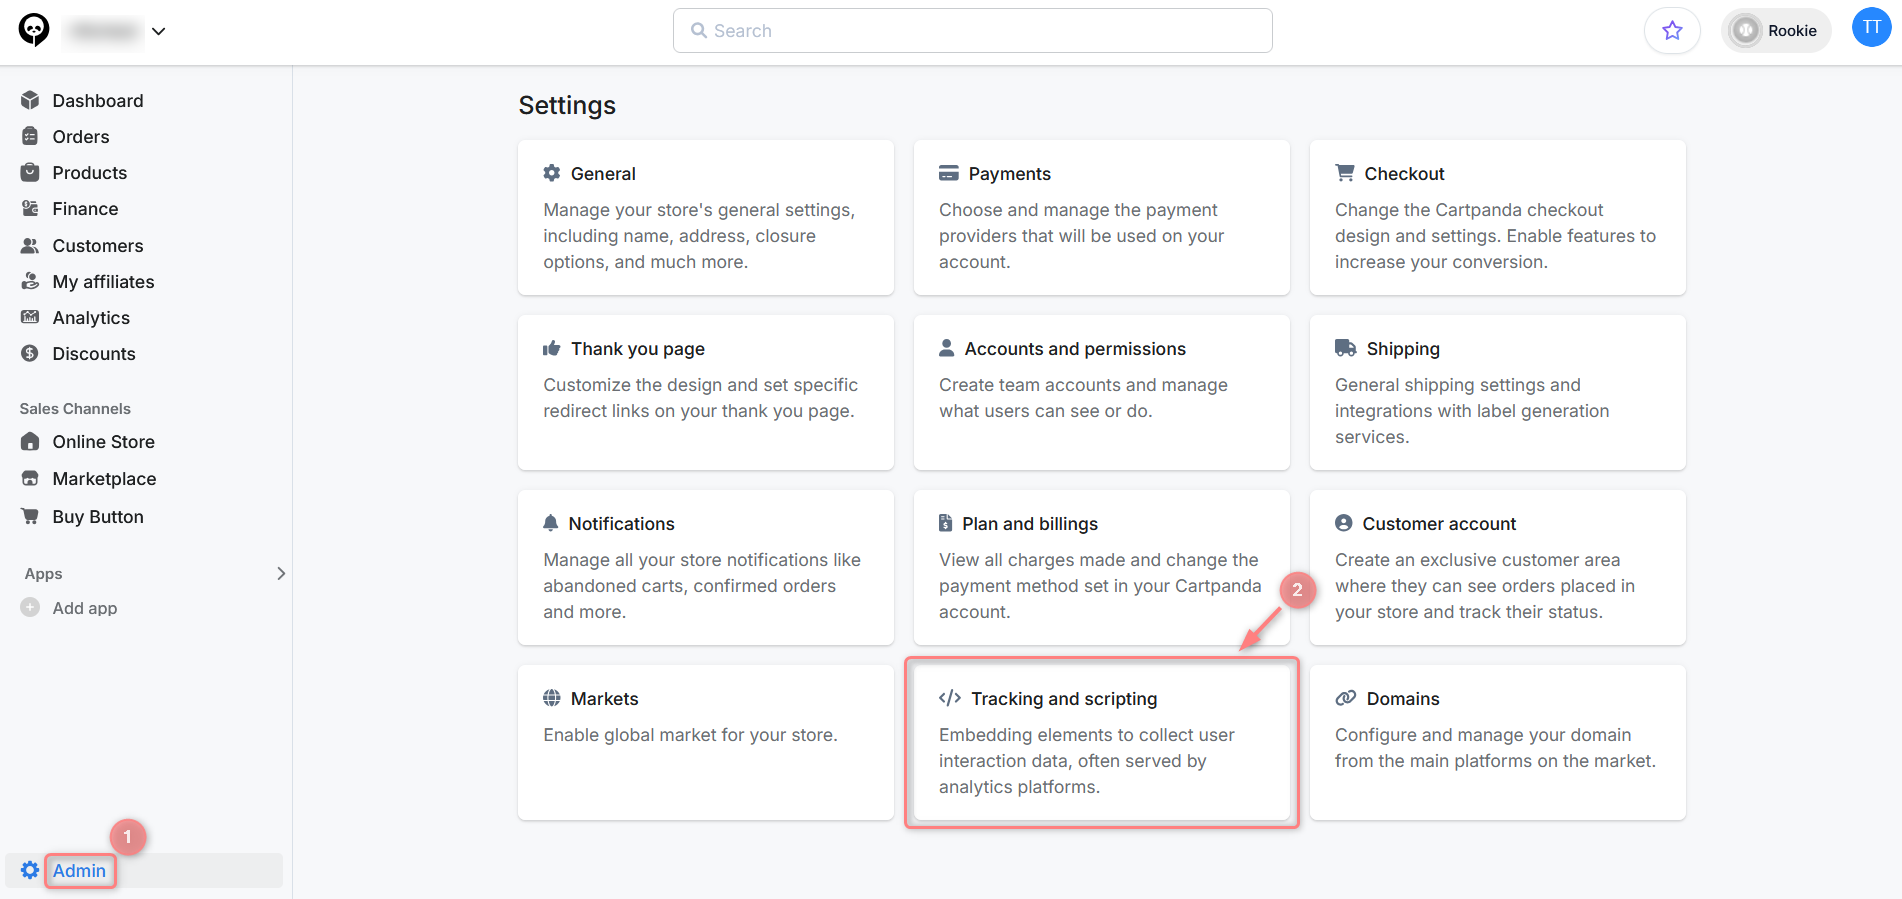
Configure the webhook
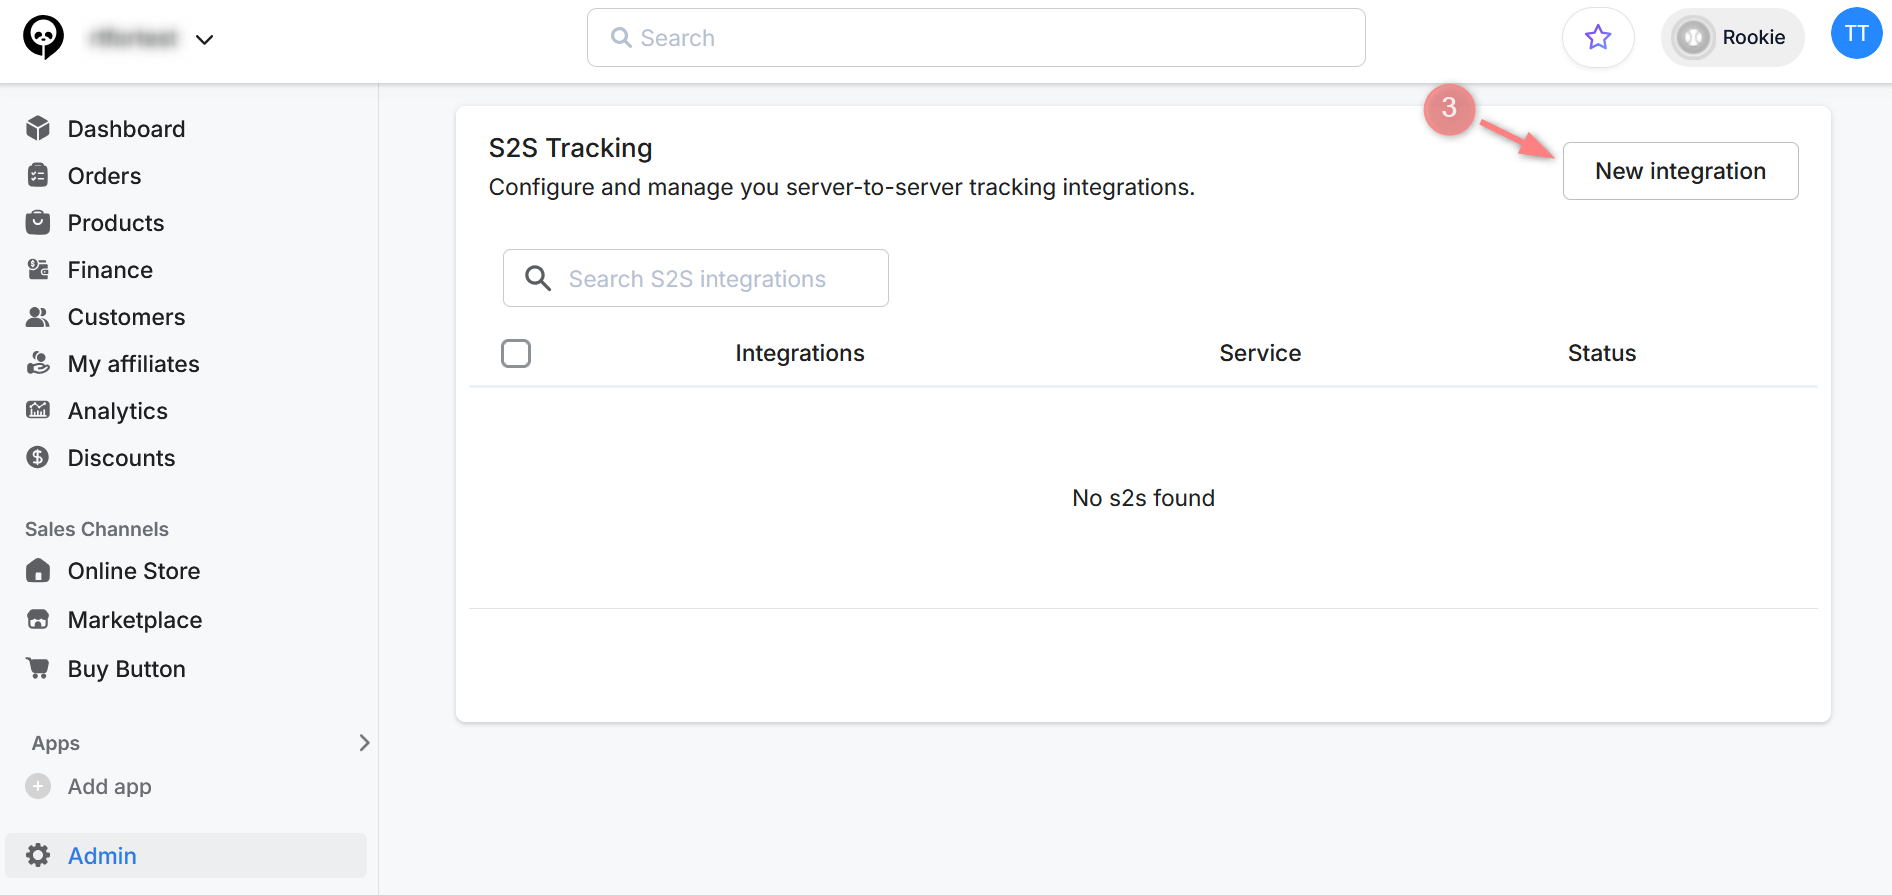
1. In your Cartpanda account go to Admin → Tracking and scripting → S2S Tracking → New integration:
2. Fill in the mandatory fields in the integration form → add RT Postback URL (copied before in step 2) to the Postback URL field → Save:
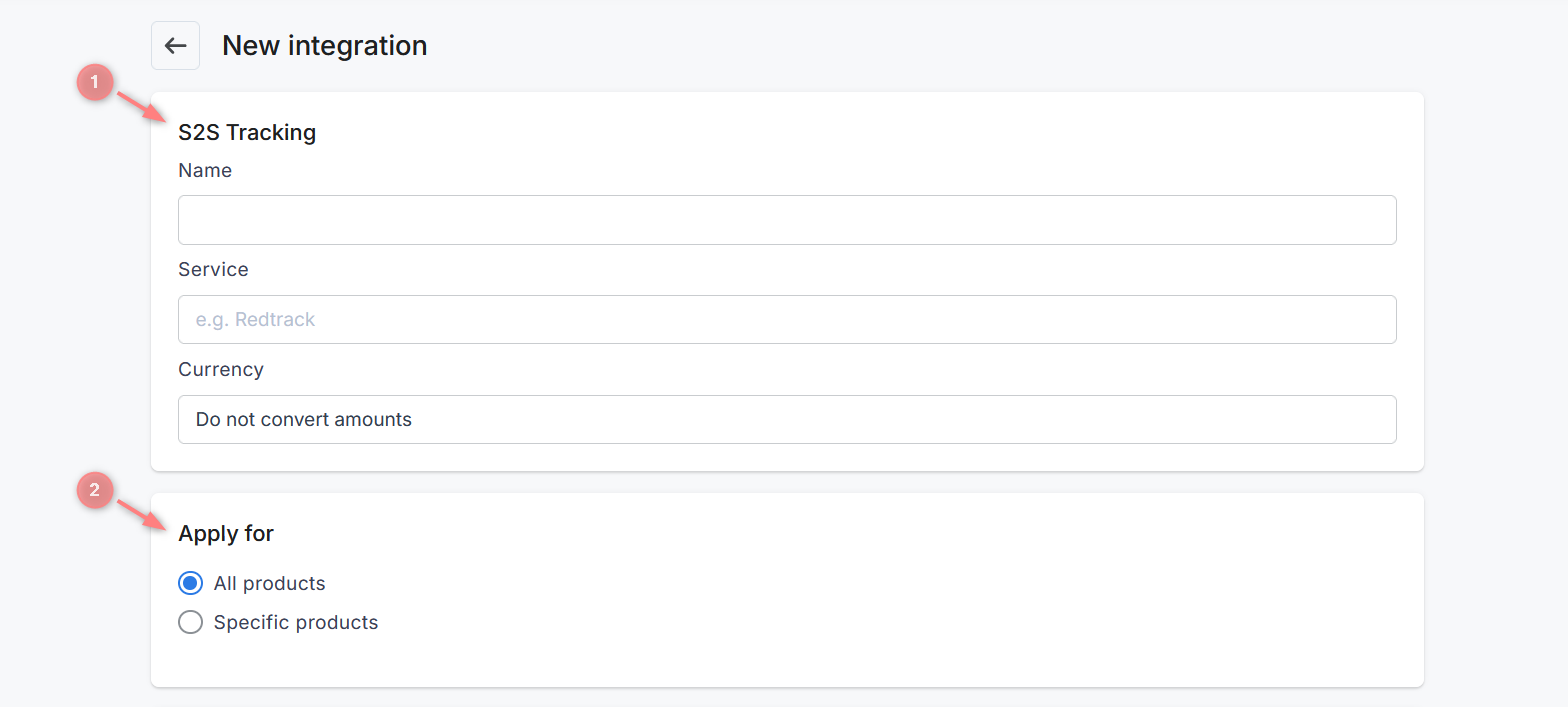
Fields explained:
Fill in the basic postback information:
- Name and Service: use these fields to identify the postback. You can name them however you prefer, they’re especially useful if you work with multiple integrations.
- Currency: select the currency in which you want the amounts to be sent in the postback.
The system will automatically convert values to the selected currency (USD, EUR, or BRL).
If you choose “Do not convert amounts”, values will be sent in the original sale currency.
Use this section to define when the postback should be triggered. You can apply it to all products or select specific products.
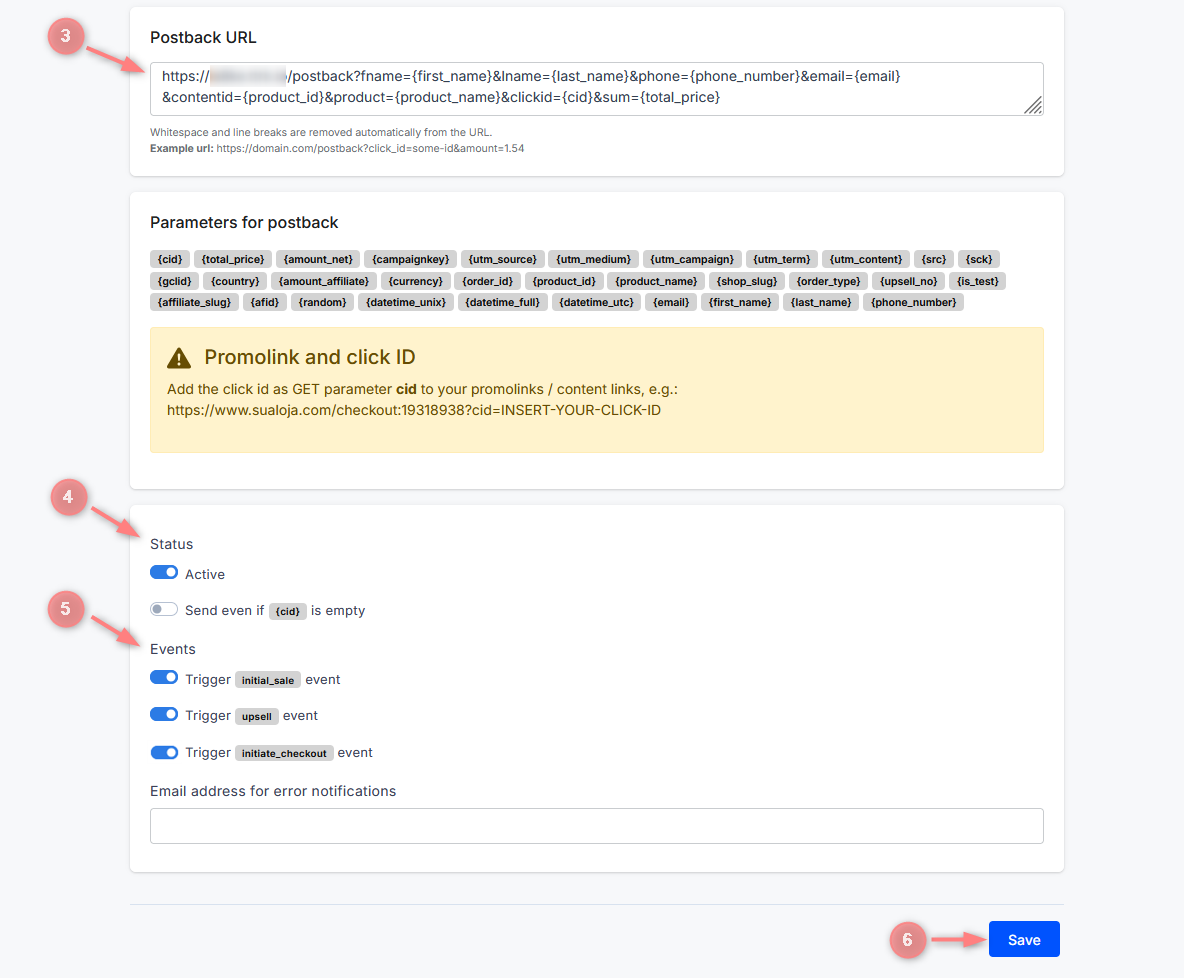
Paste the RedTrack postback URL you copied earlier in step 2 of this guide.
Make sure the Active toggle is enabled. This ensures the integration is turned on.
Here you can select which events will trigger the postback. You can select all of them or specific ones:
1. All events
If you want the postback to fire for all events, enable all toggles and append the &type={order_type} parameter to the end of the postback URL (added in step 3).
Also, make sure the events initiate_checkout, initial_sale, and upsell are added to RedTrack with these exact names, in lowercase. Otherwise, the postback will not work. Example:

2. Specific events
If you want the postback to fire for a single event, enable the toggle for that event and append the &type=event_name parameter to the end of the postback URL (as added in step 3).
Replace event_name with the exact event name and make sure this event was previously added in RedTrack. Example:
