29 Next and RedTrack

Info
29 Next is a full-stack e-commerce platform for modern direct response brands, offering features like global storefronts, marketing funnels, customer support, and advanced order management, aiming to help performance marketers scale their campaigns.
Integration
Setup in RedTrack
1. Add a custom tracking domain
1. Add a CNAME record pointing to your RedTrack default domain in your domain registrar.
2. On the left menu go to Tools → Domains → Create new domain. The default domain is stated right on the top and looks like smth.rdtk.io.
3. Add the integrated domain to your RedTrack account and activate the Free SSL option.
2. Create custom conversion events
Tools → Conversion tracking → Conversion type → add the events you want to track → Save.
Here’s the list of the 29 Next events you can track with RT:
- ViewContent
- AddToCart
- InitiateCheckout
- Purchase
The names will remain the same and be sent to the traffic channel exactly as you added them in RedTrack.
3. Add your traffic channel
Traffic channels → New From template/New From Scratch → Add.
4. Add your Offer source / Brand
The way you set it up depends on your account type:
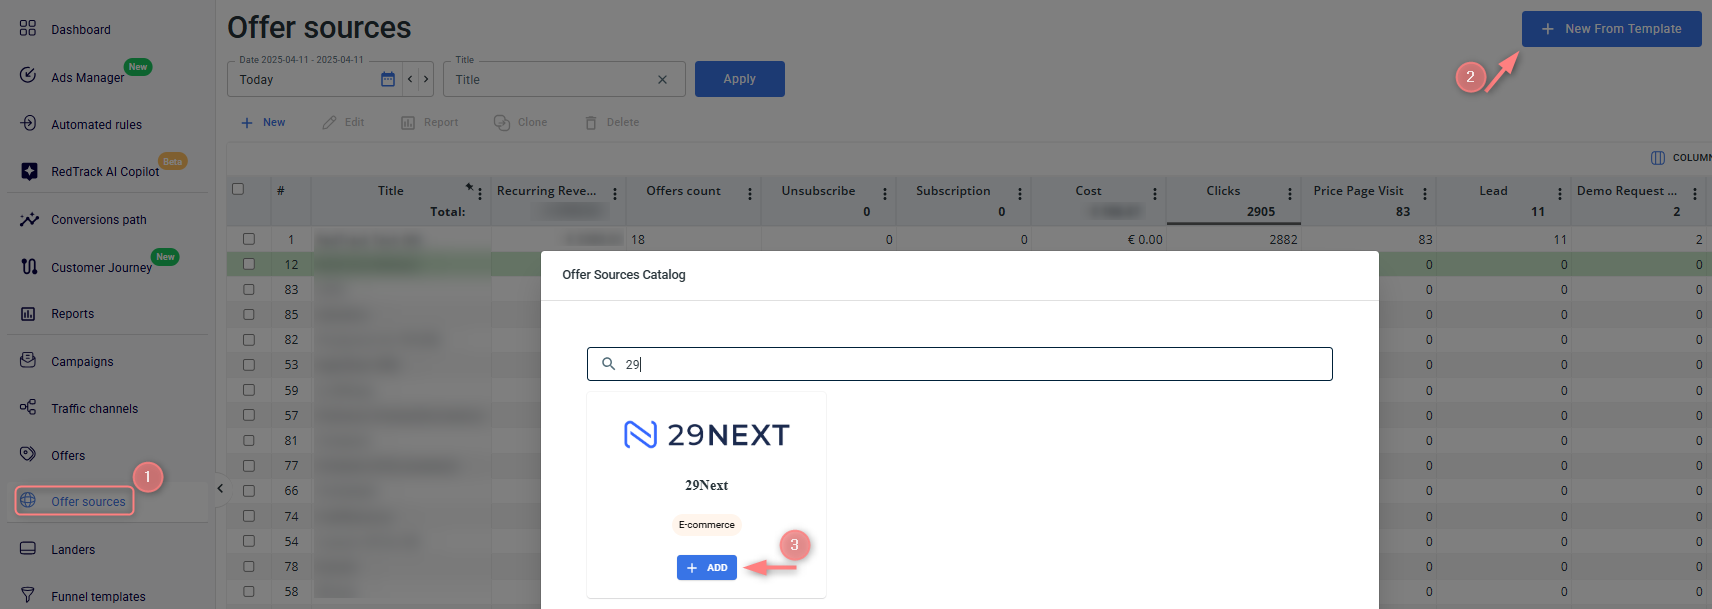
Offer sources → New From Template → find 29Next template → Add → Save:
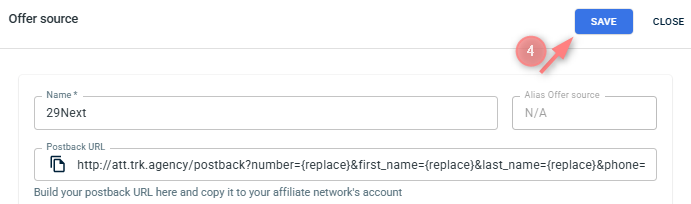
Brands → New from scratch → give your brand a name → fill in additional parameters to send the PII data for better attribution → Save the template:
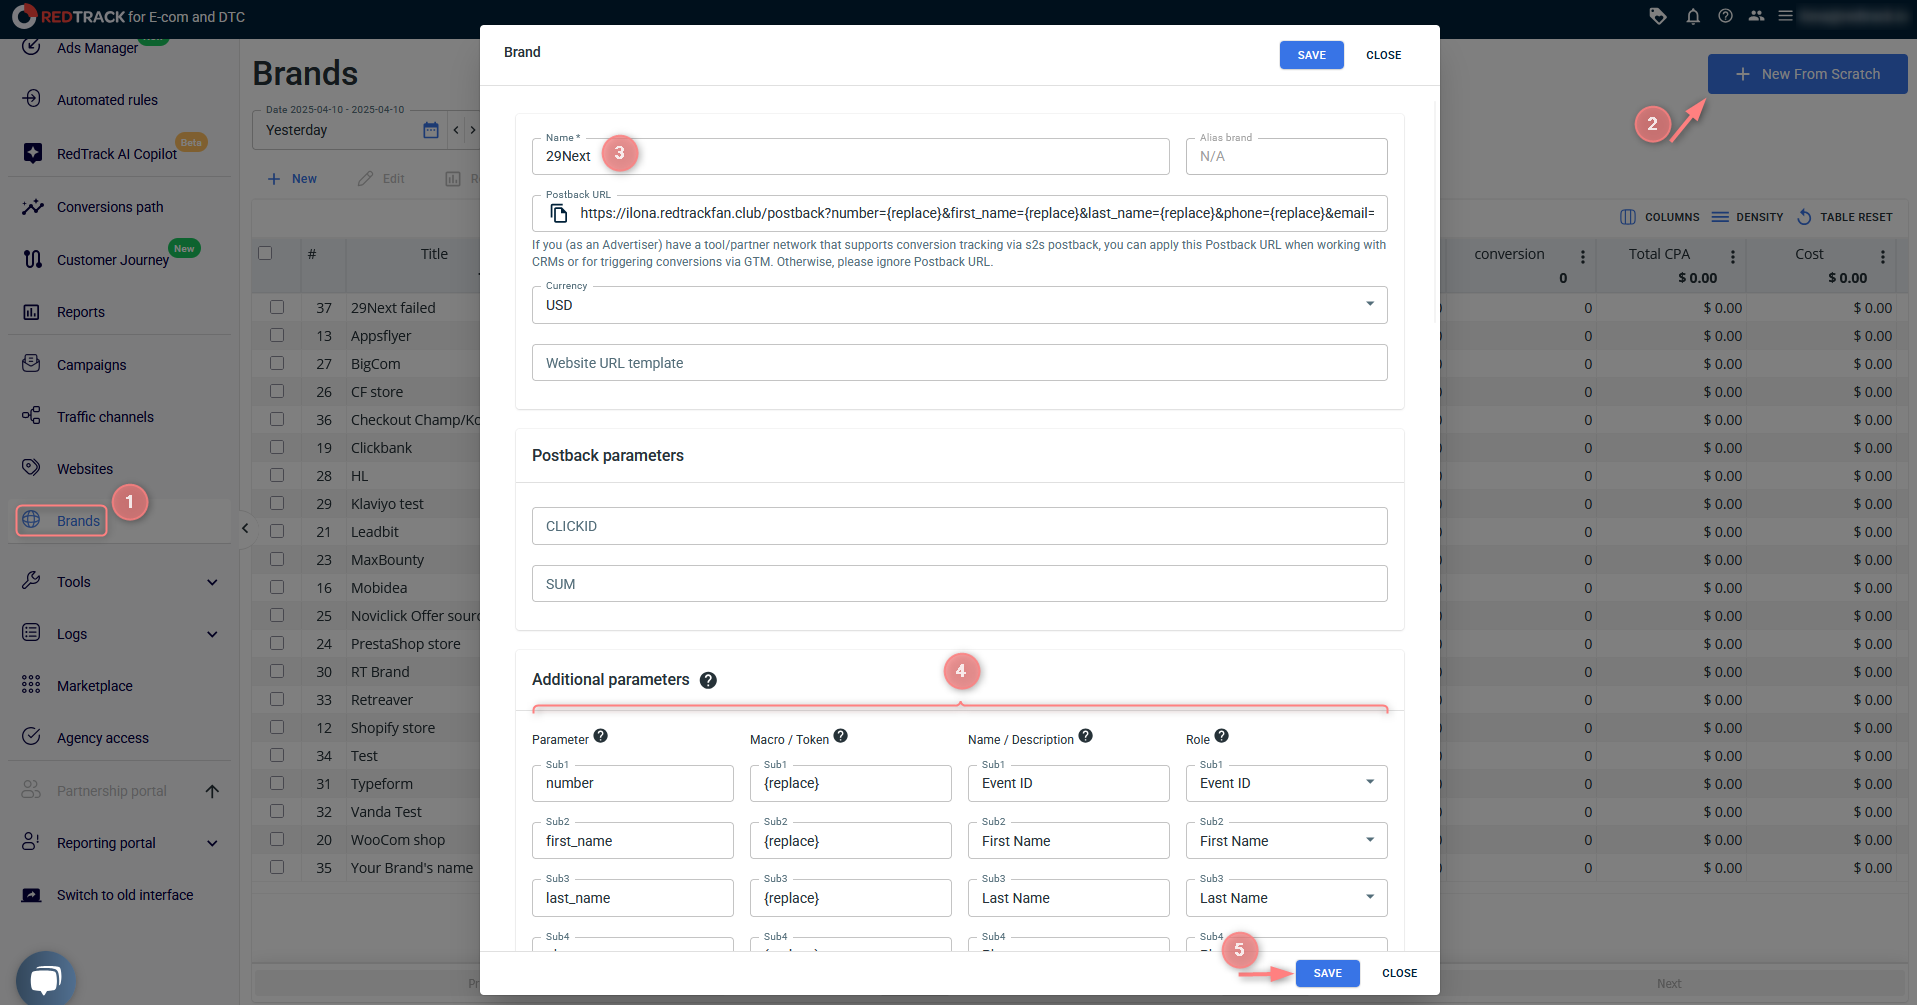
Parameters to be added with the corresponding roles:
Parameter | Macro / Token | Name / Description (what you will see in reports instead of subx) | Role | Info we receive under these parameters |
number | {replace} | Event ID | Event ID | Your order ID or the external ID for the conversion |
first_name | {replace} | First Name | First Name | Customer’s First Name from the order |
last_name | {replace} | Last Name | Last Name | Customer’s Last Name from the order |
phone | {replace} | Phone | Phone | Customer’s phone number from the order |
email | {replace} | Email | Email | Customer’s email from the order |
title | {replace} | Line item product | Product Name | Customer’s product name |
name | {replace} | Category name | Content Category | The type of product |
id | {replace} | Category ID | Content IDs | External product ID |
5. Add your Offer / Website
The way you set it up depends on your account type:
Offers → Create new offer → add the offer link to the URL field → use this guide to help you with the rest of the offer settings.
Websites → Create new website → use this guide to help within the website settings.
6. Create a campaign
Campaigns → Create new campaign → fill in the info in all the sections and tabs.
- General: give it the name, and choose the traffic channel, tracking domain, and cost-tracking method.
- Funnels: choose the type of funnel you are using and add the elements from the drop-downs.
- S2S postback: this field will be filled in automatically based on the data you have added to your traffic channel settings.
To add a campaign for the paid traffic go to Campaigns → Create new campaign → fill in the info in all the sections and tabs.
- General: give it the name, and choose the traffic channel, tracking domain, and cost-tracking method.
- Funnels: choose the type of funnel you are using and add the elements from the drop-downs.
- S2S postback: this field will be filled in automatically based on the data you have added to your traffic channel settings.
7. Create a universal script
Tools → Scripts → Create new script → fill in the mandatory fields → Save → copy the generated universal script.
Setup in 29 Next
Add RT application in 29 Next
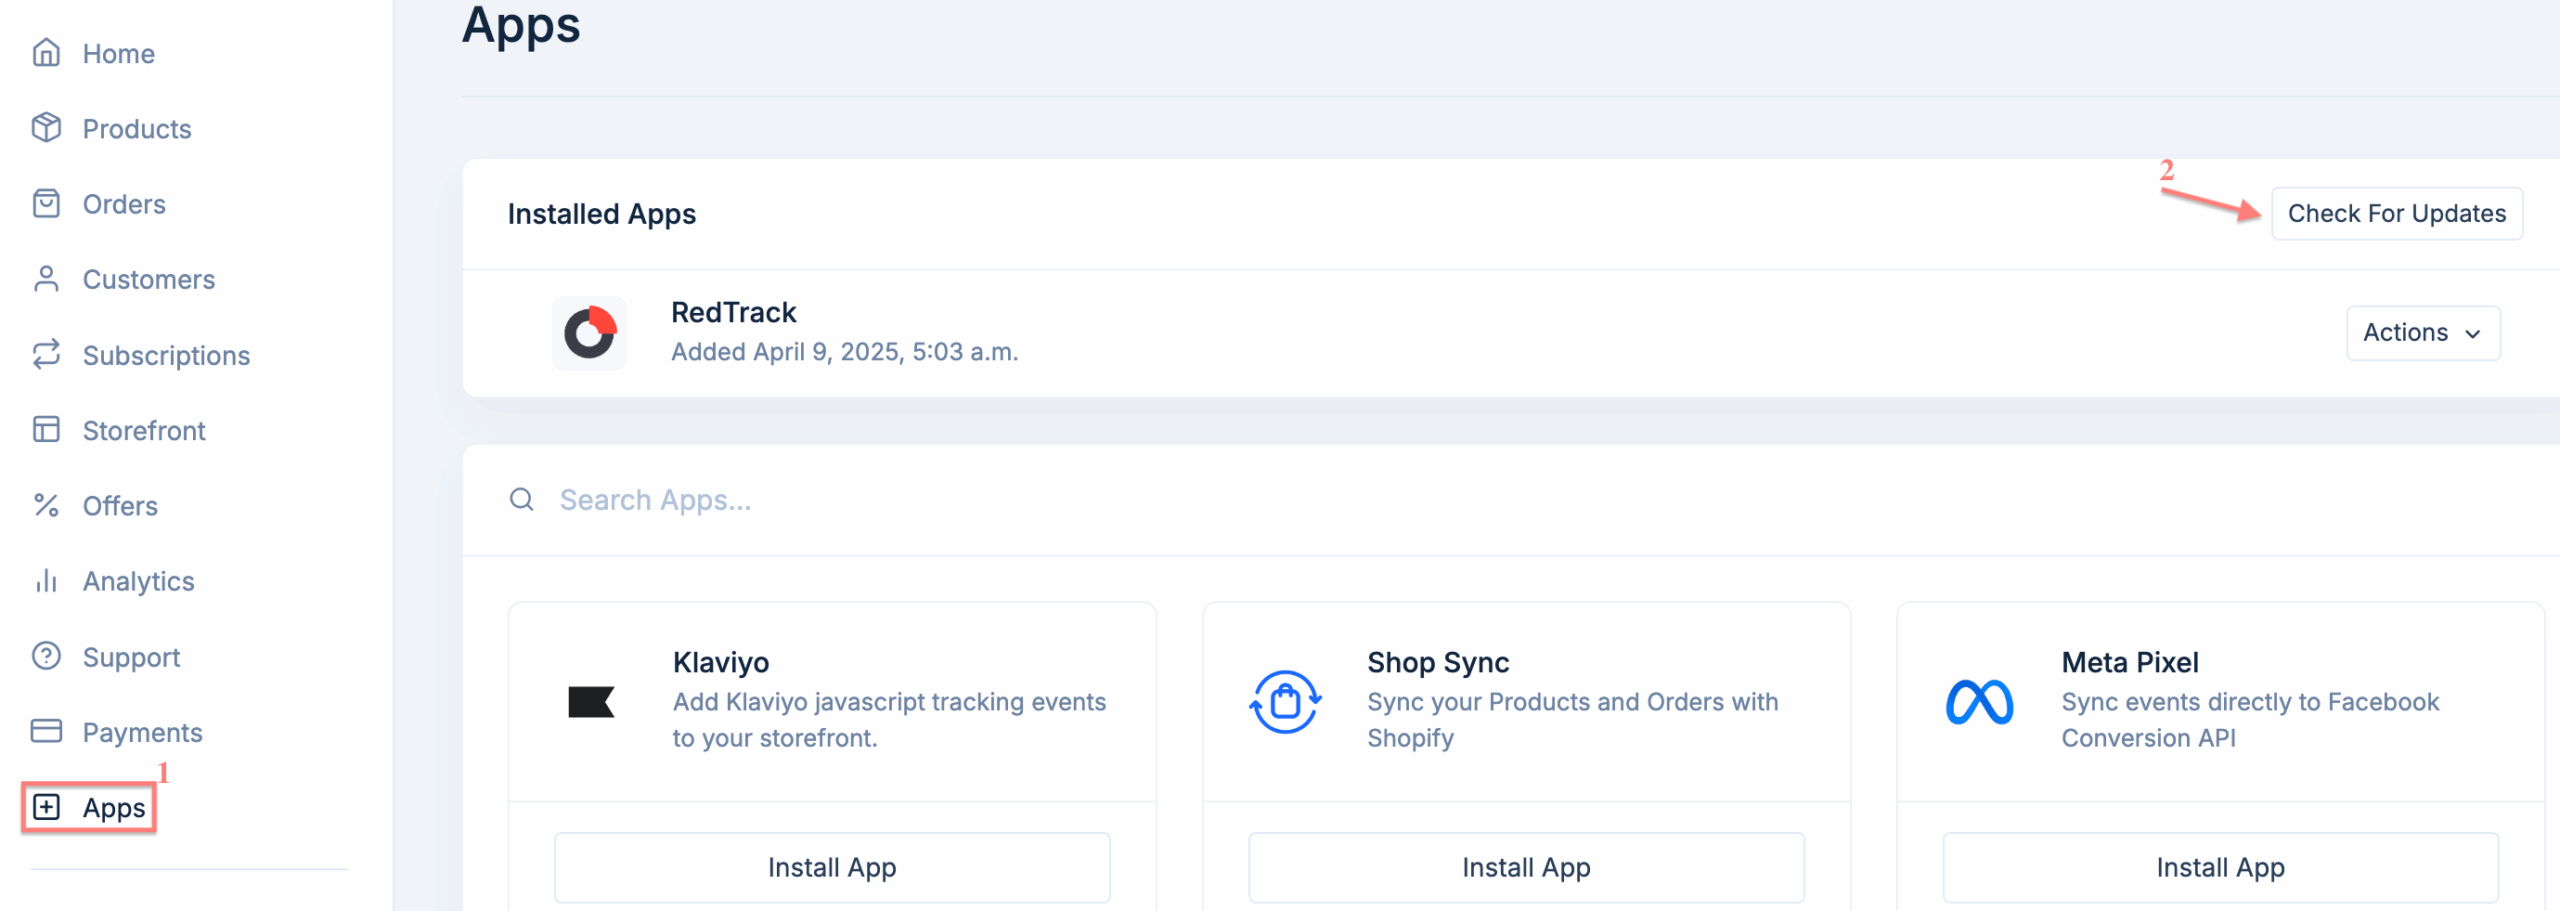
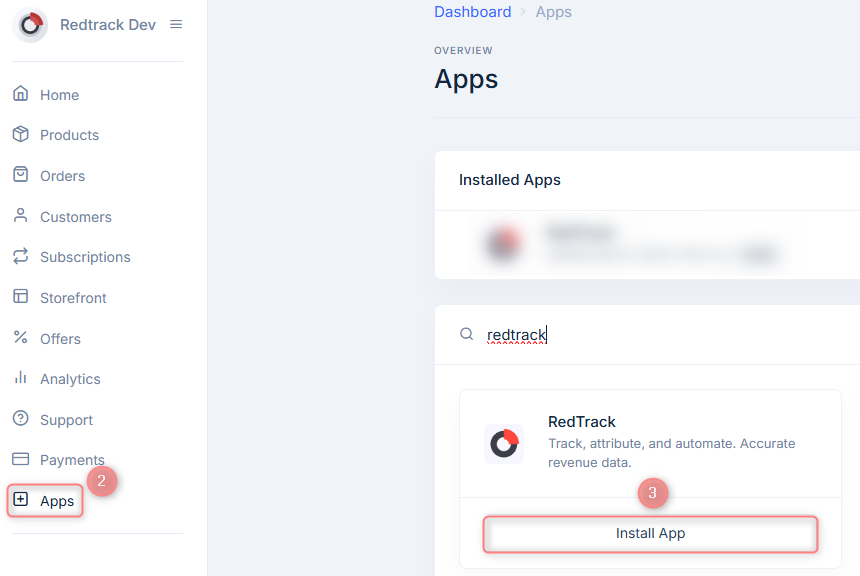
1. Go to your 29 Next account → Dashboard → Apps → find RedTrack → Install App:

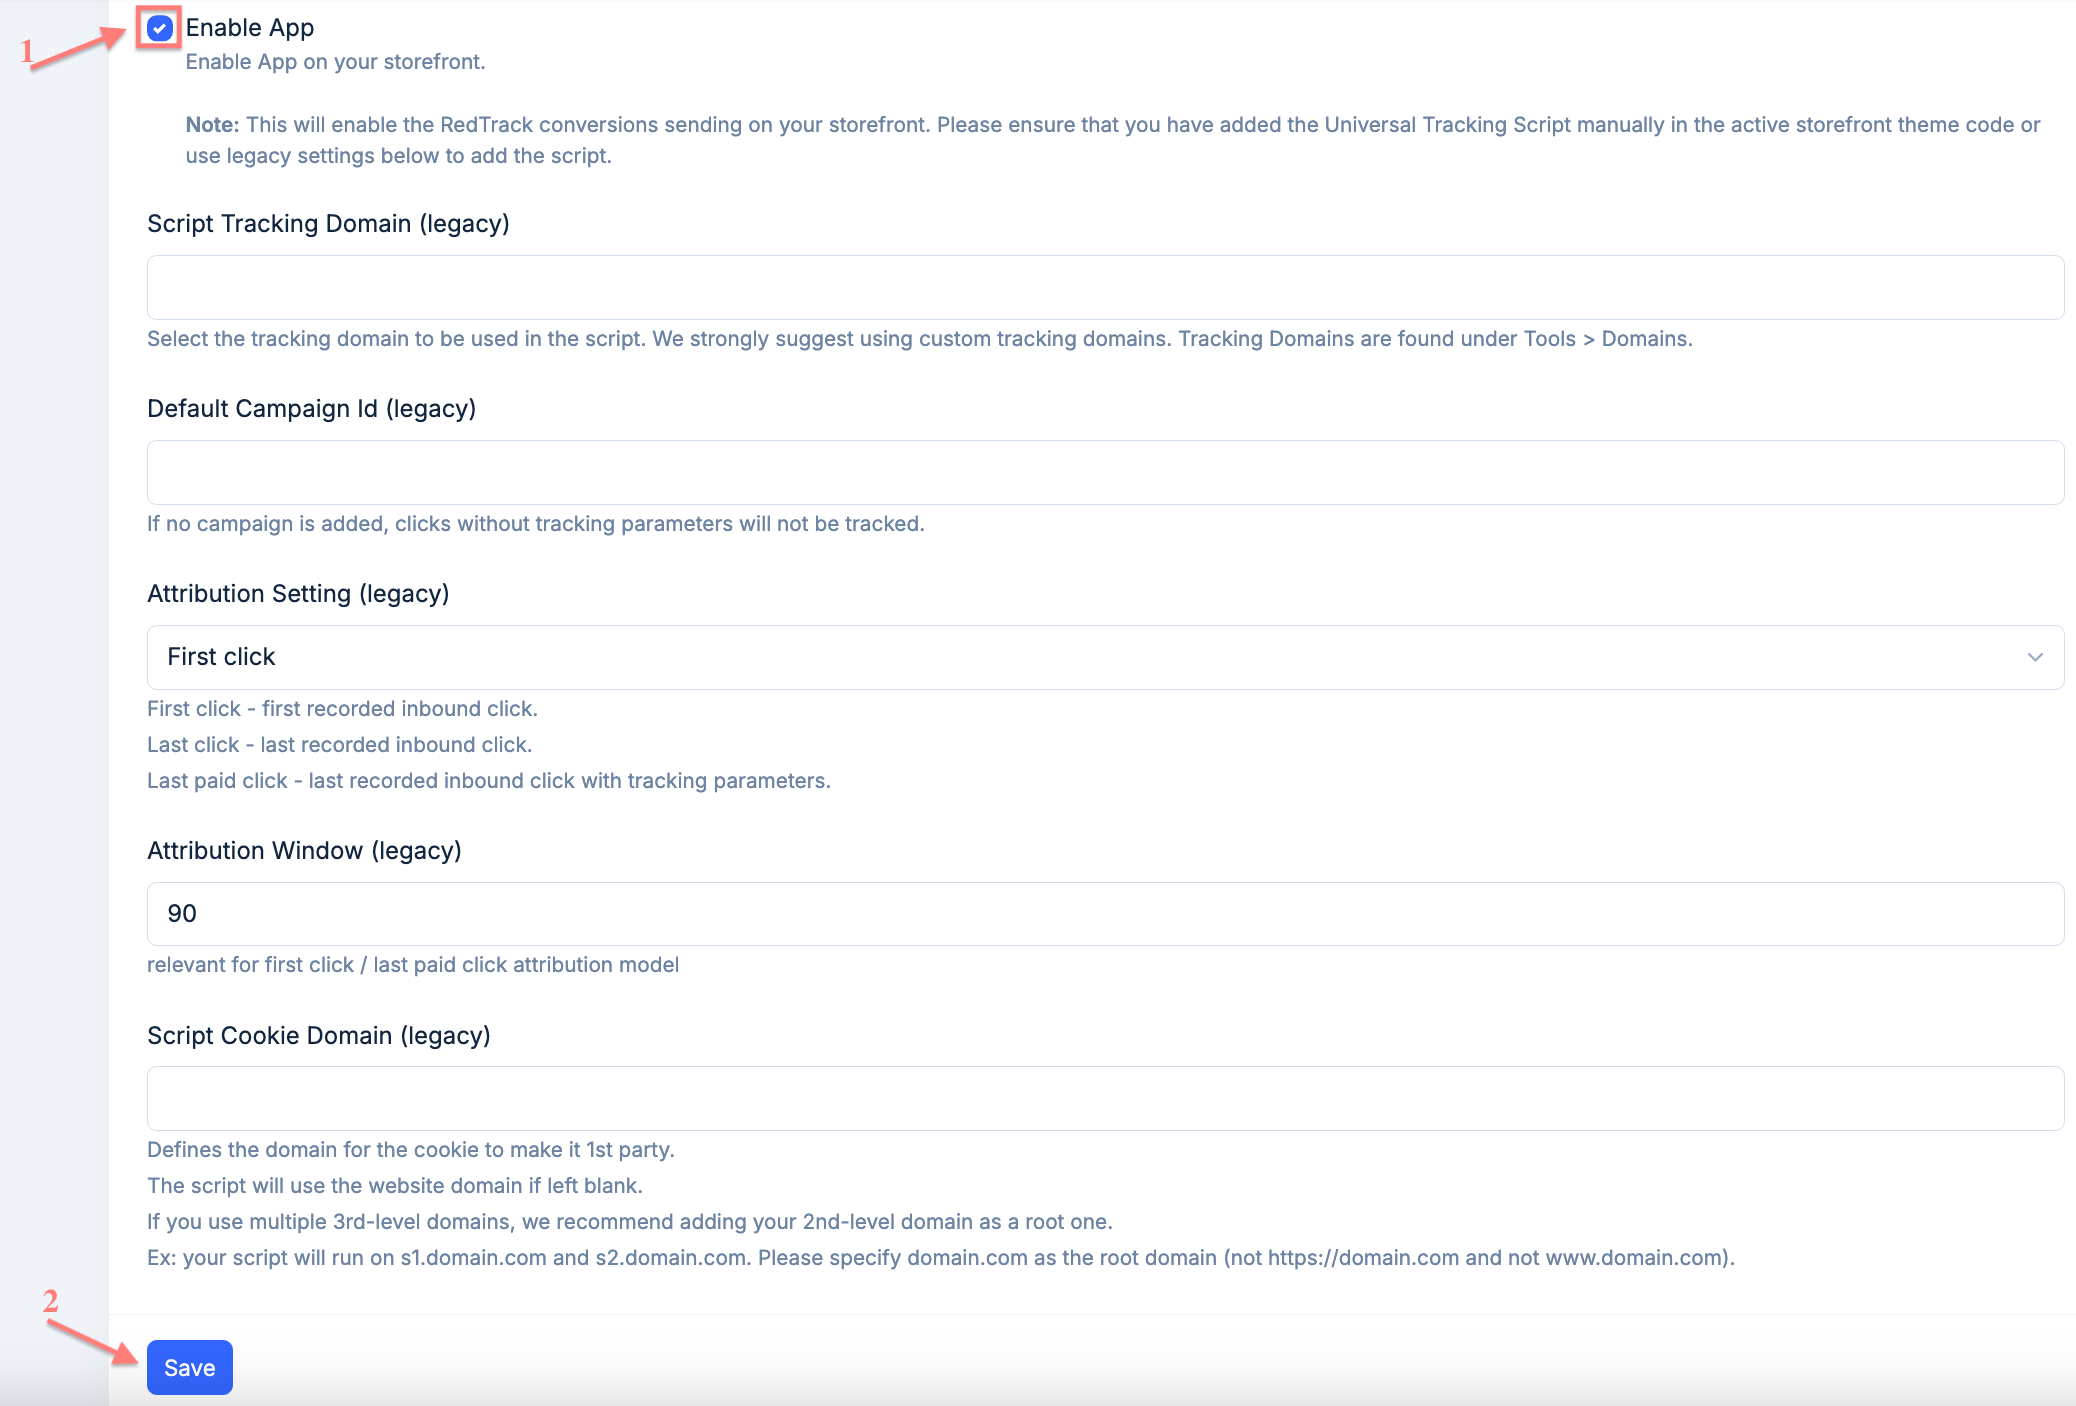
2. Enable the app → Save:
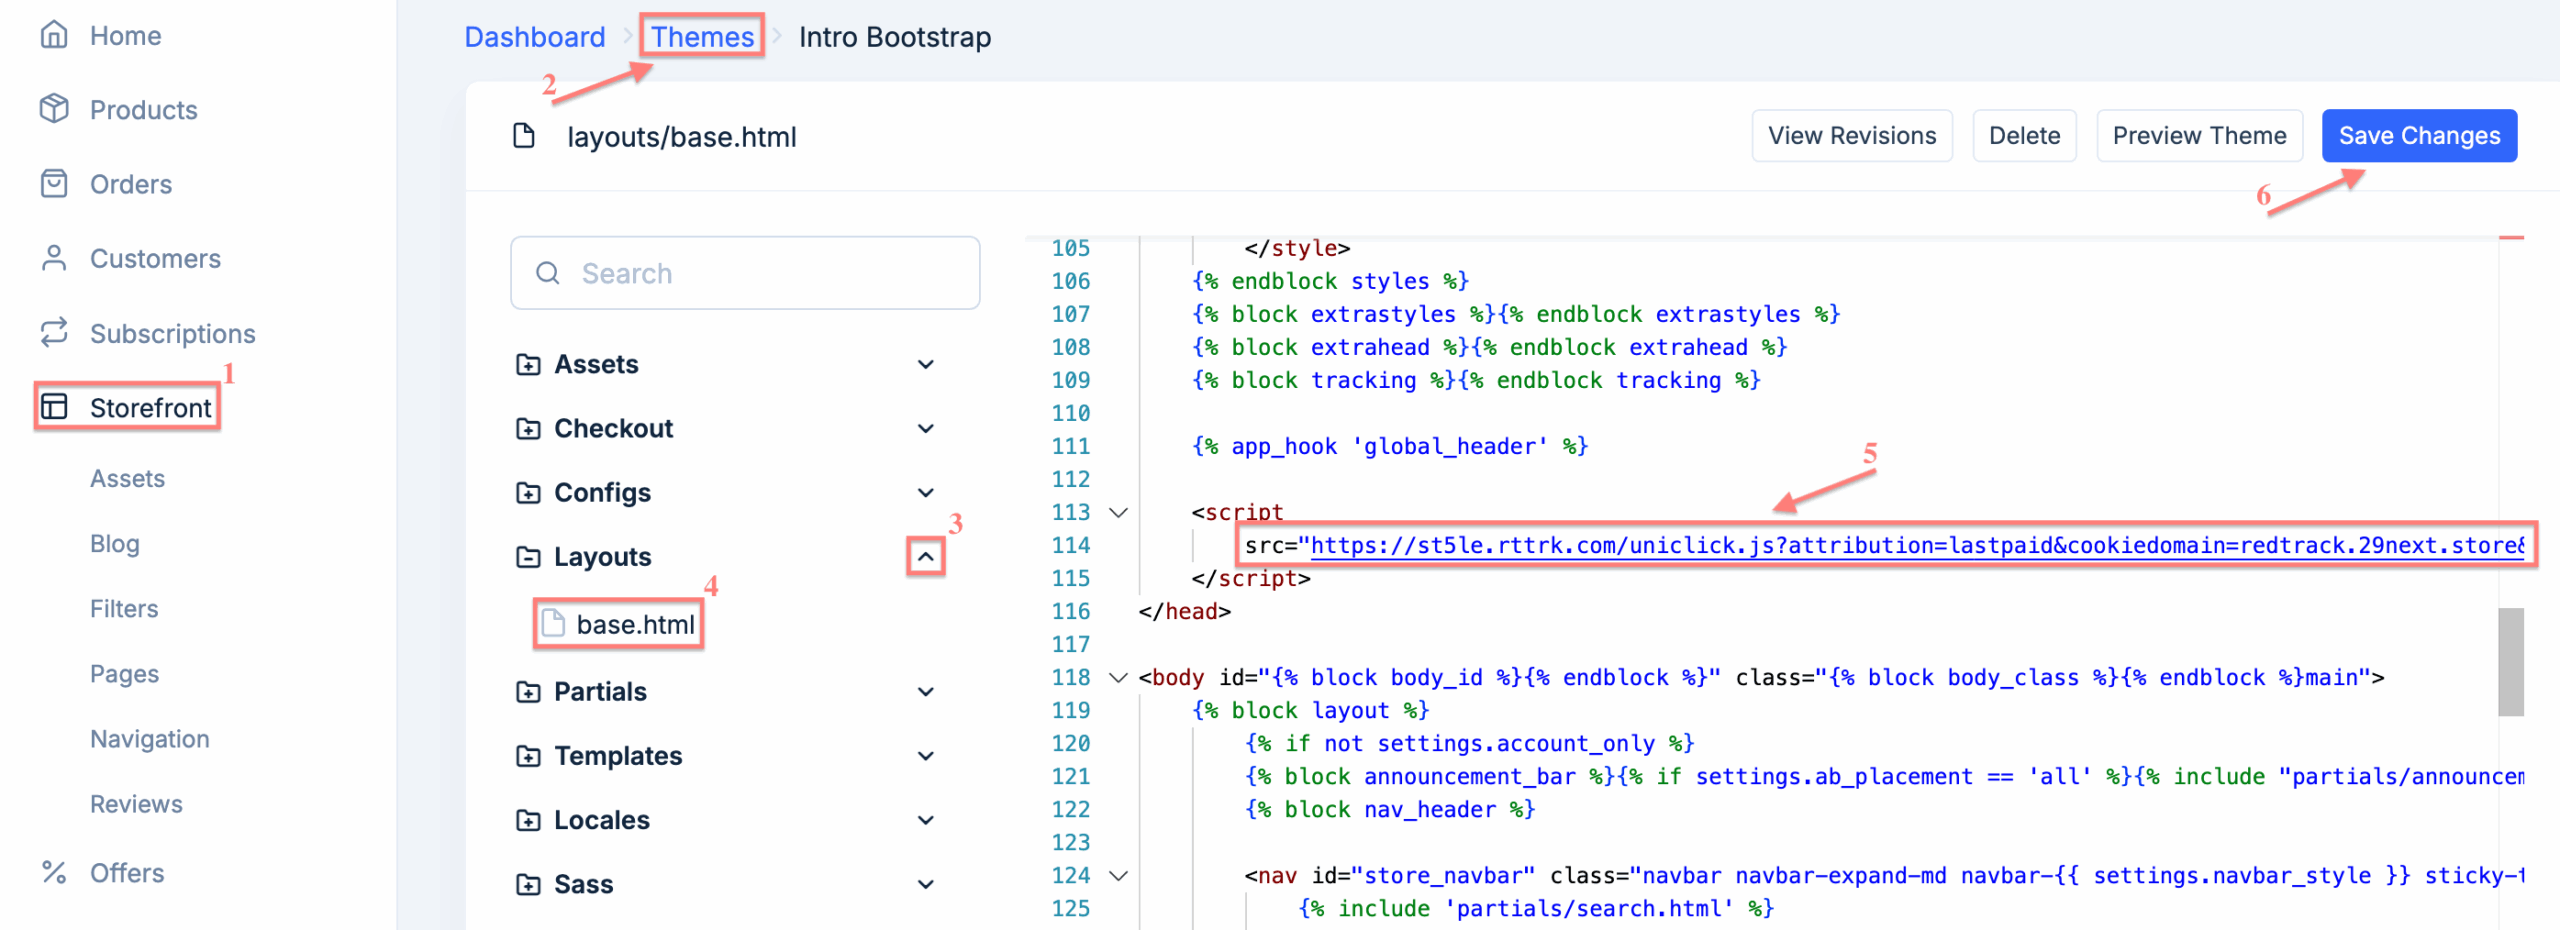
3. Go to Storefront → select Theme → Layouts → base.html → paste a universal script (copied from step 7 in RedTrack setup) at the end of the <head> section → Save changes:
4. To apply the changes, go to Apps → RedTrack → Check for Updates: