
Decide and RedTrack

Decide is a performance marketing network specializing in Direct-to-Consumer (DTC) offers. With strong coverage across key verticals such as eCommerce, Health, Financial Services, and Lead Generation, the platform provides high-intent traffic and a data-driven environment designed for scalability. Known for its focus on quality and compliance, Decide is a solid choice for advertisers seeking consistent performance and result-oriented campaign optimisation.
Integration checklist
1. Add a custom tracking domain
1. Add a CNAME record pointing to your RedTrack default domain in your domain registrar.
2. On the left menu, go to Tools → Domains → Create new domain.
3. Add the integrated domain to your RedTrack account and activate the Free SSL option.
2. Add the offer/website you are promoting
This is the target destination link where you plan to run the traffic: it can be an affiliate offer, a direct link to your website, or the shop.
1. Add the offer source: New from template/New from scratch → find the affiliate network you work with/add your custom name → Save.
2. Add the offer link: Offers → New → choose the offer source from the list, add the offer URL → save the changes.
For example: &affsub={clickid} where {clickid} is RedTrack parameter
More info on offer source and offer in RT can be found here.
1. Go to Brands → New → Add your brand (it is the name of your shop or your website).
2. On the same page, add the purchase data parameters – Name/Description is what you will see in reports – Roles define their use with CAPI.
3. Go to Websites → New → Add your website URL (this is your e-commerce shop/website link).
4. Follow the suggested steps to generate the scripts. You will need it later for your e-commerce platform.
Add the following parameters at the end of your website URL: ?rtkcid={clickid}&clickid={clickid}&cmpid={campaignid}
Note:
If your URL does NOT already contain any parameters (i.e., no ? yet), just paste the parameters as shown above.
Example: https://yourstore.com?rtkcid={clickid}&clickid={clickid}&cmpid={campaignid}
If your URL already contains parameters (i.e., it has a ?), use & to add these new ones.
Example: https://yourstore.com?utm=value&rtkcid={clickid}&clickid={clickid}&cmpid={campaignid}
3. Set up the conversion events
In your RT account go to Tools → Conversion tracking → Conversion type → add the events you want to track → Save.
The names will remain the same and be sent to the traffic channel exactly as you added them in RedTrack.
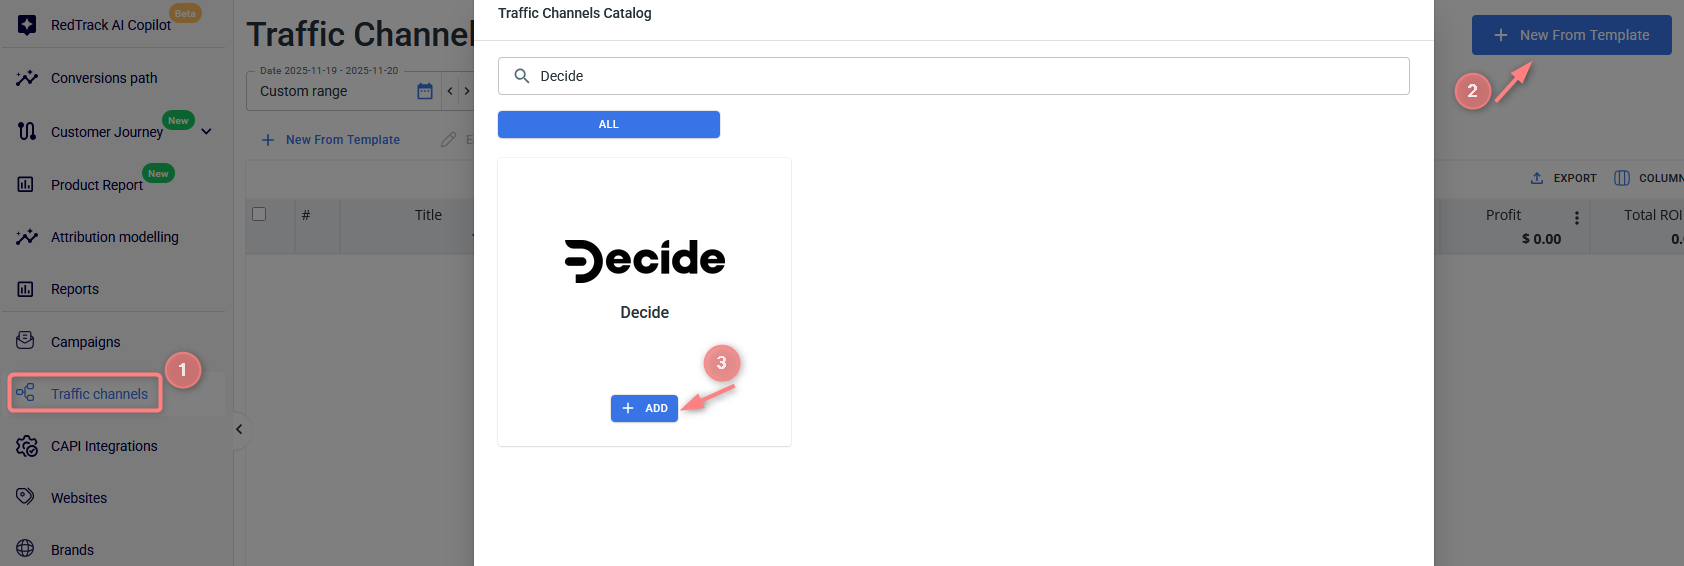
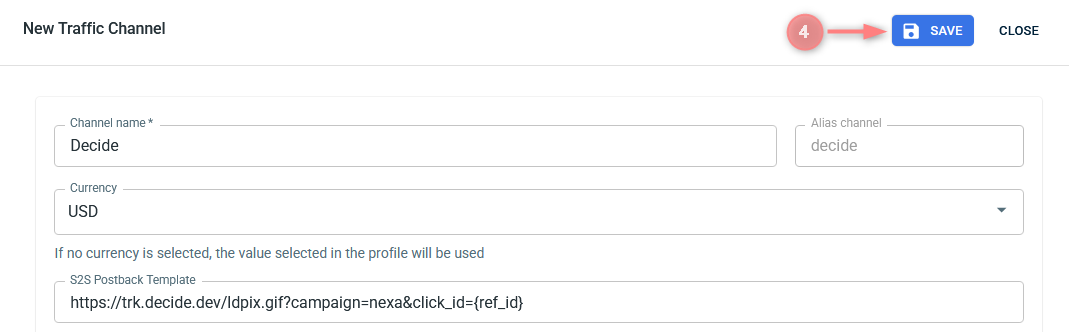
4. Activate the Decide template in RedTrack
In your RedTrack account, go to Traffic channels → New from template → find Decide → Add → Save:
5. Create a campaign
1. Create a campaign in RedTrack with Decide as your traffic channel.
In your RT account, go to Campaigns → Create new campaign → fill in the info in all the sections and tabs:
- General: give it the name, and choose the traffic channel, tracking domain, and cost-tracking method.
- Funnels: choose the type of funnel you are using and add the elements from the drop-downs.
- S2S postback: this field will be filled in automatically based on the data you have added to your traffic channel settings.
In your RT account go to Campaigns → Create new campaign → fill in the info in all the sections and tabs:
- General: give it the name, and choose the traffic channel, tracking domain, and cost-tracking method.
- Funnels: choose the type of funnel you are using and add the elements from the drop-downs.
- S2S postback: this field will be filled in automatically based on the data you have added to your traffic channel settings.
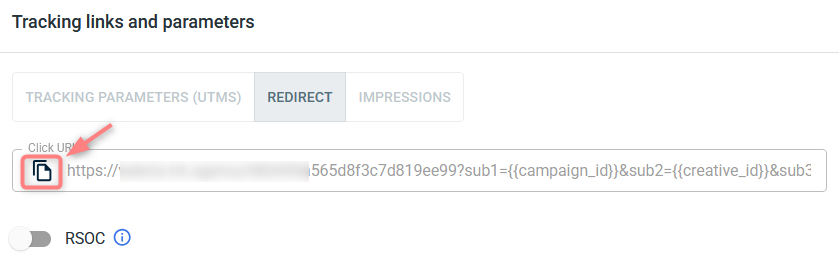
2. Once the campaign is added, your tracking link is automatically created, copy the Click URL:
– Universal script
– No-redirect
– Impressions
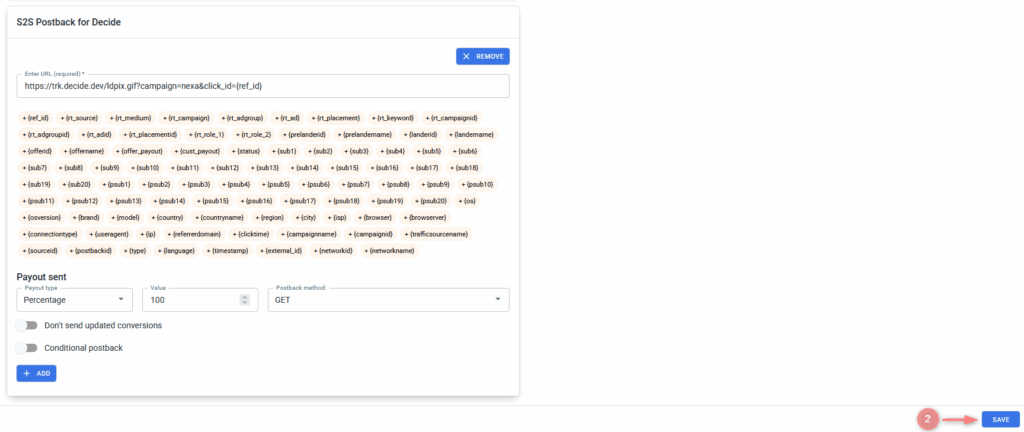
3. Apply the postback for Decide:
In the created campaign, navigate to S2S Postback for Decide section → Add → Save changes to the campaign:

4. Create a campaign in Decide and use the RedTrack redirect URL (copied within Step 2) to promote your offer.