GoHighlevel and RedTrack

Intro
GoHighLevel (aka HighLevel/ High Level/ GHL) positions itself as the go-to solution for agencies. It is an all-in-one tech stack for agencies or marketers, eliminating the need for other tools.
Integration
Setup in RedTrack
1. Add a custom tracking domain
1. Add a CNAME record pointing to your RedTrack default domain in your domain registrar.
2. On the left menu go to Tools → Domains → Create new domain.
3. The default domain is stated right on the top and looks like smth.rdtk.io.
4. Add the integrated domain to your RedTrack account and activate the Free SSL option.
2. Set up conversion tracking
Tools → Conversion tracking → Conversion type → add the events you want to track → Save.
The names will remain the same and be sent to the traffic channel exactly as you added them in RedTrack.
3. Add the offer/website you are promoting
This is the target destination link where you plan to run the traffic: it can be an affiliate offer, a direct link to your website, or the shop.
1. Act depending on your account type:
1. Add the offer source: New from template/New from scratch → find the affiliate network you work with/add your custom name → Save.
2. Add the offer link: Offers → New → choose the offer source from the list, add the offer URL → save the changes.
For example: &affsub={clickid} where {clickid} is RedTrack parameter
More info on offer source and offer in RT can be found here.
1. Go to Brands → New → Add your brand (it is the name of your shop or your website).
2. On the same page, add the purchase data parameters – Name/Description is what you will see in reports – Roles define their use with CAPI.
3. Go to Websites → New → Add your website URL (this is your e-commerce shop/website link).
4. Follow the suggested steps to generate the scripts. You will need it later for your e-commerce platform.
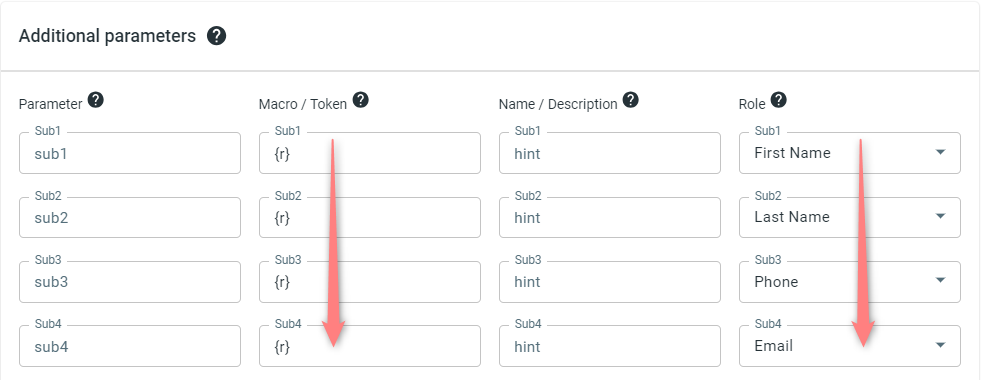
2. When adding the brand/offer source go to Additional parameters section → add {r} to Macro/Token fields and assign the following roles:
- First Name
- Last Name
- Phone
4. Create a paid traffic campaign
– Affiliates should add the campaign for the unattributed (organic) traffic per this guide.
To create a campaign for the paid traffic follow these simple steps:
- Add the Traffic channel (API integrated traffic channels/Non-API integrated traffic channels). Most of them have a preset template in RedTrack.
- Launch a campaign for the paid traffic channel. Your website/shop will be the main link added to the traffic channel. Be guided by this article for Advertisers / this one for Affiliates.
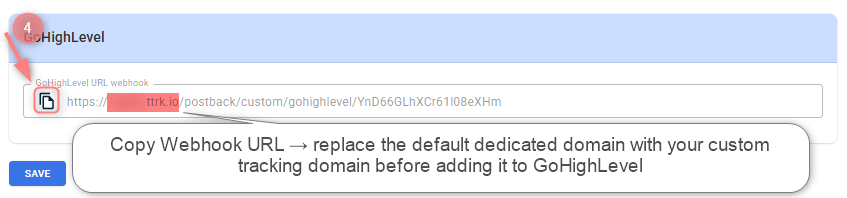
5. Copy the GoHighLevel URL webhook
1. RedTrack → Tools → Integrations → Offer sources:
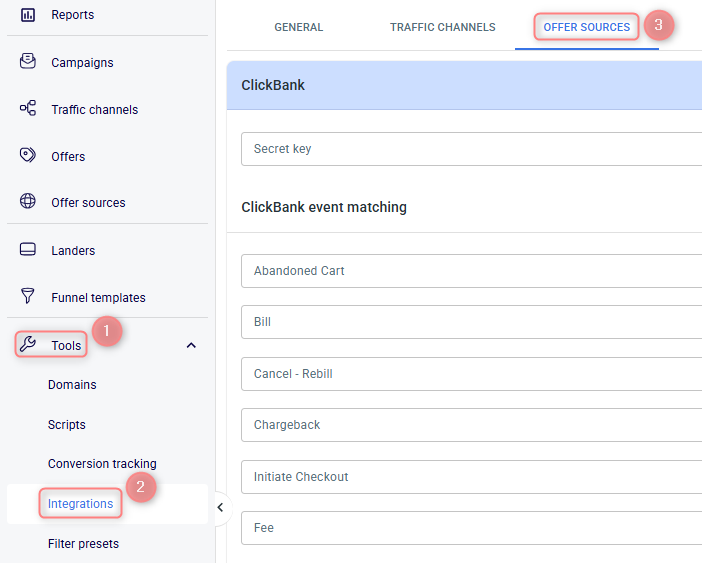
2. Scroll down the page → copy the GoHighLevel URL webhook and replace the default dedicated domain with your custom tracking domain:
Setup in GoHighLevel
1. Add RedTrack Webhook URL to GoHighLevel
For those who don’t have a Workflows tab, there is a workaround to set it up via the Triggers tab. Act as follows depending on your case:
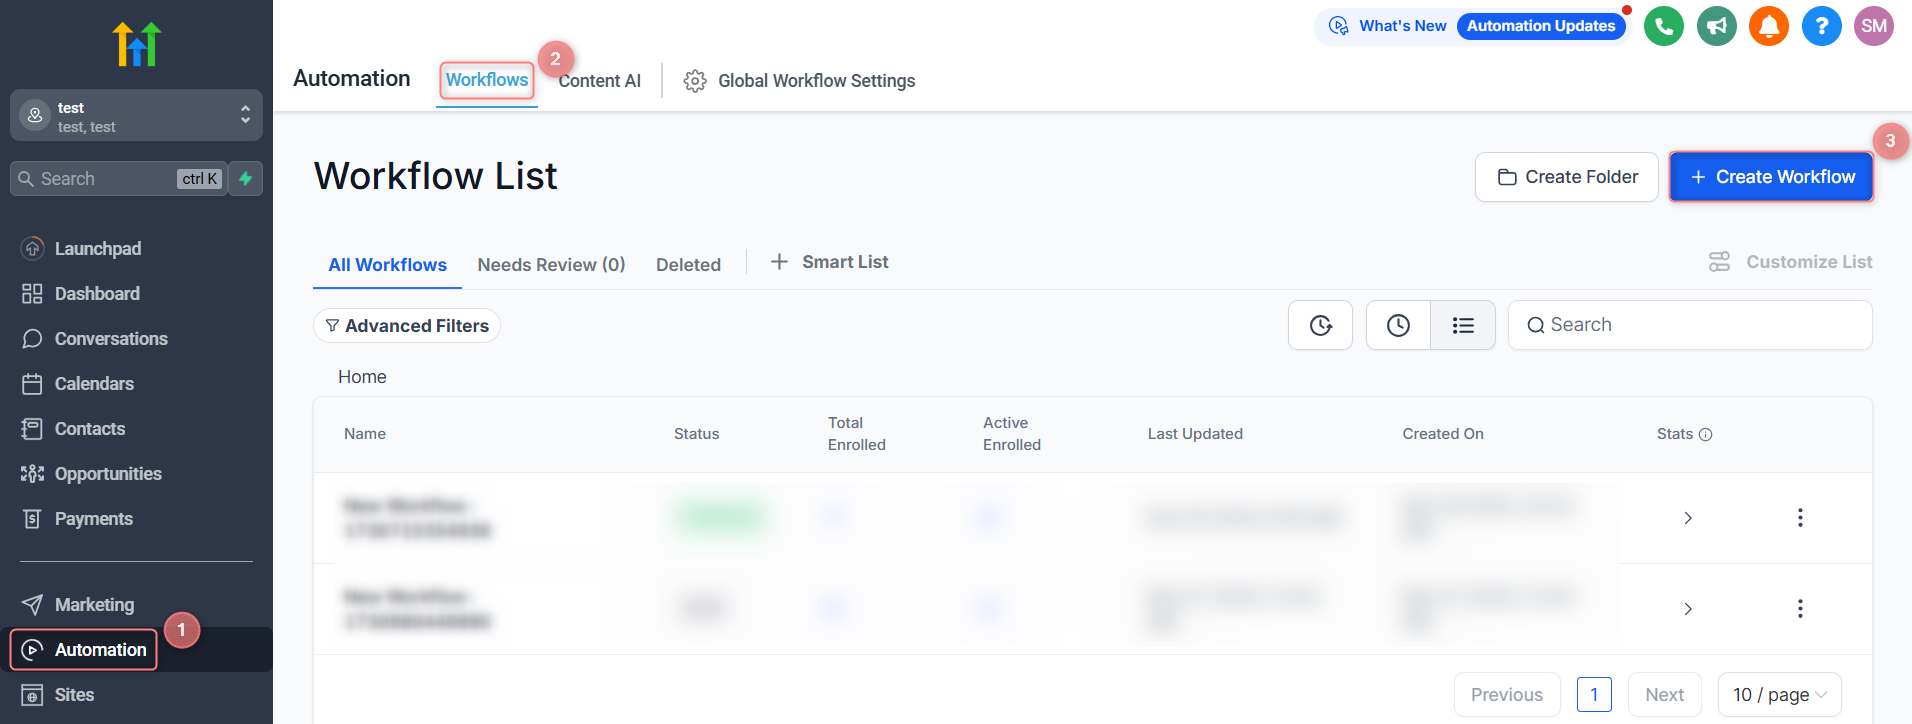
1 Your GoHighLevel account → Automation → Workflows → Create Workflow:
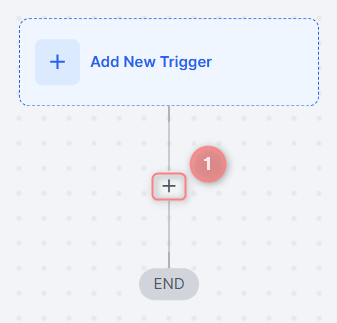
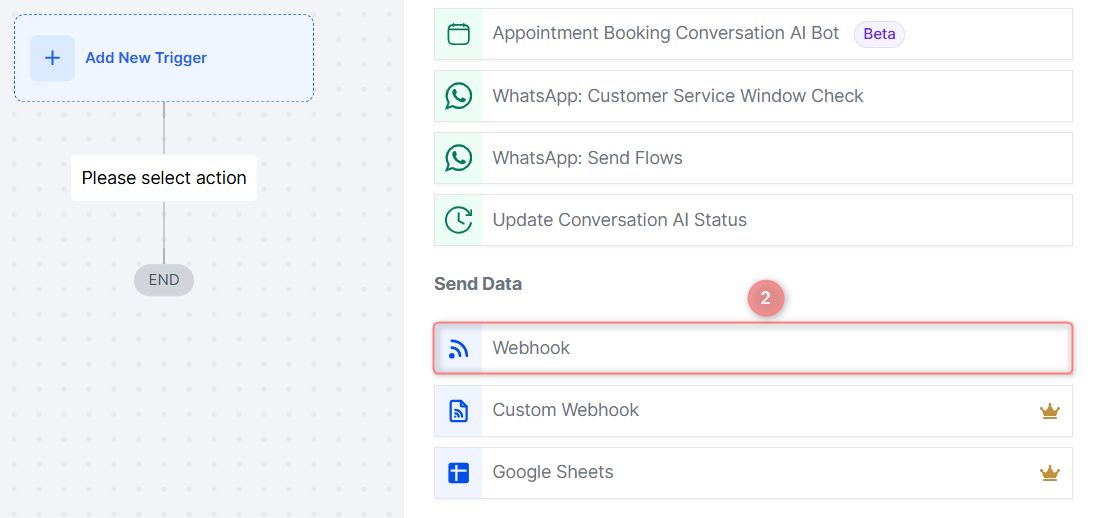
2. Press “+‘ within the corresponding Trigger → select the action Webhook:
3. Fill in the mandatory fields → enable the Publish toggle → Save Action:
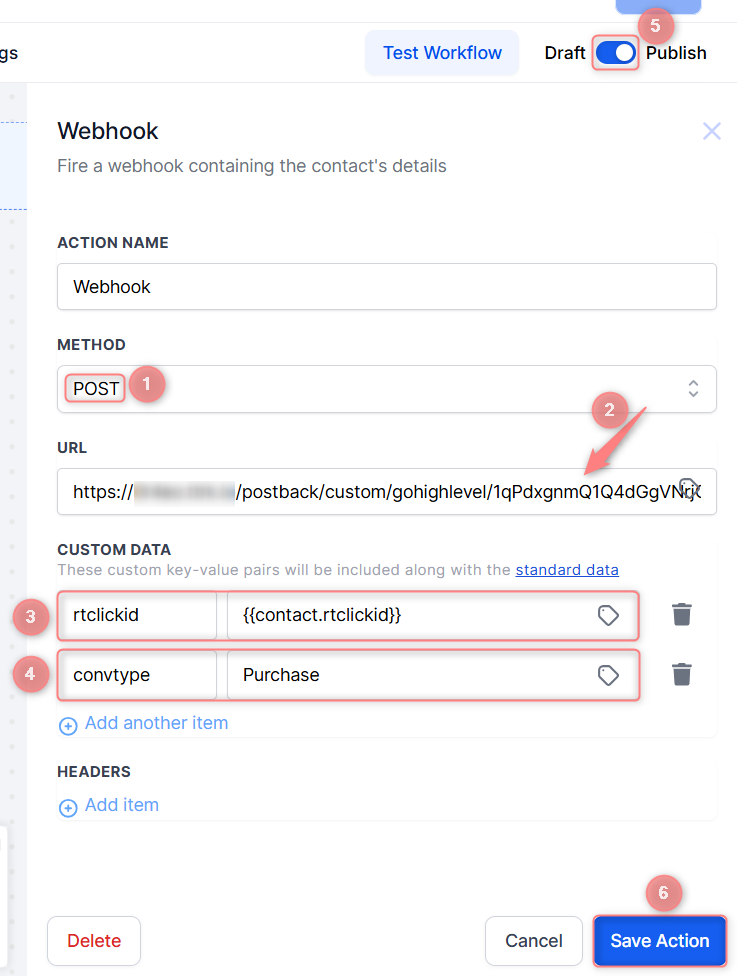
Values in the screenshot explained:
- (1) Method: POST
- (2) URL: paste the GoHighLevel URL webhook from your RedTrack account
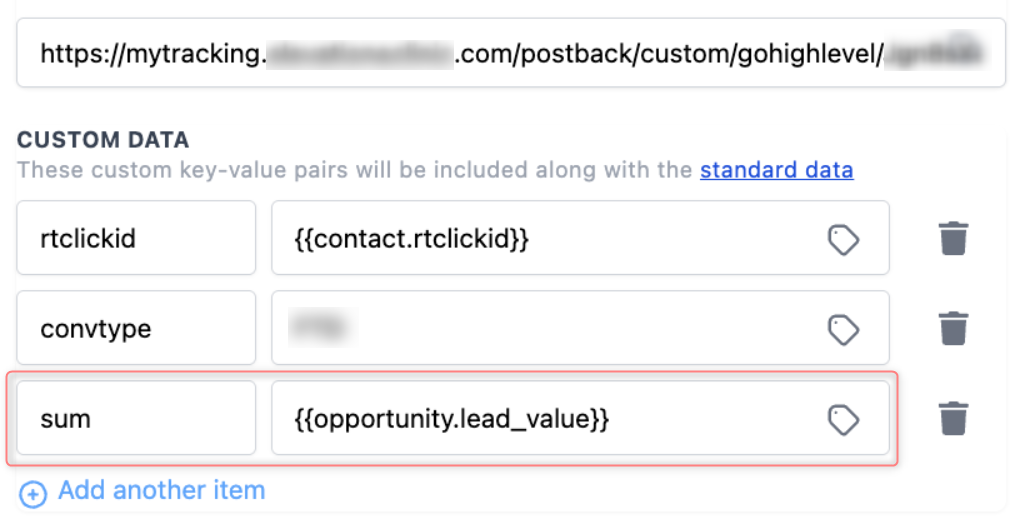
- (3), (4) In the Custom data section add the following items:
– Key: rtclickid, Value: {{contact.rtclickid}}
– Key: convtype, Value: conversion event you added in RedTrack, in our example it’s Purchase.
- (5) Enable the Publish toggle, otherwise, the webhook action will not be triggered.
- (6) Press Save Action to apply the changes.
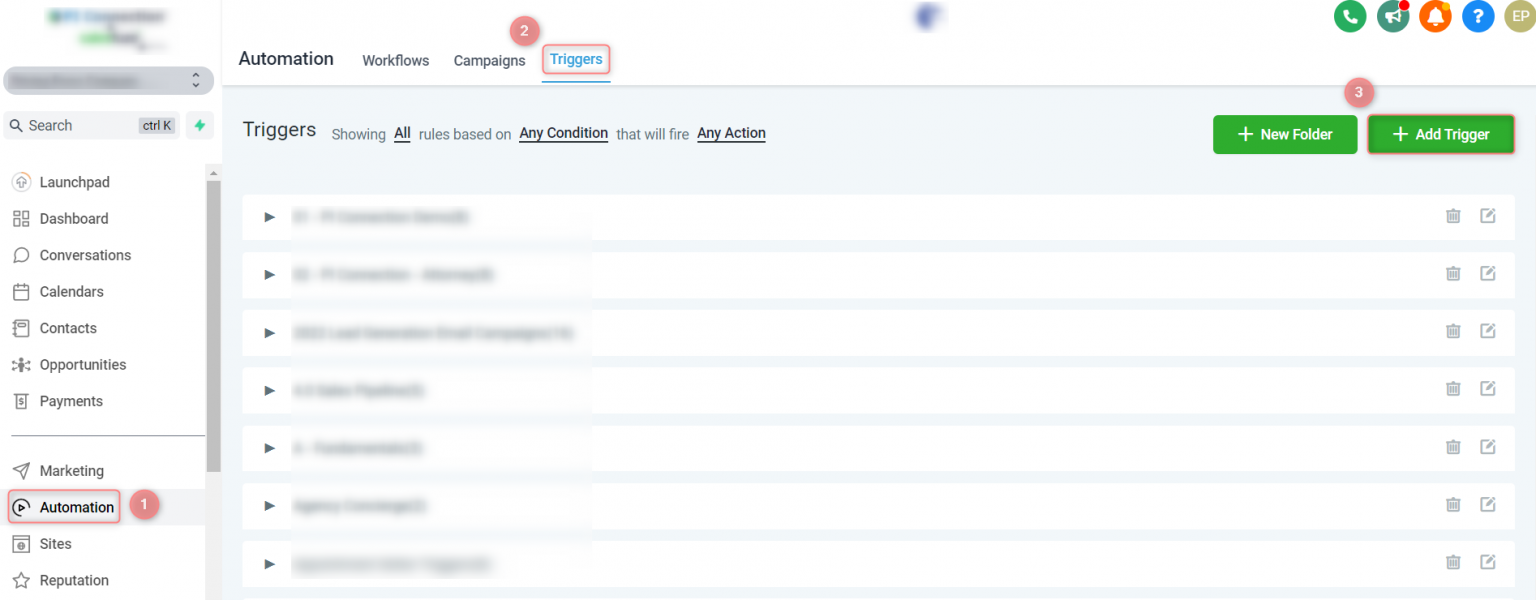
1. Go to your HighLevel account → Automation → Triggers → Add Trigger:
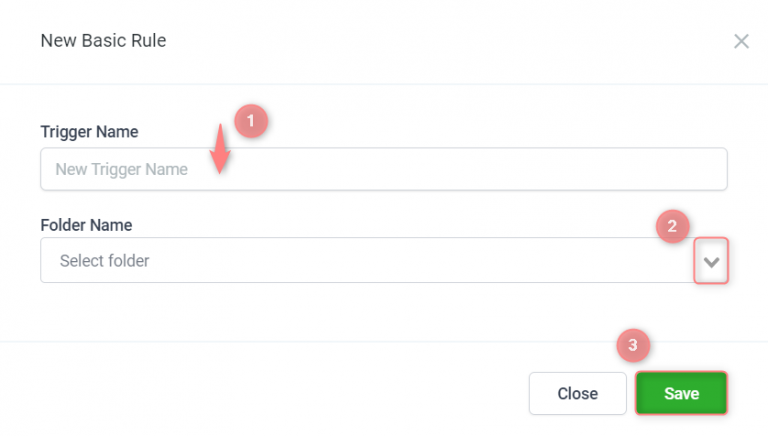
2. In the pop-up window give your Trigger a name → select the folder you want to put it in → Save:
3. Paste the generated RT webhook URL to the form → select Active:
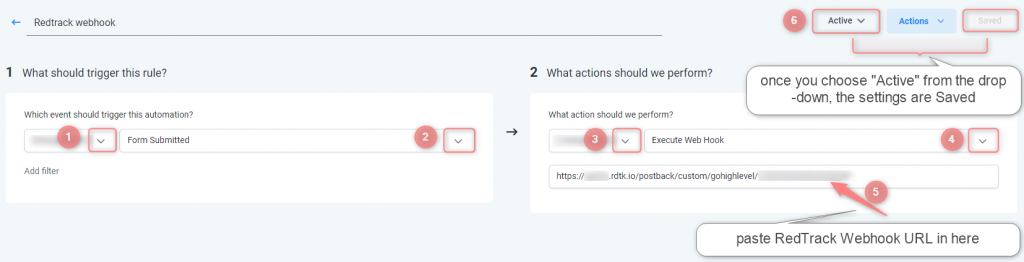
2. Set up your funnel and adjust the Form within it
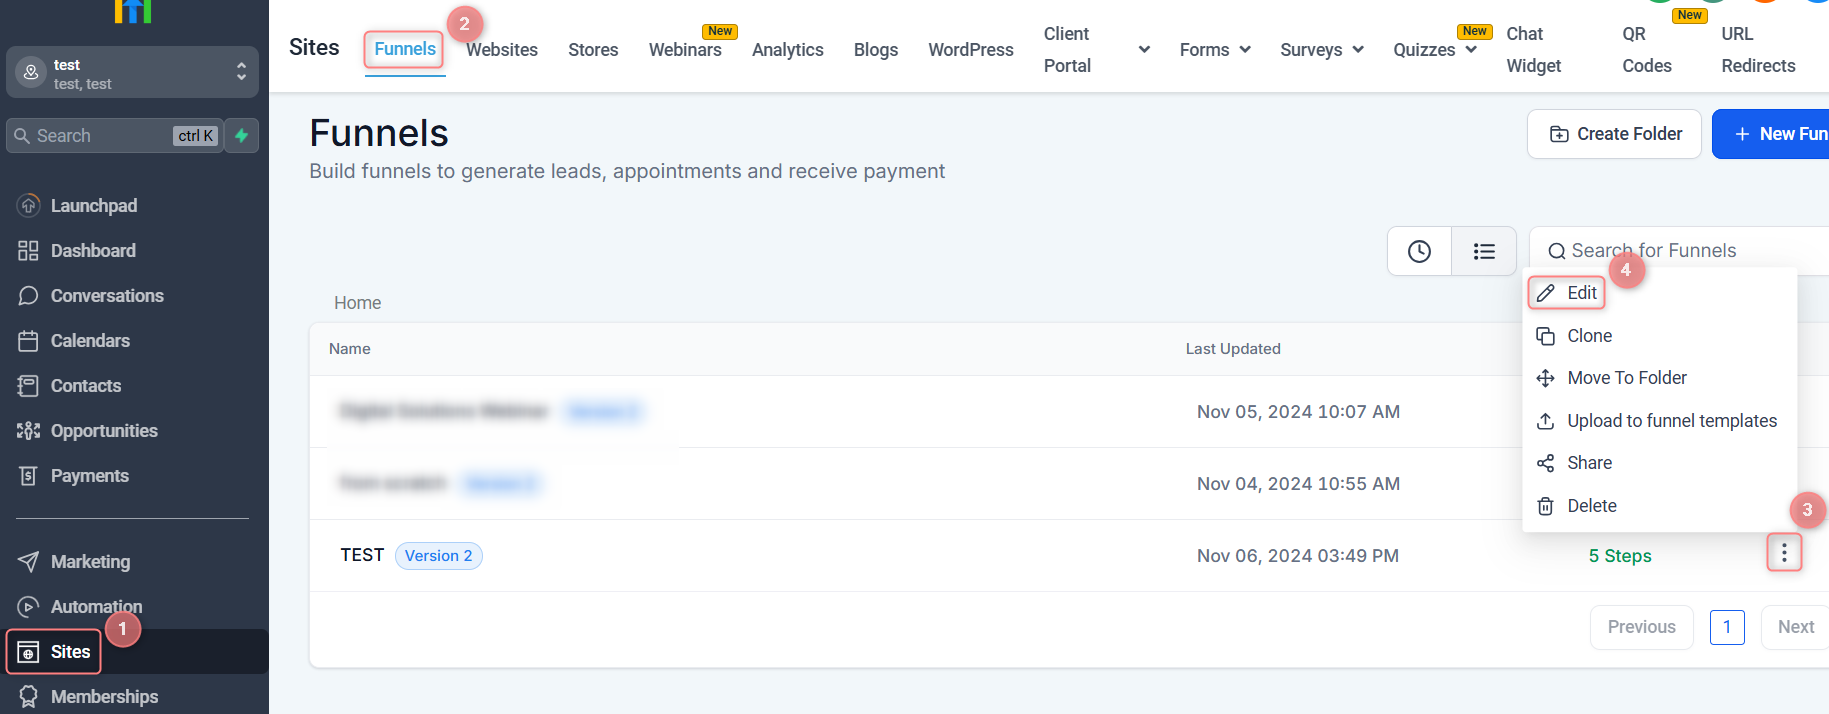
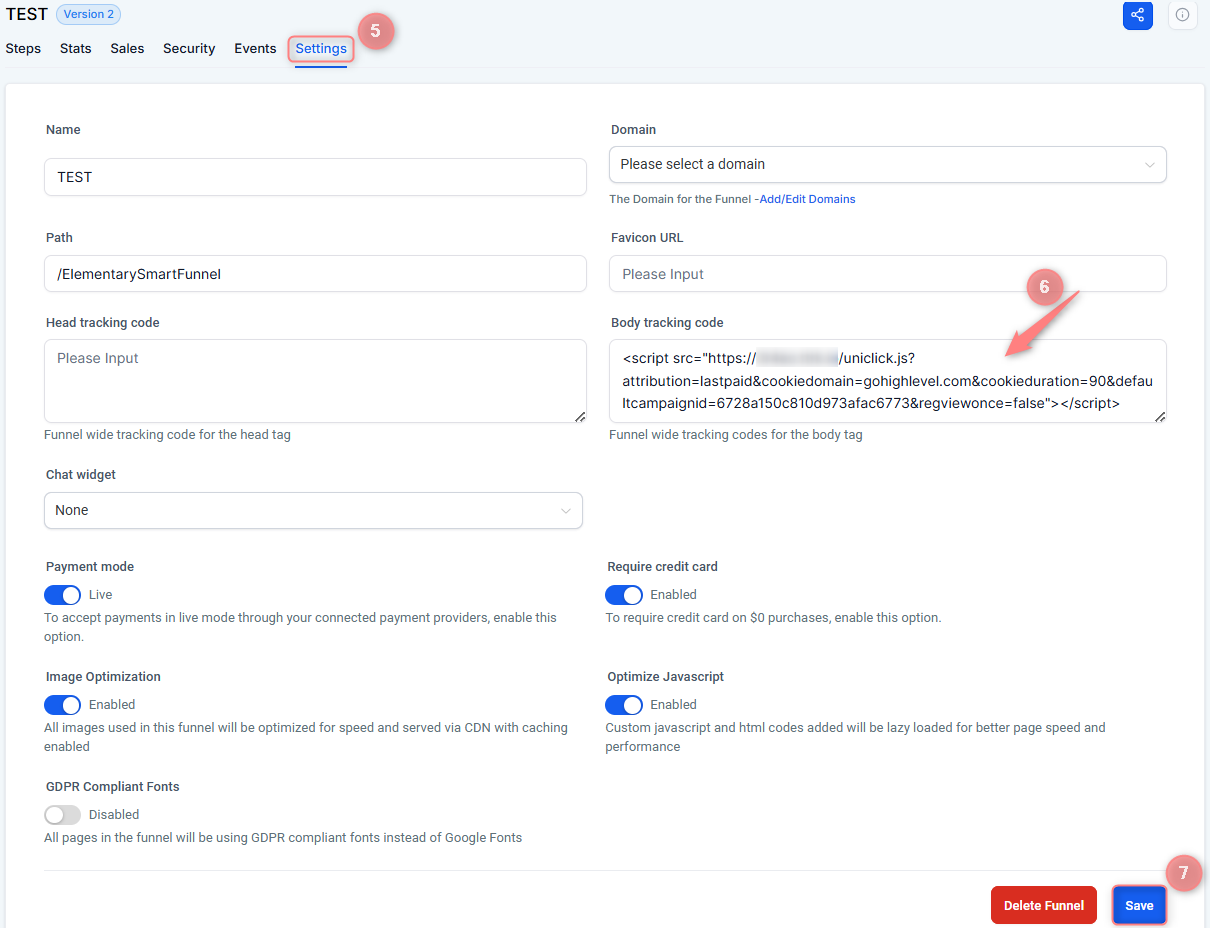
1. Set up your funnel.
Sites → choose the needed funnel → edit → Settings → Body tracking code field → paste RT universal tracking script → Save:
2. Adjust the Form within the funnel.
- Within the already adjusted funnel go to Forms → choose the needed one → edit:

- Within the form add the following:
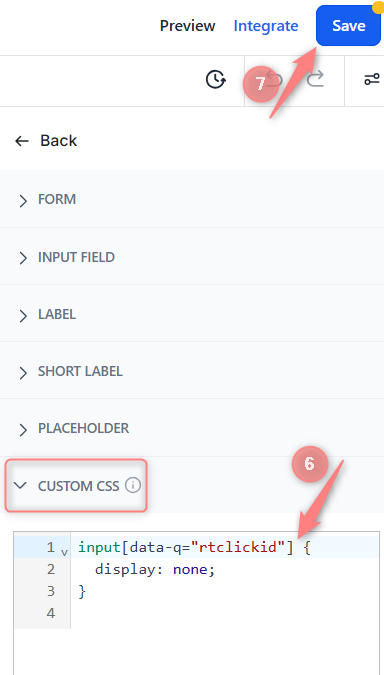
1. Styles and Options → Advanced Settings:
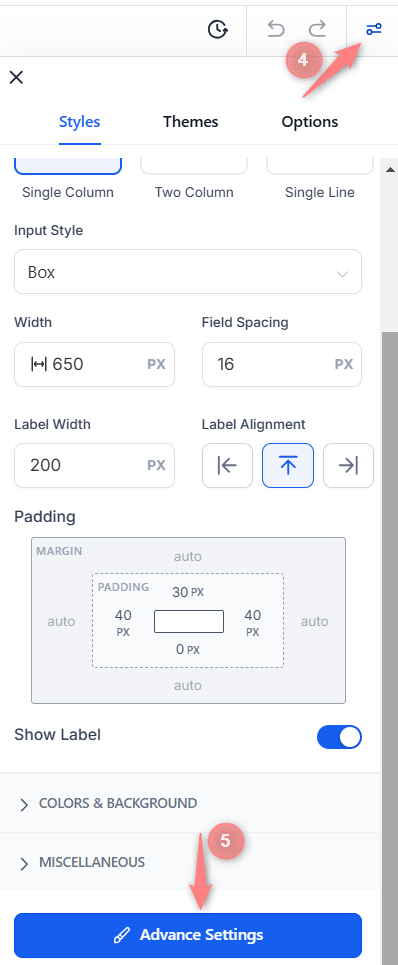
2. Custom CSS → add the piece of code below → Save:
input[data-q="rtclickid"] {
  display: none;
}
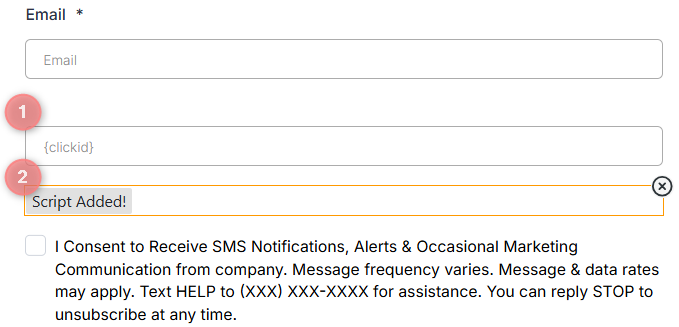
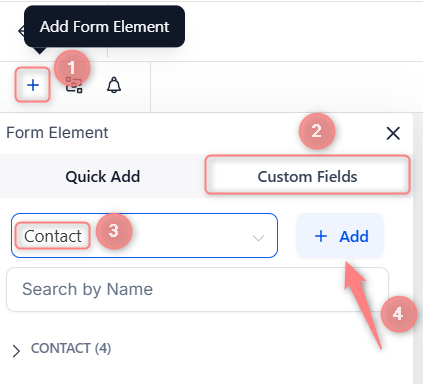
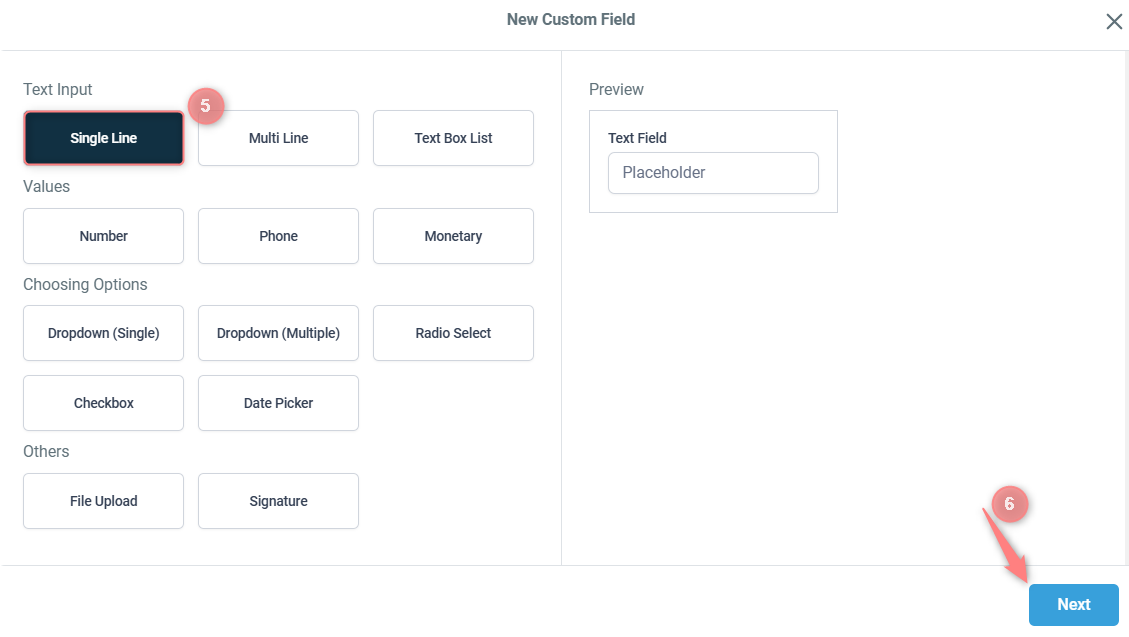
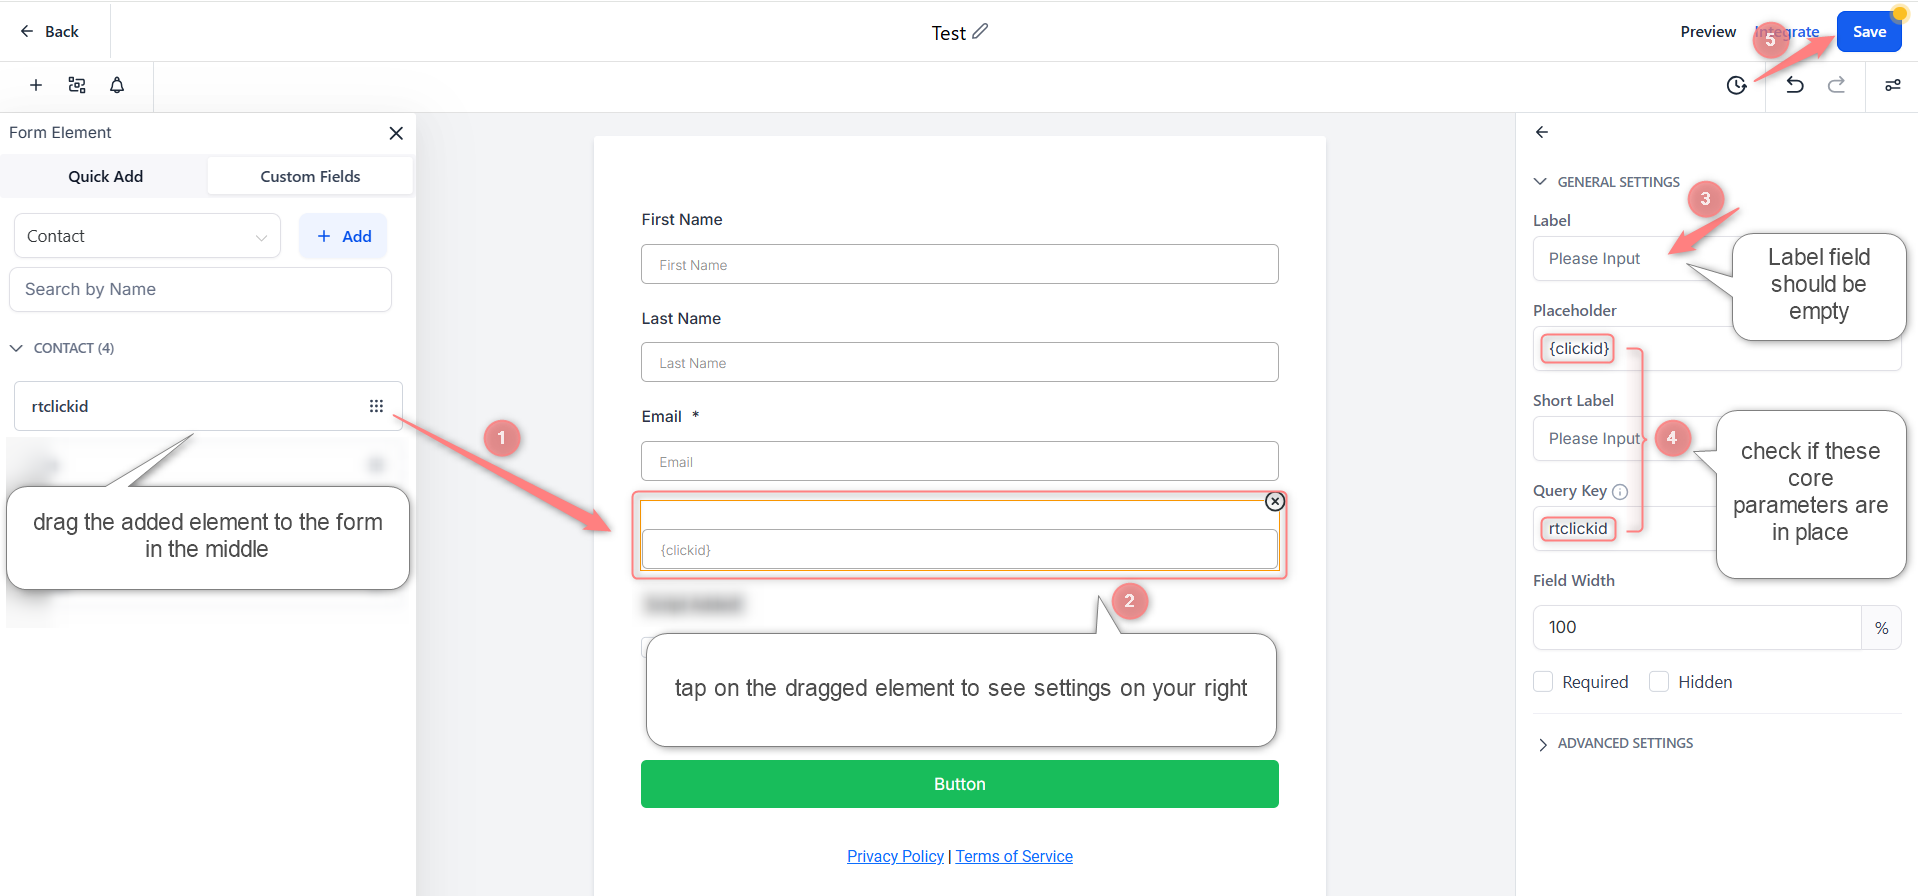
1. Add Form Element → Custom Fields → select Contact from the drop-down → Add:
Single Line → Save:
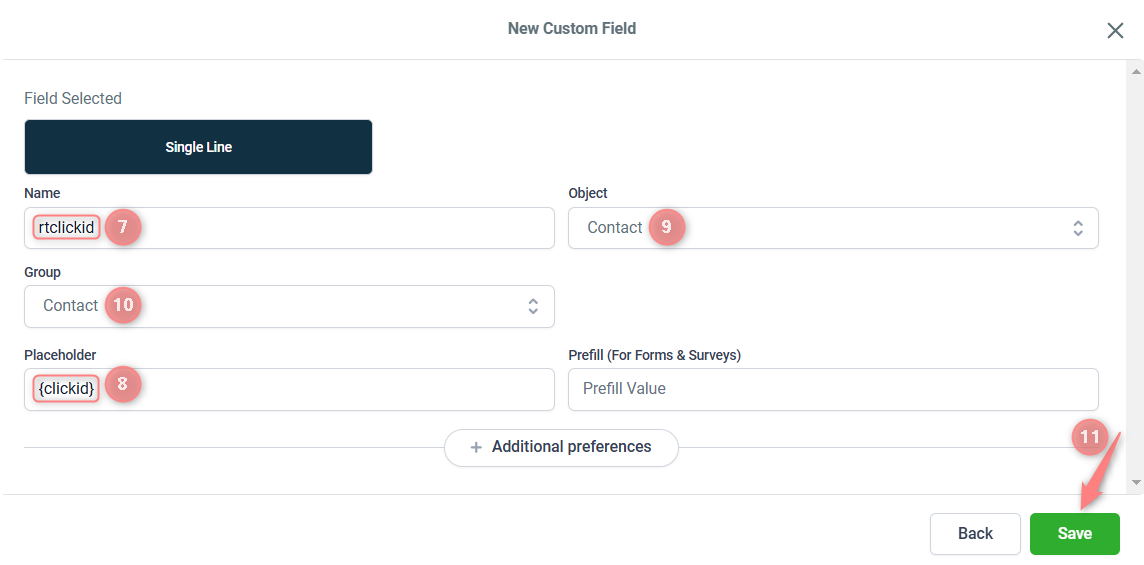
Fill in the mandatory fields in the popped-up form:
- Name: rtclickid
- Placeholder: {clickid}
- Object and Group: Contact
2. Drag the created contact element to the Form → navigate to this element in the form with your mouse → in the settings on your right do the following:
- erase the Label name
- make sure Placeholder = {clickid} value and Query Key = rtclickid
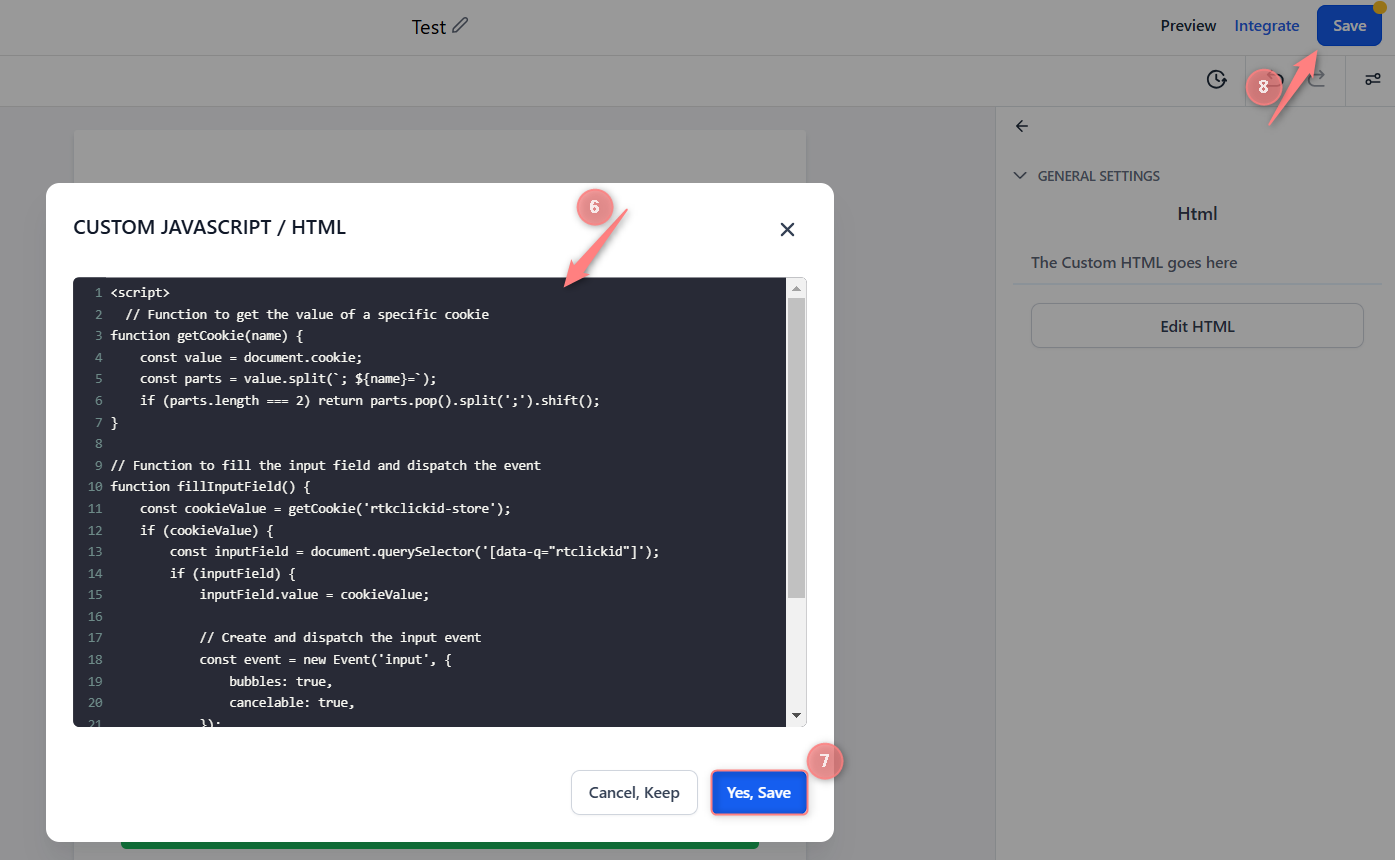
1. Add Form Element → Quick Add → drag the Html element to the main Form → navigate to this element in the form with your mouse → Edit HTML:
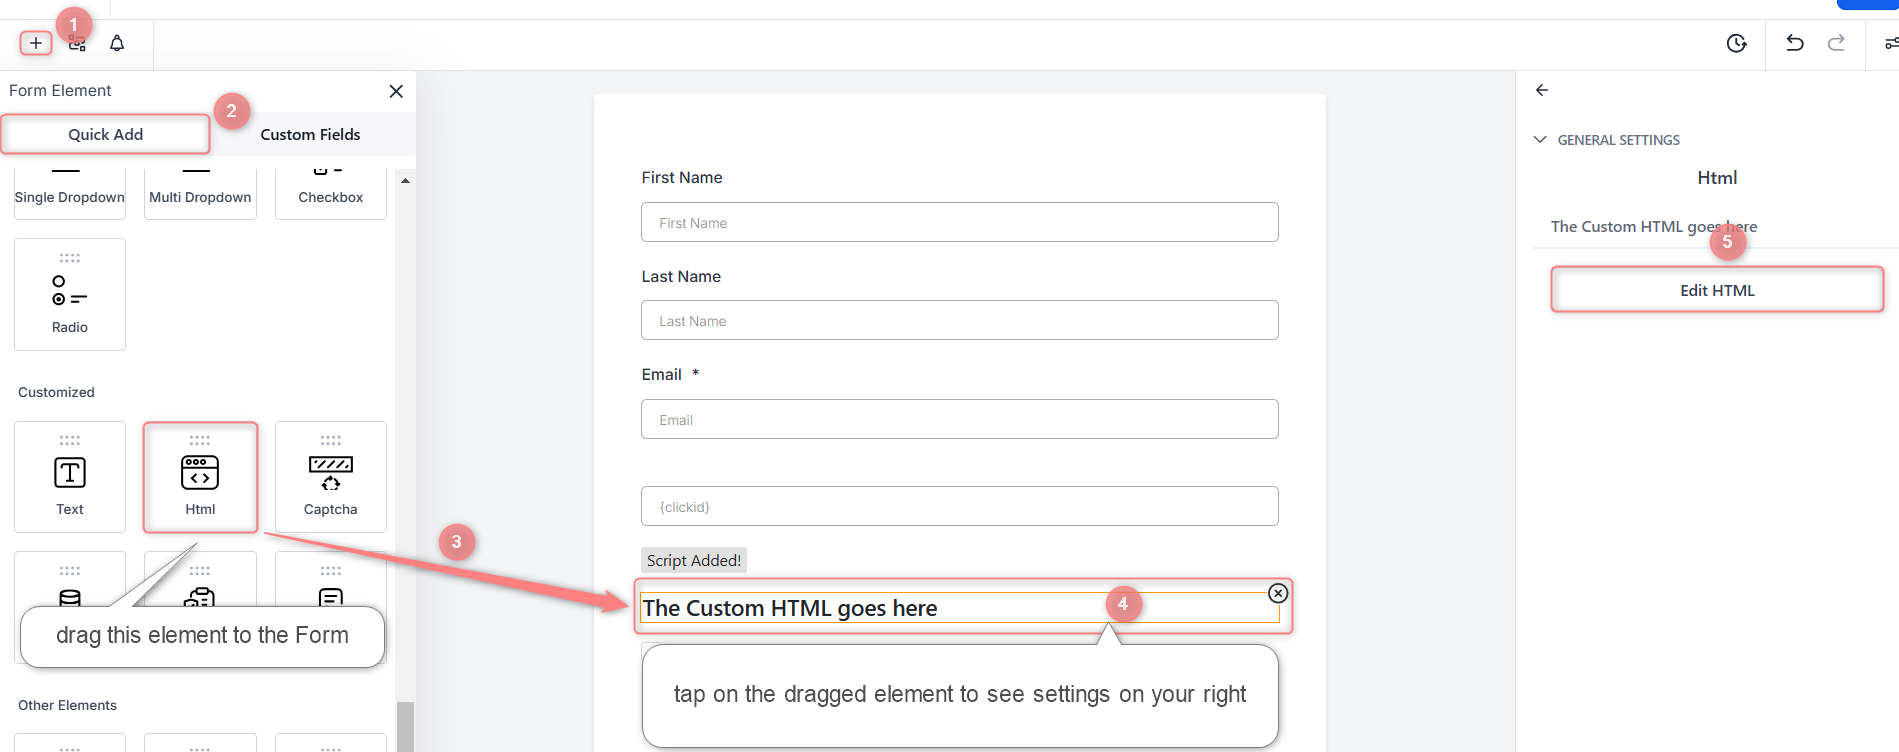
2. Add the code below → Yes, Save it → Save the changes to the Form overall:
<script>
  // Function to get the value of a specific cookie
function getCookie(name) {
    const value = document.cookie;
    const parts = value.split(`; ${name}=`);
    if (parts.length === 2) return parts.pop().split(';').shift();
}

// Function to fill the input field and dispatch the event
function fillInputField() {
    const cookieValue = getCookie('rtkclickid-store');
    if (cookieValue) {
        const inputField = document.querySelector('[data-q="rtclickid"]');
        if (inputField) {
            inputField.value = cookieValue;

            // Create and dispatch the input event
            const event = new Event('input', {
                bubbles: true,
                cancelable: true,
            });
            inputField.dispatchEvent(event);
        }
    }
}

fillInputField()
</script>