HubSpot and RedTrack
HubSpot is one of the most widely used CRM and marketing automation platforms, designed to help sales, marketing, and customer service teams grow better. With its all-in-one ecosystem, businesses can attract, engage, and delight customers more effectively.
Integration checklist
For RedTrack
1. Add a custom tracking domain
1. Add a CNAME record pointing to your RedTrack default domain in your domain registrar.
2. On the left menu, go to Tools → Domains → Create new domain.
3. Add the integrated domain to your RedTrack account and activate the Free SSL option.
2. Set up conversion tracking
Tools → Conversion tracking → Conversion type → add the events you want to track → Save.
The names will remain unchanged and will be sent to the traffic channel exactly as you added them in RedTrack.
3. Add the offer/website you are promoting
This is the destination link where you plan to drive traffic: it can be an affiliate offer, a direct link to your website, or your shop.
1. Act depending on your account type:
1. Add the offer source: New from template/New from scratch → find the affiliate network you work with/add your custom name → Save.
2. Add the offer link: Offers → New → choose the offer source from the list, add the offer URL → save the changes.
For example: &affsub={clickid} where {clickid} is RedTrack parameter
More info on the offer source and offer in RT can be found here.
1. Go to Brands → New → Add your brand (it is the name of your shop or your website).
2. On the same page, add the purchase data parameters – Name/Description is what you will see in reports – Roles define their use with CAPI.
3. Go to Websites → New → Add your website URL (this is your e-commerce shop/website link).
4. Follow the suggested steps to generate the scripts. You will need it later for your e-commerce platform.
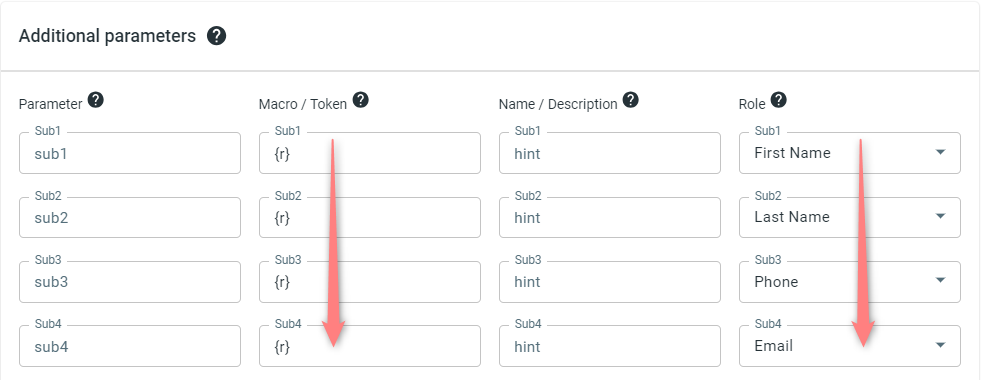
2. When adding the brand/offer source, go to the Additional parameters section → add {r} to the Macro/Token fields and assign the following roles to the parameters:
- First Name
- Last Name
- Phone
4. Create a paid traffic campaign
– Affiliates should add the campaign for the unattributed (organic) traffic per this guide.
To create a campaign for paid traffic, follow these simple steps:
- Add the Traffic channel (API integrated traffic channels/Non-API-integrated traffic channels). Most of them have a preset template in RedTrack.
- Launch a campaign for the paid traffic channel. Your website/shop will be the main link added to the traffic channel. Be guided by this article for Advertisers / this one for Affiliates.
For HubSpot
1. Create a hidden field
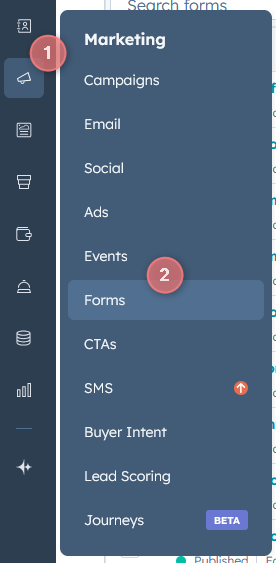
1. Access the Form Editor: Marketing → Forms → Edit the desired form.
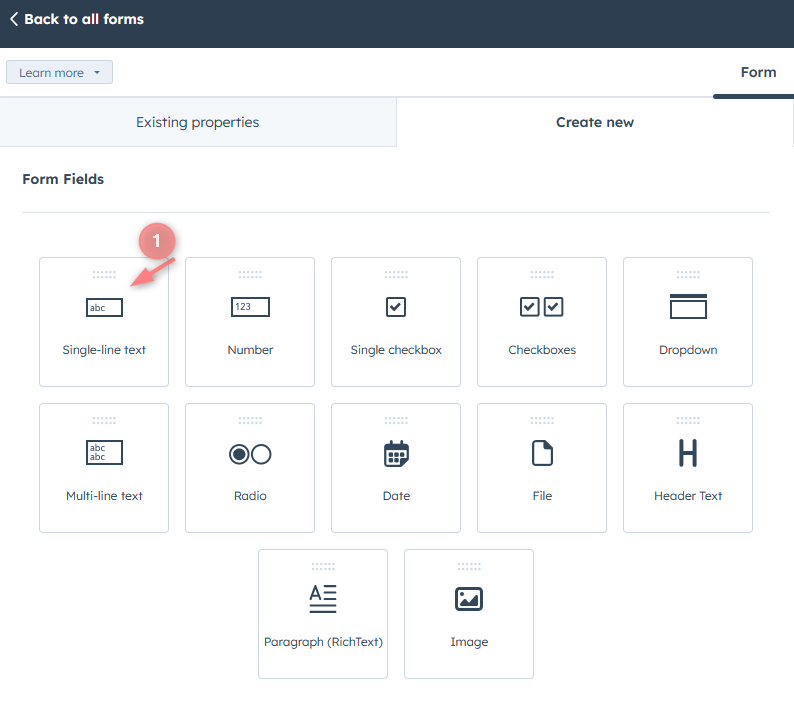
2. In the form editor, go to Create New → Single-line text → Set the property label as rtclickid
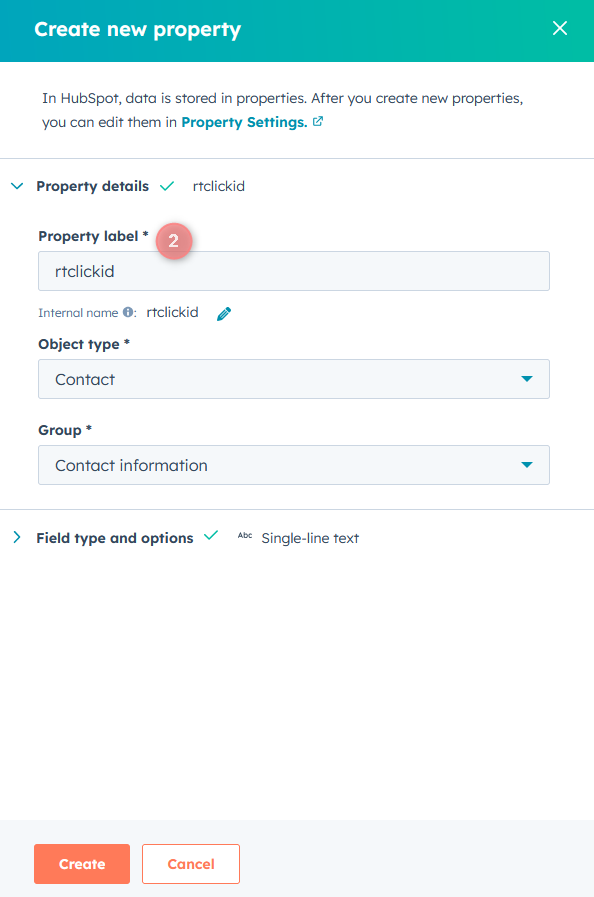
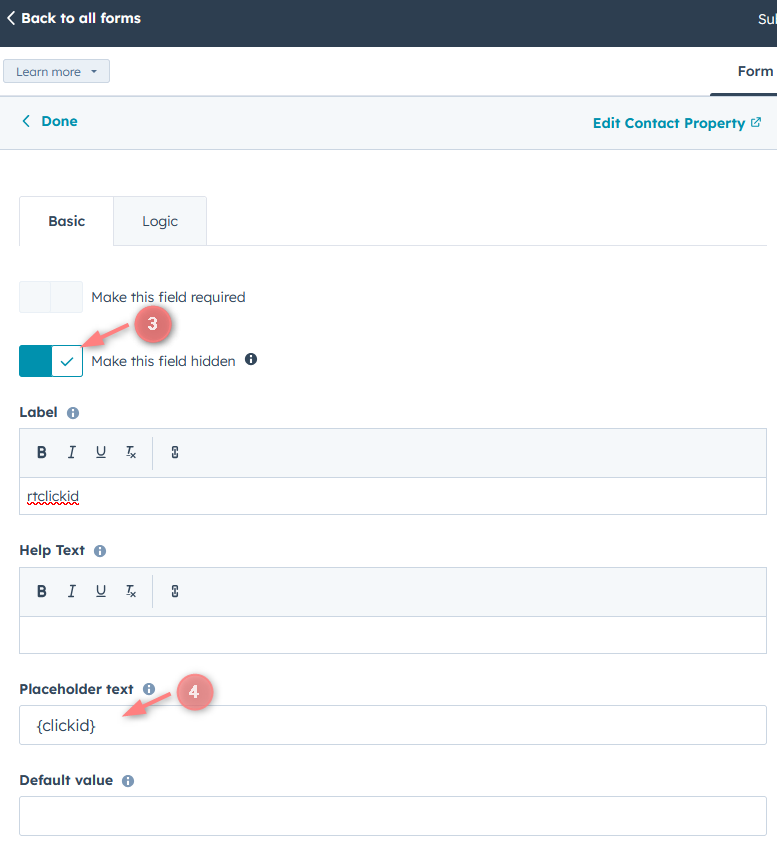
3. Turn on the toggle for “Make this field hidden” → Set the placeholder value as {clickid} → Publish changes.
2. GTM setup
* For Affiliates: use this guide to help you with the universal tracking script.
* For Advertisers: a universal tracking script was created automatically once you had added your Website.
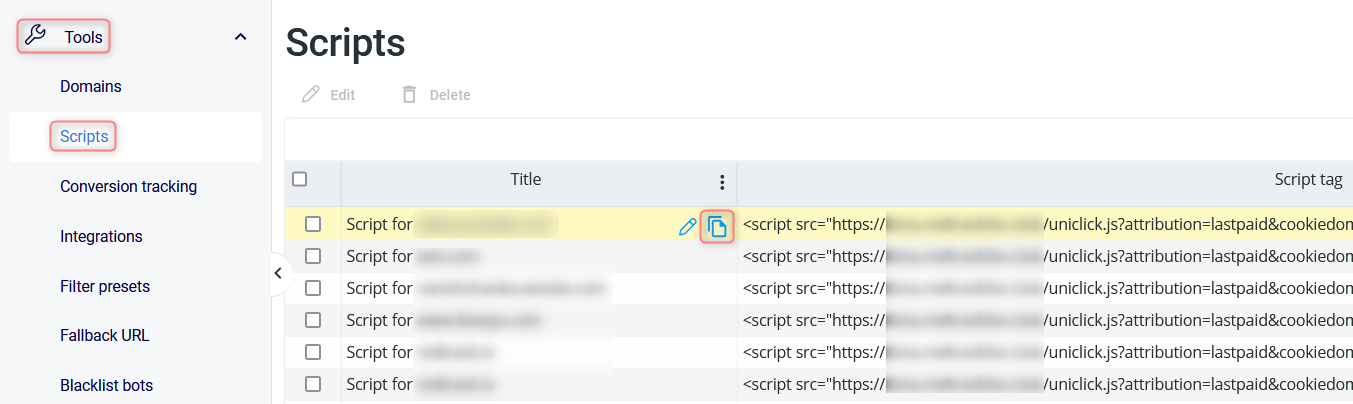
Both Affiliates and Advertisers can find the generated universal tracking script in Tools → Scripts:
1. Adjust the settings in GTM
1.1 Follow this guide on how to integrate Google Tag Manager (GTM) with RedTrack.
1.2 In GTM settings, create 2 types of Tags:
Essential elements:
- Tag = Custom HTML
- Triggering = All Pages (Page view)
Script:
Use the universal tracking script for this.
Essential elements:
- Type= Custom HTML
- Triggering= All Elements (All Clicks)
Script:
<script>
function setFormClickIdValue(clickid) {
    console.log(clickid)
      document.querySelectorAll('input').forEach(function(el) {
        console.log(el.value)
          if (el.value.indexOf("{clickid}")>-1) {
              el.value = el.value.replace(/{clickid}/, clickid)
          }
      });
  }
  function getCookie(name) {
      var value = "; " + document.cookie;
      var parts = value.split("; " + name + "=");
      if (parts.length == 2) return parts.pop().split(";").shift();
  }
      if (getCookie('rtkclickid-store') !== null && getCookie('rtkclickid-store') !== undefined && getCookie('rtkclickid-store') !== 'undefined') {
          setTimeout(function(){
            setFormClickIdValue(getCookie('rtkclickid-store'))
          }, 3000)
      }
</script>
2. Connect GTM to HubSpot
2.1 Copy your Google Tag Manager Container ID.
2.2 Go to your HubSpot account → navigate to Settings (top right corner) → open the section Website > Pages → choose the domain you want to edit.
2.3 Scroll to the Integrations or Site Header & Footer Code section → paste your Google Tag Manager code snippets (Head and Body) into the corresponding fields → Save and Publish.
3. Set the postback
1. Go to your HubSpot account → navigate to Settings → open the section Objects → Activities → Workflow (or directly Automation → Workflows depending on your HubSpot plan).
2. Create or edit the workflow that triggers after a form submission/conversion event.
3. Inside the workflow, click the “+” button to add a new action → select Send a Webhook.
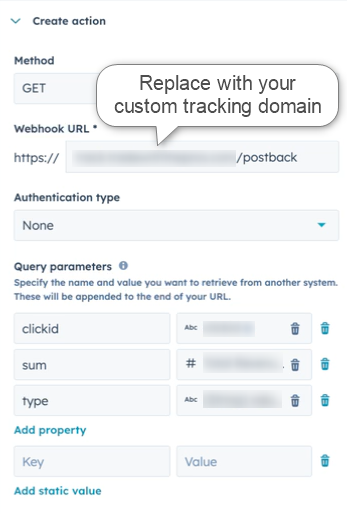
4. Paste the RedTrack Postback URL into the action setup window and map the parameters → click Save to apply the webhook action:
- Use the GET method.
- Add the dynamic HubSpot tokens as query parameters:
- clickid → rtclickid
- sum → map to the deal amount (if you want to track revenue in RedTrack)
- type → fill with the name of the event that you’re sending back to RedTrack