

Exoclick and RedTrack

Exoclick is a self-service platform, super user-friendly, and it has an intuitive interface and detailed reports. Founded in 2006, it now reaches around 5 billion daily impressions.
RedTrack has an API integration with Exoclick, which gives you the following benefits:
- Synchronize costs.
- Pause: campaign, placement, creative.
- Create automated rules.
Integration
Important before you start
Before you proceed with the integration, make sure to have the already added:
- Custom tracking domain
- Offer source and Offer (if you’re an Affiliate)/ Store and Store tracking URL (if you’re an Advertiser)
- Conversion types you’re planning to work with
Integration steps
1. Create a goal ID in Exoclick.
1.1 Conversion tracking → New goal:
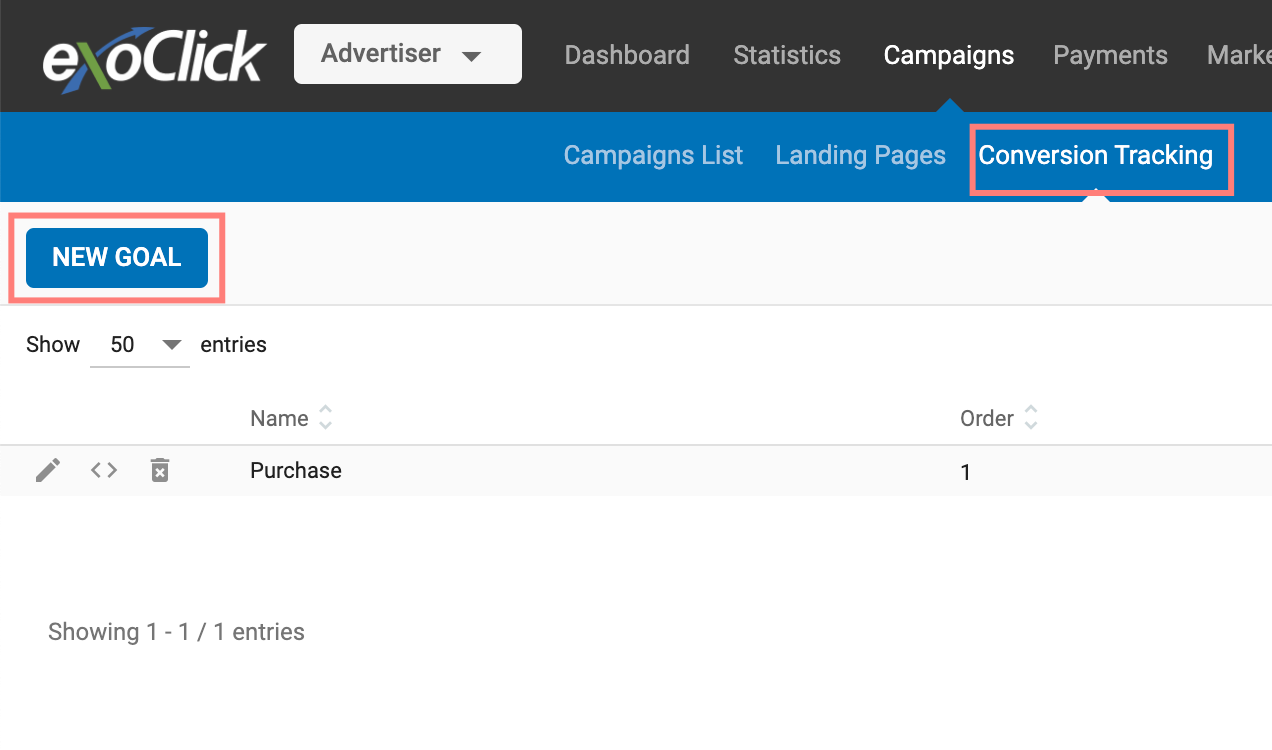
1.2 Set the name and click the Create a goal button → copy the Goal ID:

2. Add Exoclick template to RedTrack.
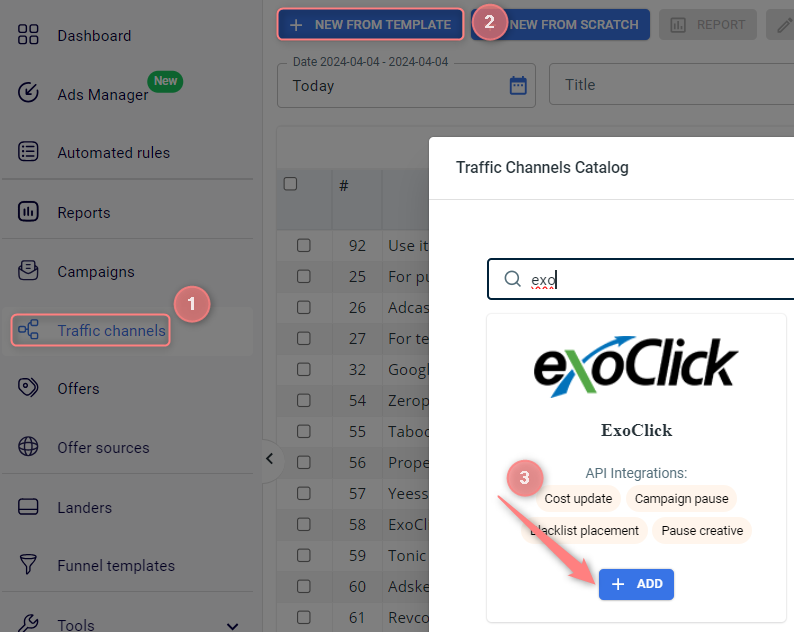
2.1 Go to your RedTrack account → Traffic channels → New from template → find Exoclick → Add:
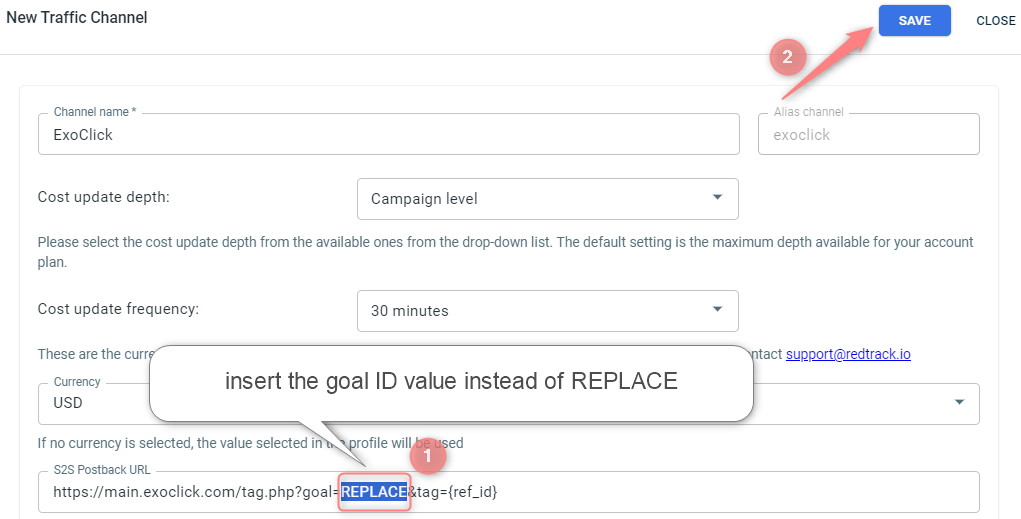
2.2 Change the “REPLACE” part in the Postback URL with the goal ID from your Exoclick account copied within step 1.2:
3. Integrate Exoclick with your RedTrack account.
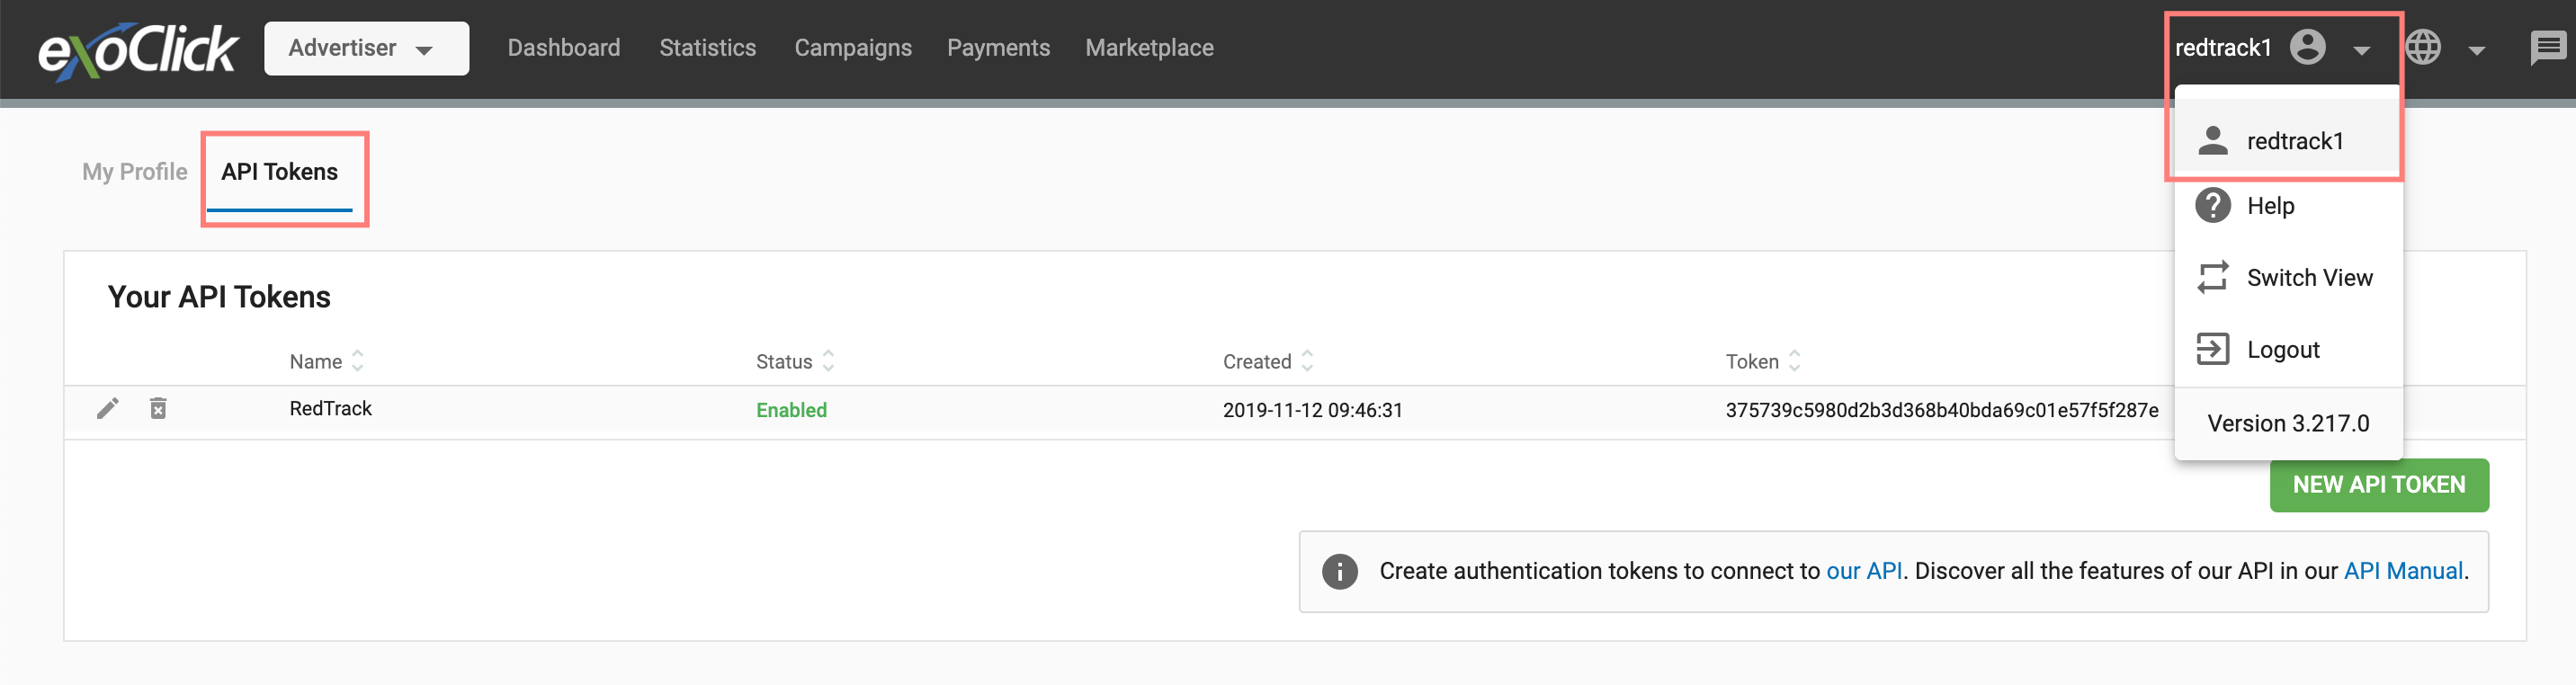
3.1 Go to your Exoclick account → API Tokens → copy the token:
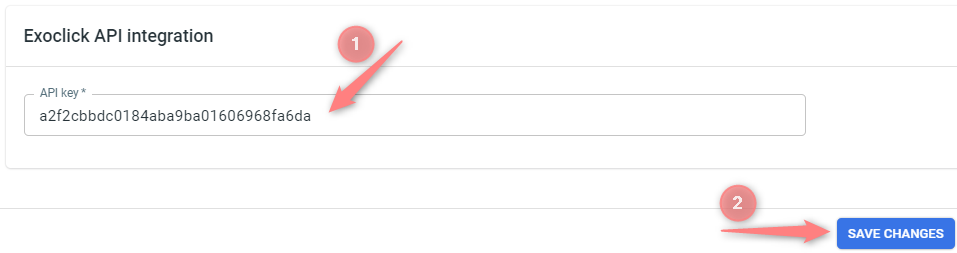
3.2 Get back to RedTrack → go to the template added within step 2.1 → Exoclick API integration → paste the copied token to the API key field → Save changes:

4. Set up a Campaign/Ad Tracking in RedTrack with Exoclick as a traffic channel.
To create a campaign/ad tracking in RT act depending on your account type:
4.1. Campaigns → Create new campaign → fill in the info in all the sections and tabs:
- General: Give it the name, and choose the traffic channel, tracking domain, and cost-tracking method.
- Funnels: Choose the type of funnel you are using and add the elements from the drop-downs.
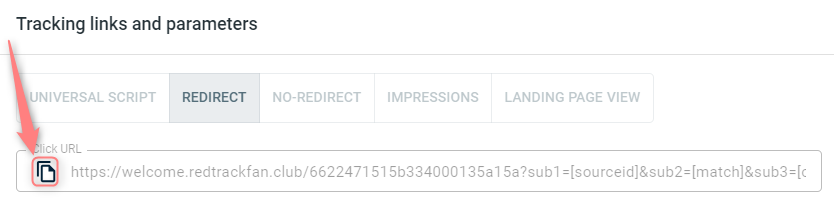
4.2. Once the Campaign is saved go to Tracking links and parameters → copy the automatically generated click URL (your tracking link):
4.1. Ad Tracking → New Ad Tracking → Fill in the info in all the sections and tabs:
- General: Give it the name, and choose the traffic channel, and cost-tracking method.
- Funnels: Choose the type of funnel you are using and add the elements from the drop-downs.
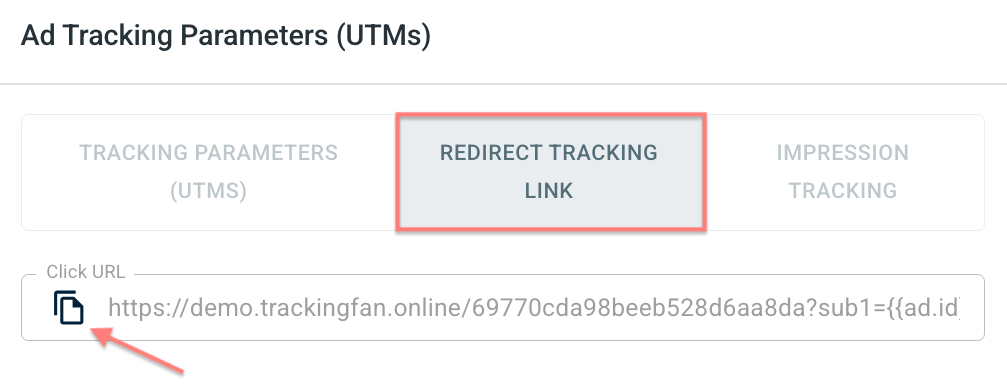
4.2. Once the Ad Tracking is saved go to Ad Tracking Parameters (UTMs) → copy the tracking parameters from the Redirect tracking link tab:
– Universal script
– No-redirect
– Impressions
5. Create a campaign in Exoclick.
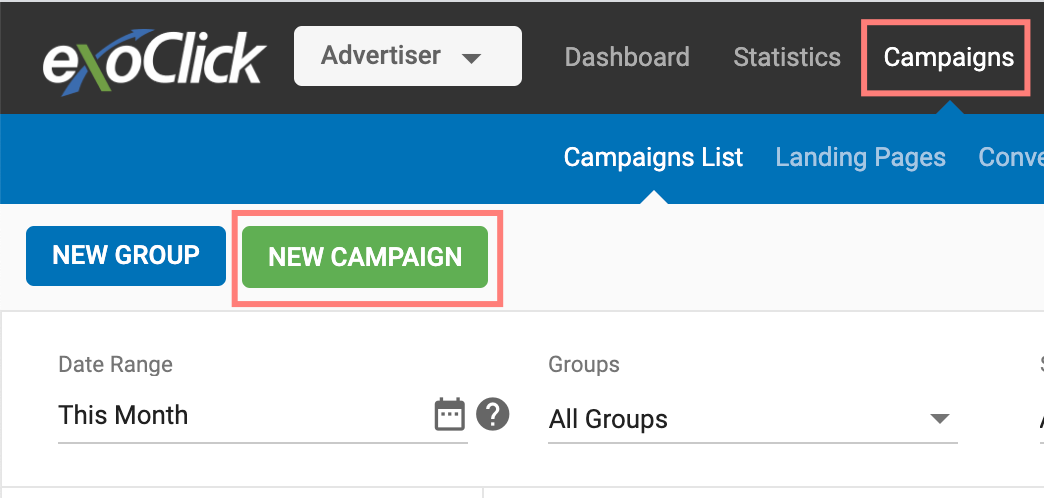
5.1 In your Exoclick account go to Campaigns → New campaign:
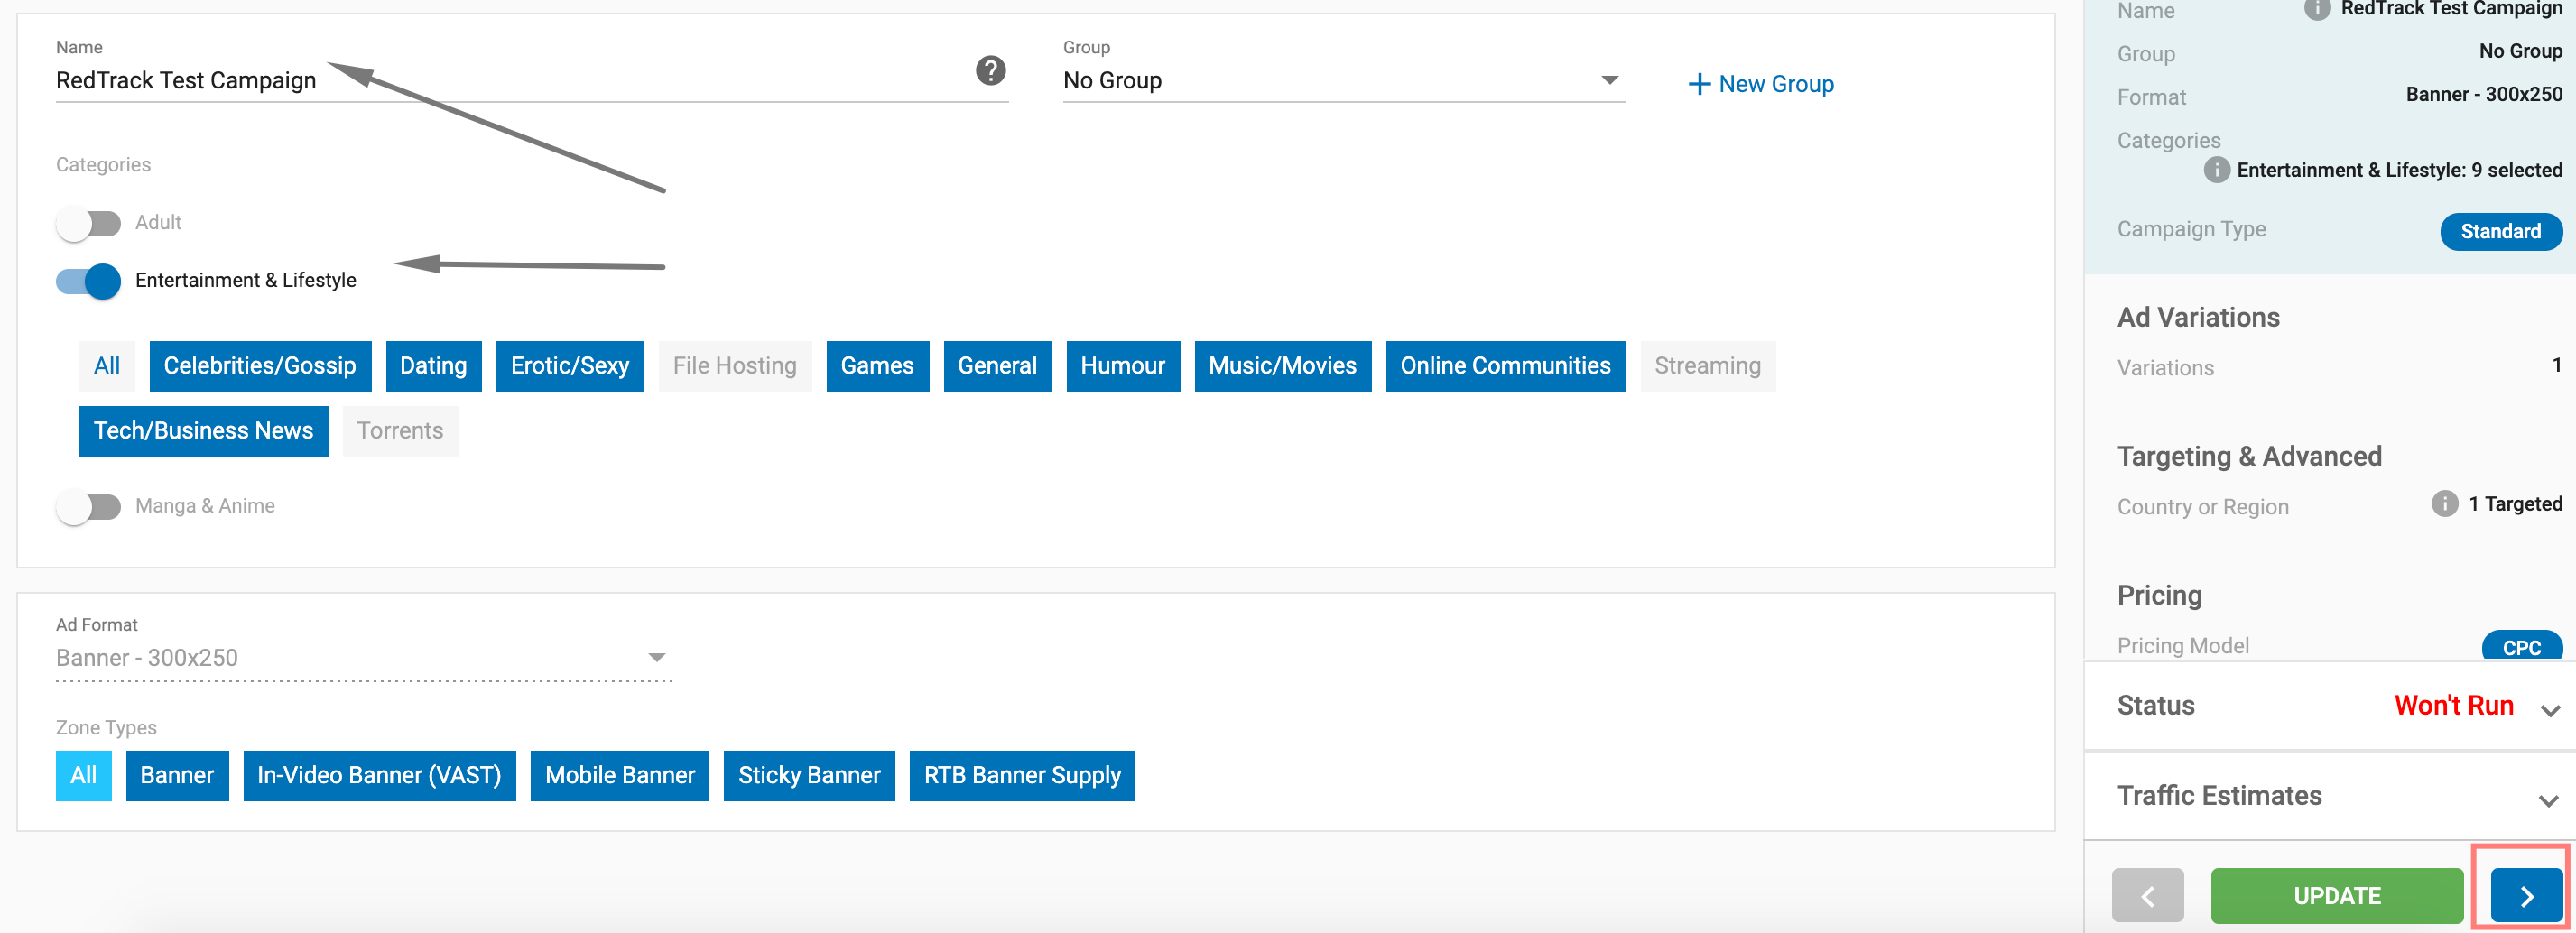
5.2 Set the name, category and go to the next section:
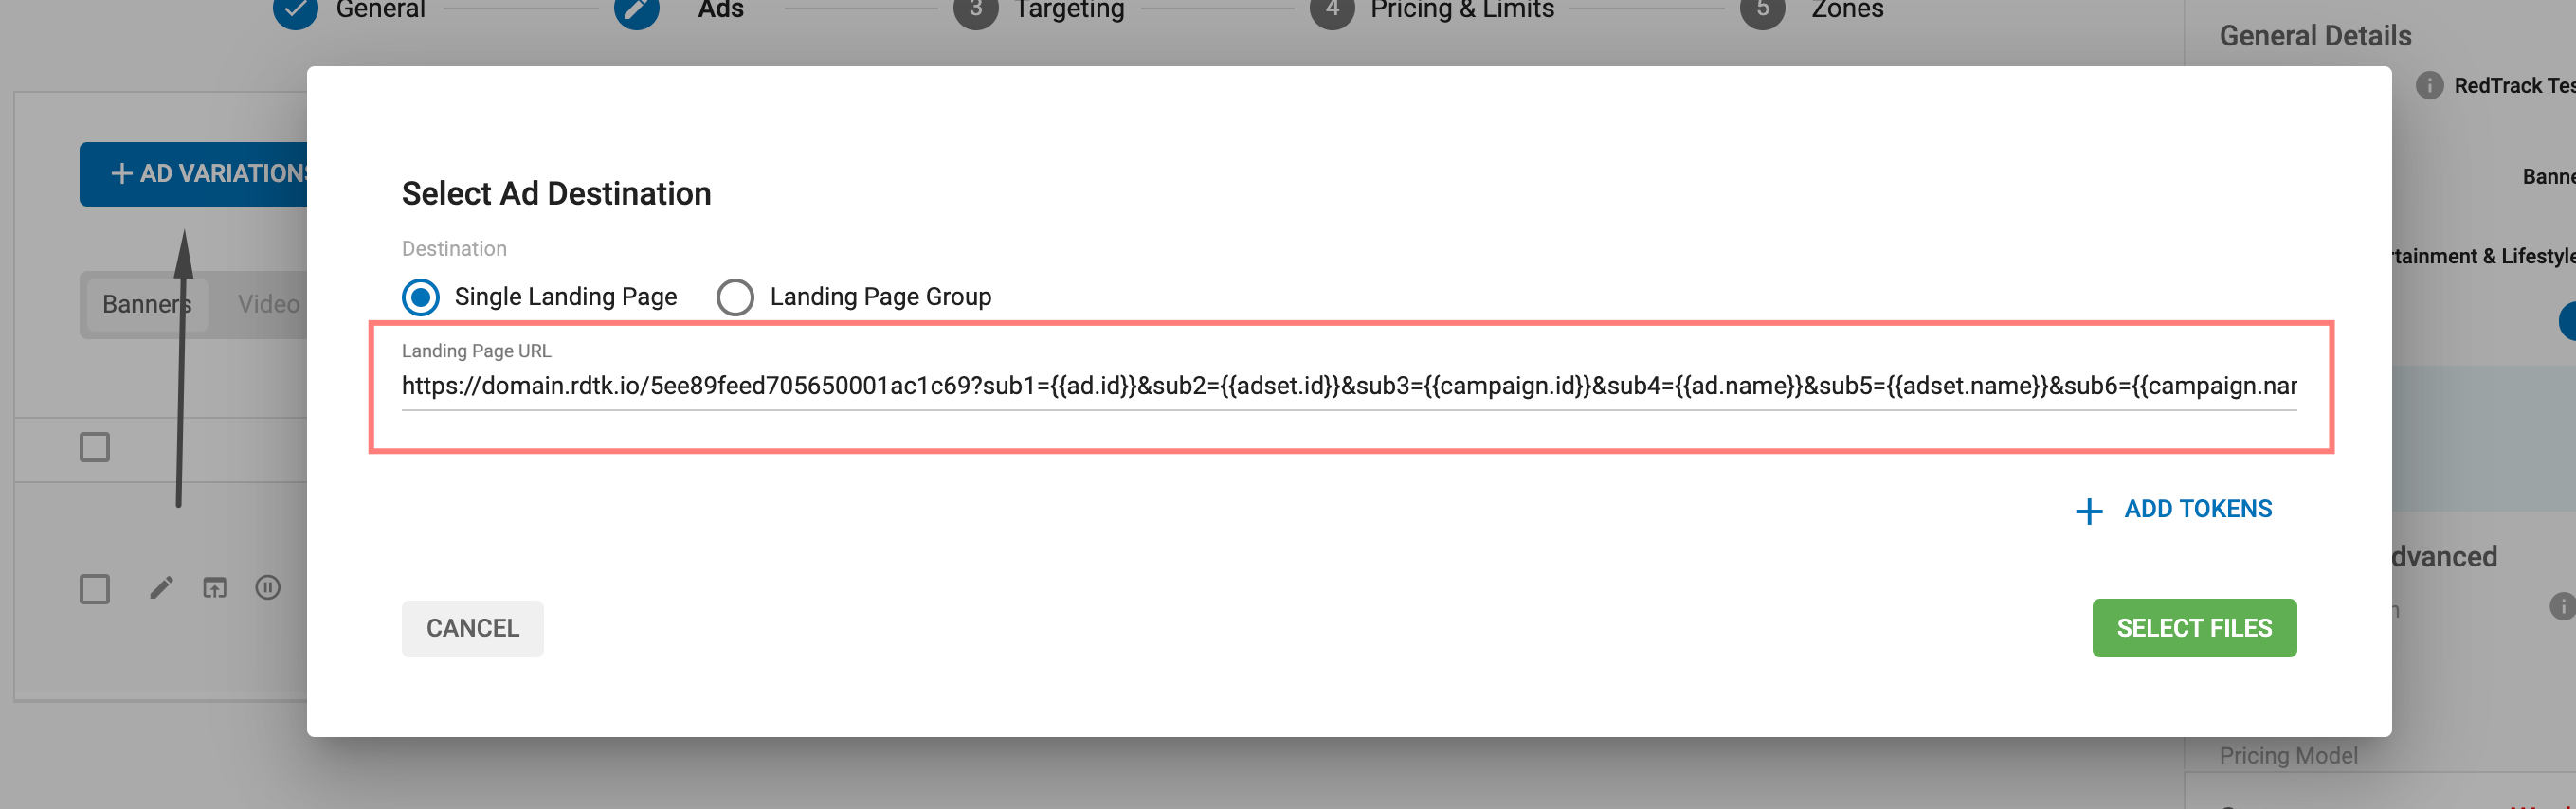
5.3 Click the Add variations button → add RedTrack tracking link (Campaign click URL copied within step 4) as the Landing page URL:
5.4 Add your ad variations → adjust other settings → Create the ad campaign and start running traffic.
6. Set up the Postback URL/Ad network webhook for conversions in RedTrack.
Go to Campaign/Ad Tracking settings (created within step 4) → scroll down to S2S Postback for Exoclick/Ad network webhook for conversions → press Add → check if all the needed values for the parameters are in place → Save changes:
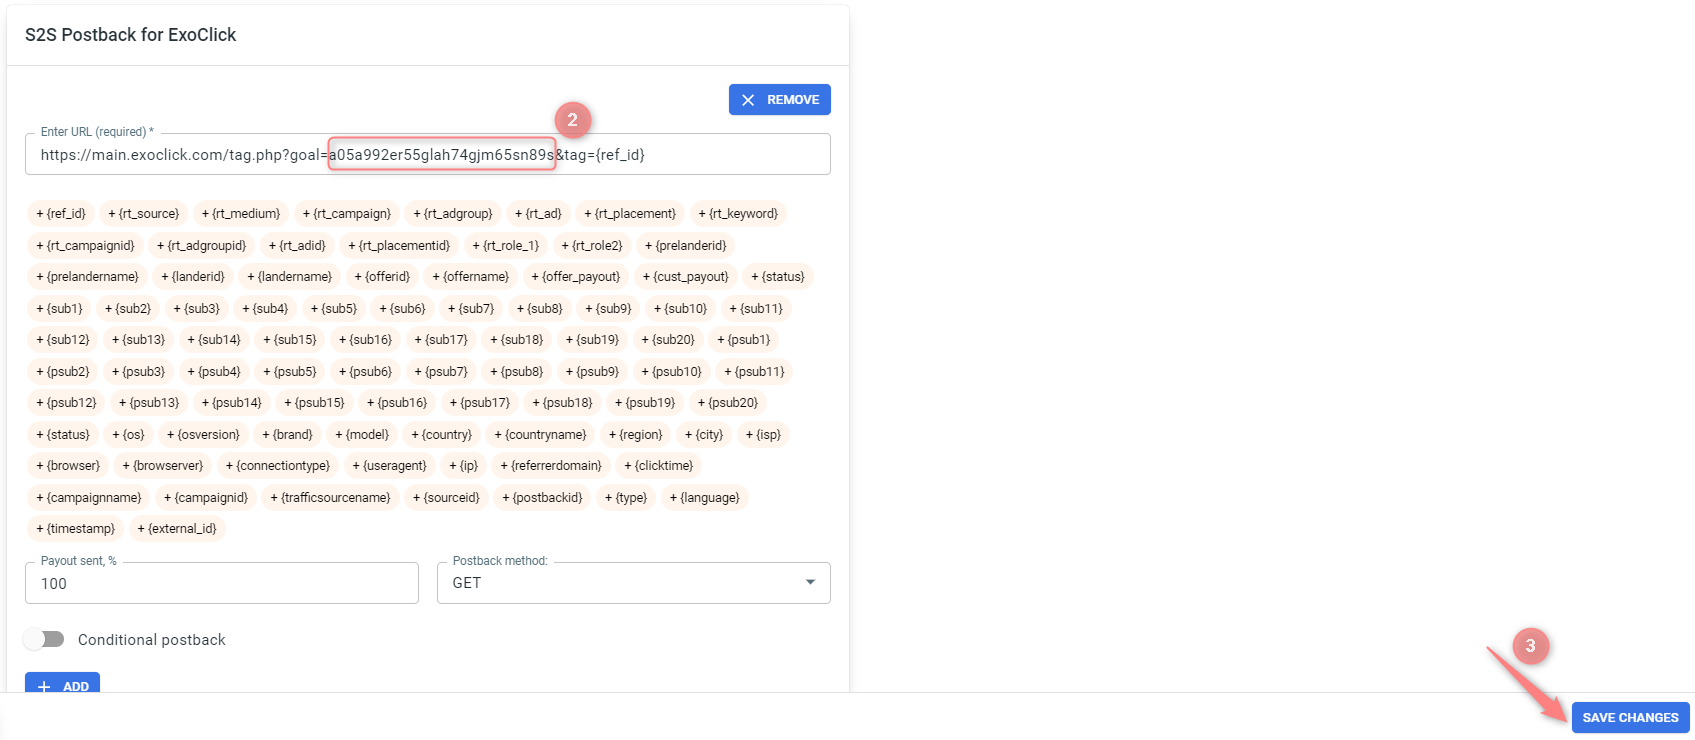
▸ If you changed the Postback URL in the Traffic channel (added/removed some parameters to it), remember to manually update the link in Campaign/Ad Tracking settings as well, as it won’t be generated correctly automatically.
▸ Some Traffic channels require you to edit the Postback with specific parameters for each Campaign/Ad Tracking (e.g., the goal for Exoclick or ap_key for Go2Mobi). If the field remains blank or something like “REPLACE” is stated, that means you need to define the Postback conditions manually.
7. Set up the automation.
- Use this guide to help set up rules.
- Use this guide for setting up the auto update cost feature.

