
BIGO Ads and RedTrack

Info
BIGO Ads is a global mobile advertising platform that reaches over 150 countries and regions around the world, with a focus on targeting users in the Middle East, South Asia, Southeast Asia, and Russia.
Integration
1. Add a custom tracking domain
1. Add a CNAME record pointing to your RedTrack default domain in your domain registrar.
2. On the left menu go to Tools → Domains → Create new domain.
3. The default domain is stated right on the top and looks like smth.rdtk.io.
4. Add the integrated domain to your RedTrack account and activate the Free SSL option.
2. Add the offer/store tracking URL you are promoting
This is the target destination link where you plan to run the traffic: it can be an affiliate offer, a direct link to your website, or the shop.
1. Add the offer source: New from template/New from scratch → find the affiliate network you work with/add your custom name → Save.
2. Add the offer link: Offers → New → choose the offer source from the list, add the offer URL → save the changes.
For example: &affsub={clickid} where {clickid} is RedTrack parameter
More info on offer source and offer in RT can be found here.
1. Go to Stores → New → Add your store (it is the name of your shop).
2. On the same page, in the Additional parameters section, add the purchase data parameters – Name/Description is what you will see in reports – Roles define their use with CAPI.
3. Go to Store tracking URLs → New → Add your store URL (this is your e-com shop).
4. Follow the suggested steps to generate the scripts. You will need it later for your e-com platform.
3. Set up the conversion events
In your RT account go to Tools → Conversion tracking → Conversion type → add the events you want to track → Save.
The names will remain the same and be sent to the traffic channel exactly as you added them in RedTrack.
4. Get the unique values from BIGO Ads
Log in to your BIGO Ads account to get the values for pixel_id, event_id and report key:
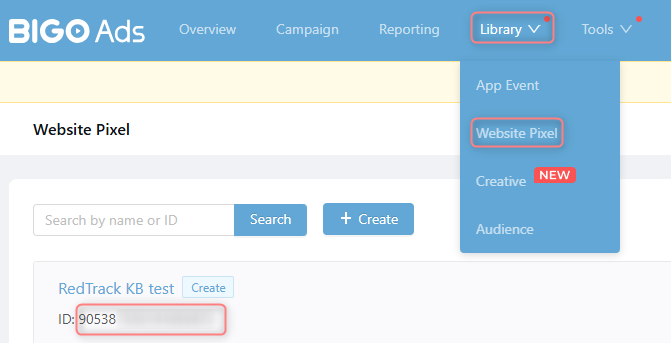
To retrieve you pixel_id go to Library → Website Pixel → find the ID for the needed pixel:
event_id=name of the conversion event type you want to track (e.g.: event_id=purchase)
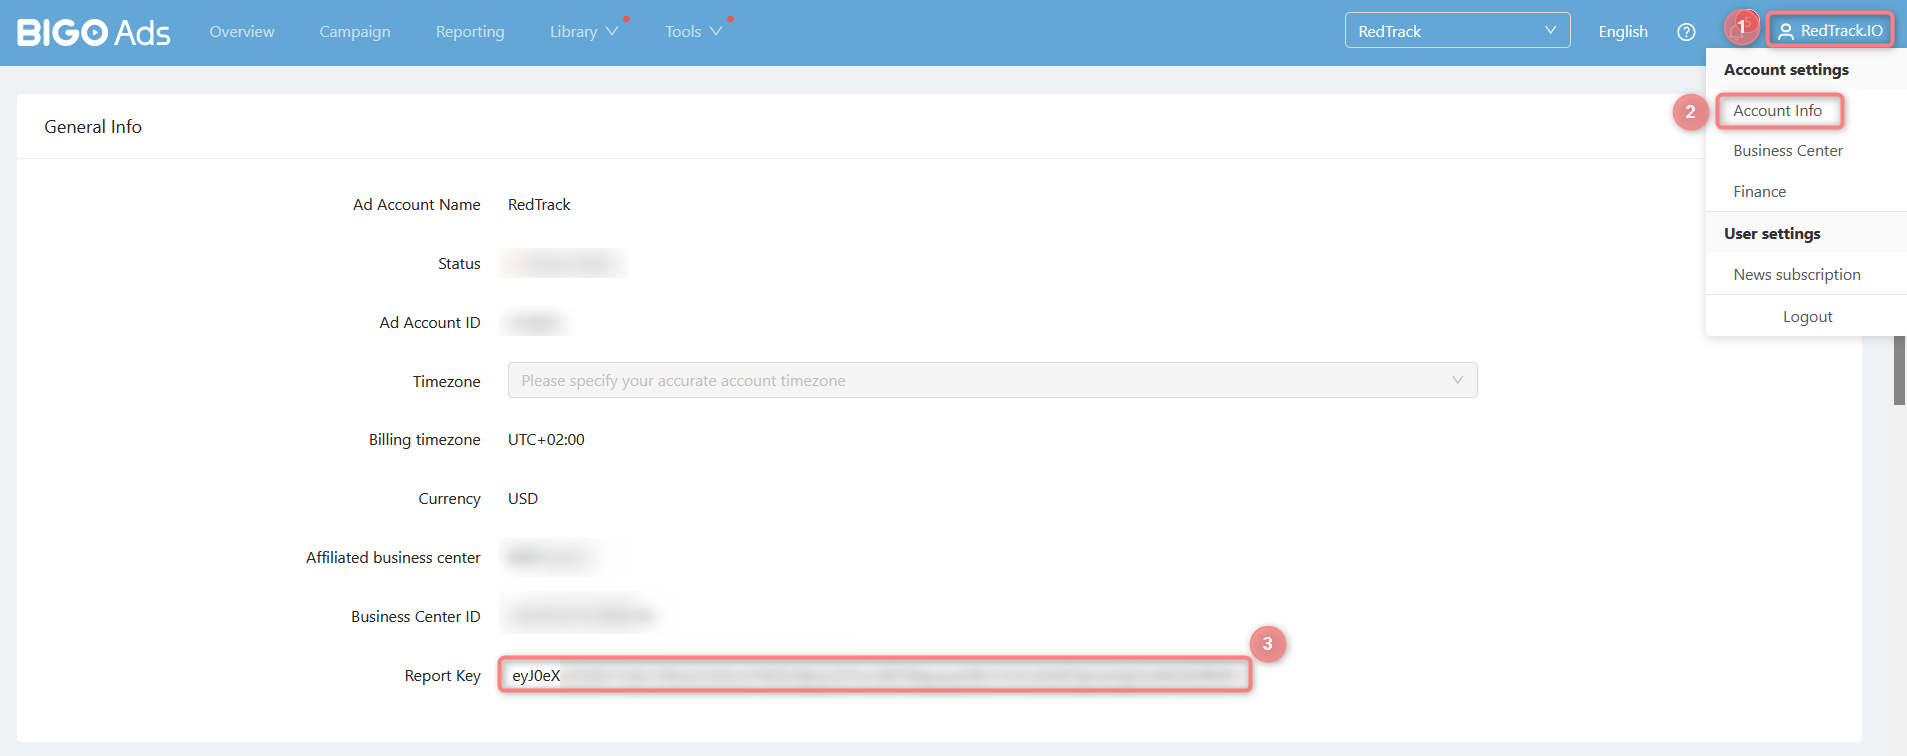
To get your Report Key, click your account name in the top right corner → Account Info → copy the Report Key under the General Info section.
5. Add the BIGO Ads template to RedTrack
1. Add Bigo Ads template to RedTrack.
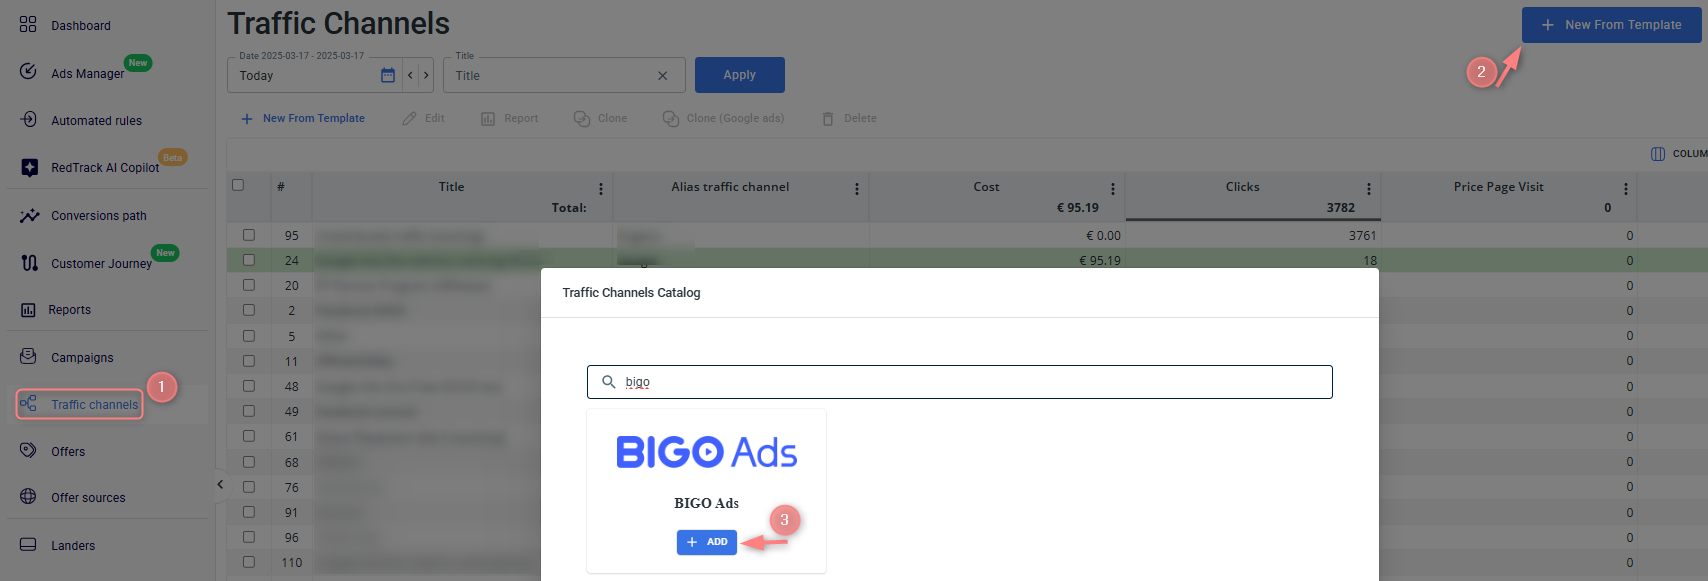
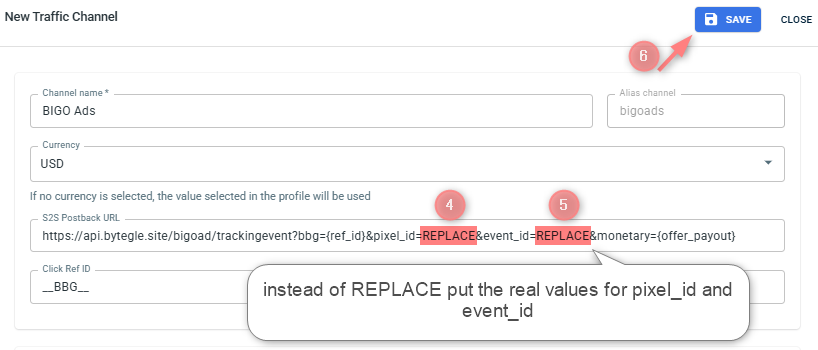
In your RedTrack account go to Traffic channels → New from template → find BIGO Ads → Add → put in the BIGO Ads token values instead of REPLACE in the Postback URL → Save:
2. Integrate BIGO Ads with RedTrack.
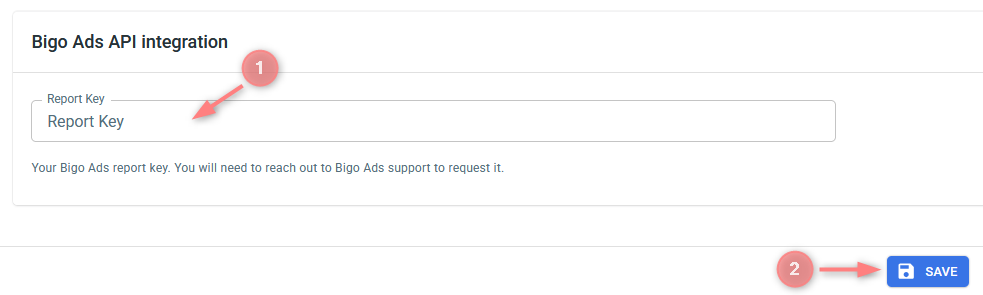
In the added BIGO Ads template go to Bigo Ads API integration → fill in the Report Key with the value copied before → Save the changes:
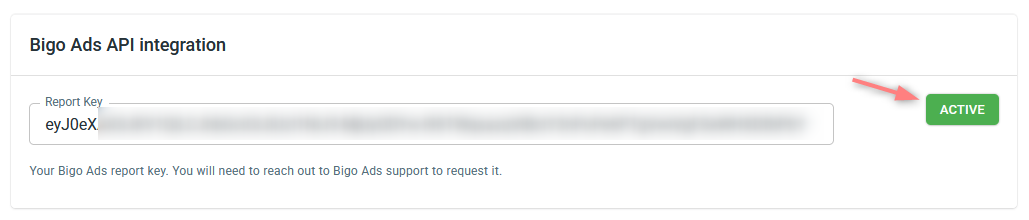
Active button means the integration is on:
6. Create a campaign/ ad tracking
1. Create a campaign/ad tracking in RedTrack with BIGO Ads as your traffic channel.
1.1. Campaigns → Create new campaign → fill in the info in all the sections and tabs:
- General: Give it the name, and choose the traffic channel, tracking domain, and cost-tracking method.
- Funnels: Choose the type of funnel you are using and add the elements from the drop-downs.
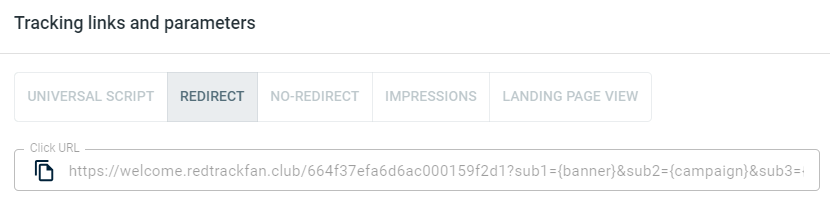
1.2. Once the Campaign is saved go to Tracking links and parameters → copy the automatically generated click URL (your tracking link):
1.1. Ad Tracking → New Ad Tracking → fill in the info in all the sections and tabs:
- General: Give it the name, and choose the traffic channel, and cost-tracking method.
- Funnels: Choose the type of funnel you are using and add the elements from the drop-downs.
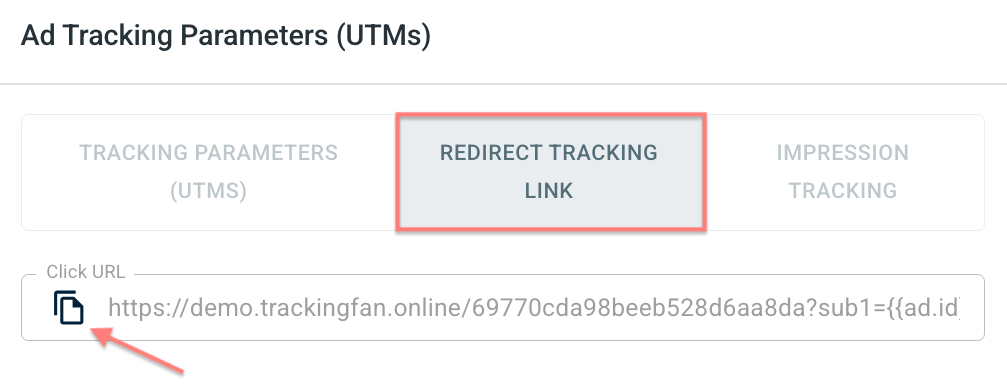
1.2. Once the Ad Tracking is saved go to Ad Tracking Parameters (UTMs) → copy Click URL from the Redirect tracking link tab:
– Universal script
– No-redirect
– Impressions
3. Apply the postback for BIGO Ads.
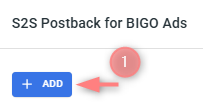
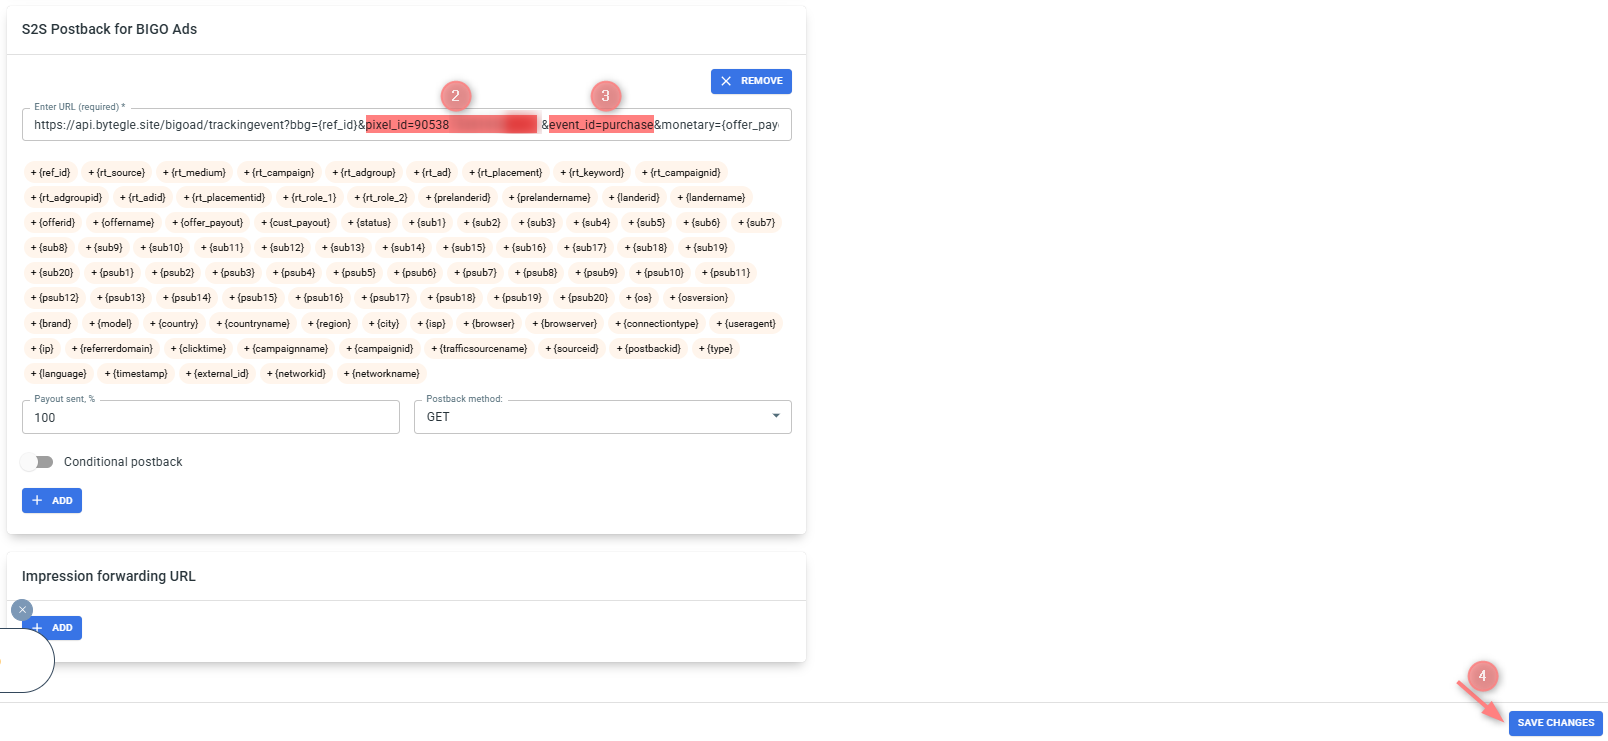
In the created RedTrack campaign/ad tracking navigate to S2S Postback for BIGO Ads/ Ad network webhook for conversions section → Add → check if the mandatory values for pixel_id and event_id tokens are added → Save changes:
4. Create a campaign in BIGO Ads and add the RedTrack tracking link.
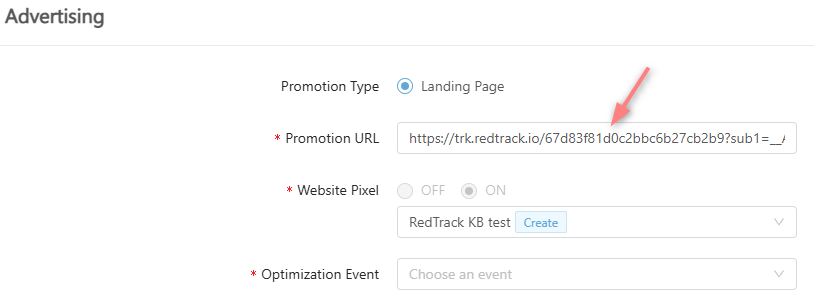
When adding a campaign to your BIGO Ads account add the copied RedTrack tracking link to the Promotional URL field: