HubSpot and RedTrack
Intro
HubSpot is one of the most widely used CRM and marketing automation platforms, designed to help sales, marketing, and customer service teams grow better. With its all-in-one ecosystem, businesses can attract, engage, and delight customers more effectively.
Integration
Setup in RedTrack
1. Add a custom tracking domain
1. Add a CNAME record pointing to your RedTrack default domain in your domain registrar.
2. On the left menu go to Tools → Domains → Create new domain.
3. Add the integrated domain to your RedTrack account and activate the Free SSL option.
2. Set up conversion tracking
Tools → Conversion tracking → Conversion type → add the events you want to track → Save.
The names will remain the same and be sent to the traffic channel exactly as you added them in RedTrack.
3. Add the offer/website you are promoting
This is the target destination link where you plan to run the traffic: it can be an affiliate offer, a direct link to your website, or the shop.
1. Act depending on your account type:
1. Add the offer source: New from template/New from scratch → find the affiliate network you work with/add your custom name → Save.
2. Add the offer link: Offers → New → choose the offer source from the list, add the offer URL → save the changes.
For example: &affsub={clickid} where {clickid} is RedTrack parameter
More info on offer source and offer in RT can be found here.
1. Go to Brands → New → Add your brand (it is the name of your shop or your website).
2. On the same page, add the purchase data parameters – Name/Description is what you will see in reports – Roles define their use with CAPI.
3. Go to Websites → New → Add your website URL (this is your e-commerce shop/website link).
4. Follow the suggested steps to generate the scripts. You will need it later for your e-commerce platform.
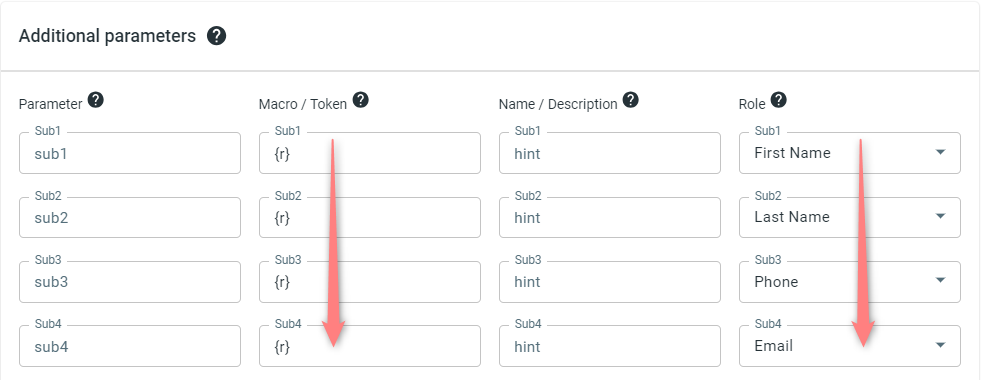
2. When adding the brand/offer source go to Additional parameters section → add {r} to Macro/Token fields and assign the following roles:
- First Name
- Last Name
- Phone
4. Create a paid traffic campaign
– Affiliates should add the campaign for the unattributed (organic) traffic per this guide.
To create a campaign for the paid traffic follow these simple steps:
- Add the Traffic channel (API integrated traffic channels/Non-API integrated traffic channels). Most of them have a preset template in RedTrack.
- Launch a campaign for the paid traffic channel. Your website/shop will be the main link added to the traffic channel. Be guided by this article for Advertisers / this one for Affiliates.
Setup in HubSpot
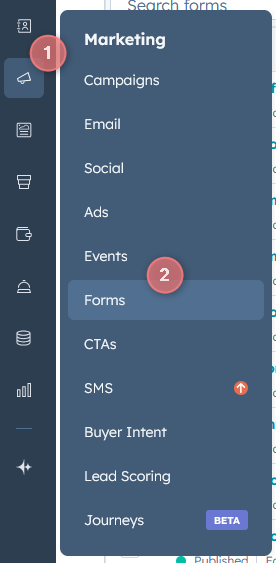
1. Create a hidden field
1. Access the Form Editor: Marketing → Forms → Edit the desired form.
2. In the form editor go to Create New → Single-line text → Set the property label as rtclickid
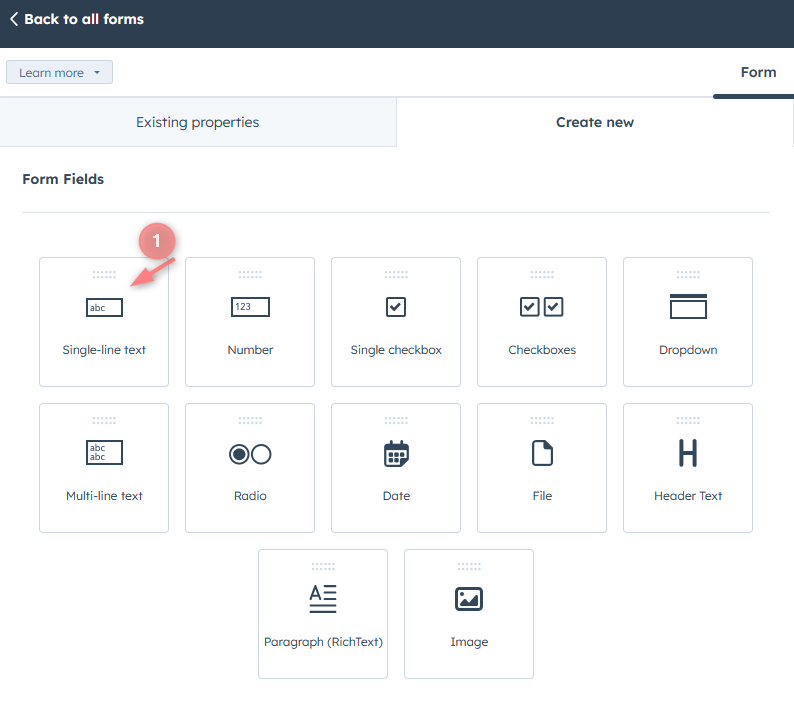
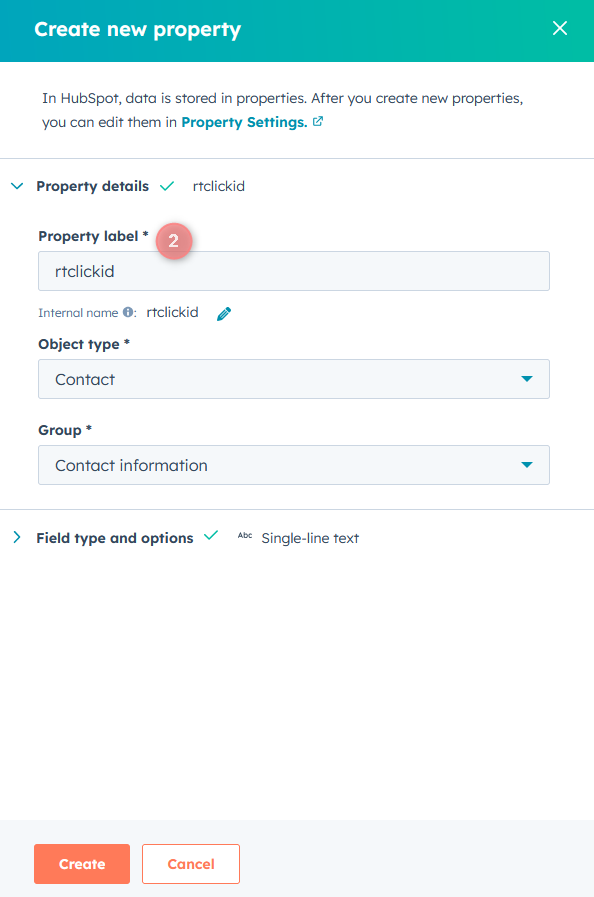
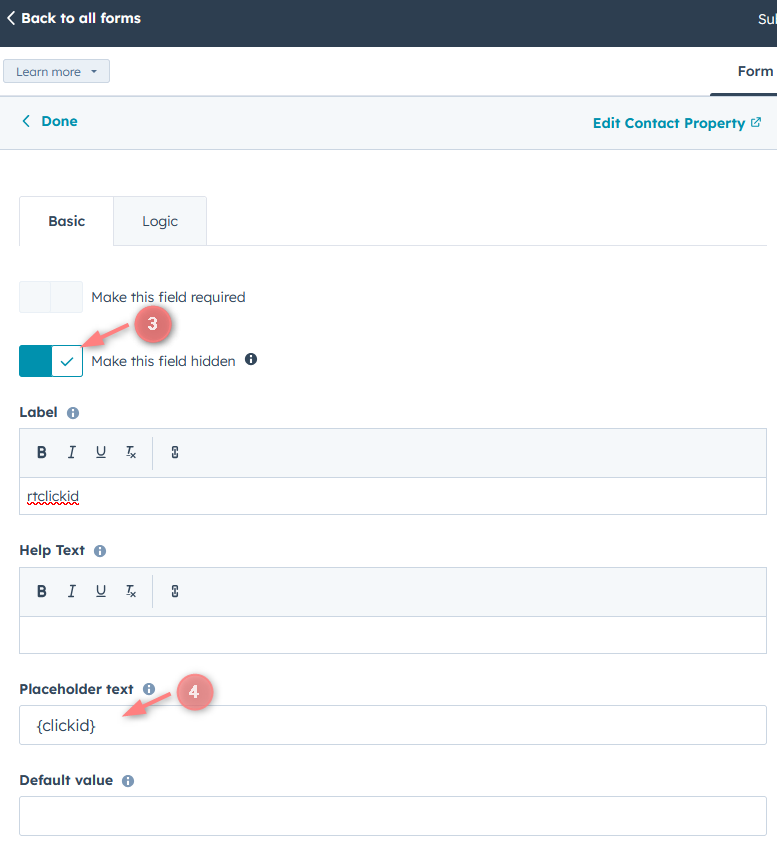
3. Turn on the toggle for “Make this field hidden” → Set the placeholder value as {clickid} → Publish changes.
2. GTM setup
* For Affiliates: use this guide to help you with the universal tracking script.
* For Advertisers: a universal tracking script was created automatically once you had added your Website.
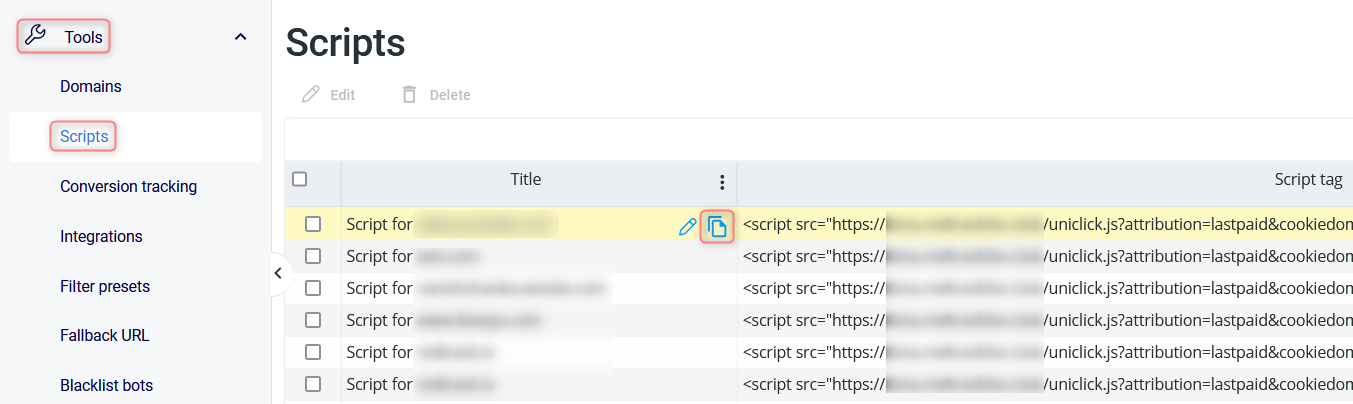
Both Affiliates and Advertisers can find the generated universal tracking script in Tools → Scripts:
1. Adjust the settings in GTM
1.1 Follow this guide on how to integrate Google Tag Manager (GTM) with RedTrack.
1.2 In GTM settings Create 2 types of Tags:
Essential elements:
- Tag = Custom HTML
- Triggering = All Pages (Page view)
Script:
Use the universal tracking script for this.
Essential elements:
- Type= Custom HTML
- Triggering= All Elements (All Clicks)
Script:
<script>
function setFormClickIdValue(clickid) {
    console.log(clickid)
      document.querySelectorAll('input').forEach(function(el) {
        console.log(el.value)
          if (el.value.indexOf("{clickid}")>-1) {
              el.value = el.value.replace(/{clickid}/, clickid)
          }
      });
  }
  function getCookie(name) {
      var value = "; " + document.cookie;
      var parts = value.split("; " + name + "=");
      if (parts.length == 2) return parts.pop().split(";").shift();
  }
      if (getCookie('rtkclickid-store') !== null && getCookie('rtkclickid-store') !== undefined && getCookie('rtkclickid-store') !== 'undefined') {
          setTimeout(function(){
            setFormClickIdValue(getCookie('rtkclickid-store'))
          }, 3000)
      }
</script>
2. Connect GTM to HubSpot
2.1 Copy your Google Tag Manager Container ID.
2.2 Go to your HubSpot account → navigate to Settings (top right corner) → open the section Website > Pages → choose the domain you want to edit.
2.3 Scroll to the Integrations or Site Header & Footer Code section → paste your Google Tag Manager code snippets (Head and Body) into the corresponding fields → Save and Publish.
3. Set the postback
1. Go to your HubSpot account → navigate to Settings → open the section Objects > Activities > Workflow (or directly Automation → Workflows depending on your HubSpot plan).
2. Create or edit the workflow that triggers after a form submission/conversion event.
3. Inside the workflow, click the “+” button to add a new action → select Send a Webhook.
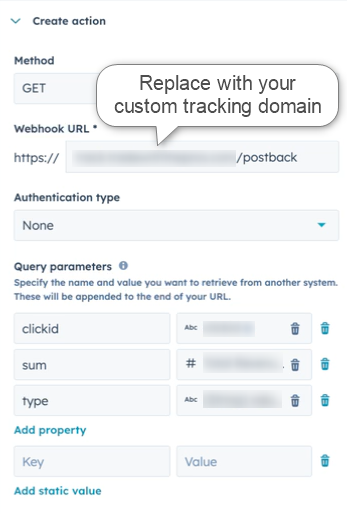
4. Paste the RedTrack Postback URL into the action setup window and map the parameters → click Save to apply the webhook action:
- Use GET method.
- Add the dynamic HubSpot tokens as query parameters:
- clickid → rtclickid
- sum → map to the deal amount (if you want to track revenue in RedTrack)
- type → fill with the name of the event that you’re sending back to RedTrack