Outbid and RedTrack

Outbid (former LetsCPA) is a sweepstake-focused affiliate network promoting both SOI and CC Submit offers worldwide.
Integration
Before you begin
Before you proceed with the integration, make sure to have the already added:
- Custom tracking domain
- Conversion events you want to track
- Traffic channel
Integration steps
1. Add Outbid as an Offer source in RedTrack.
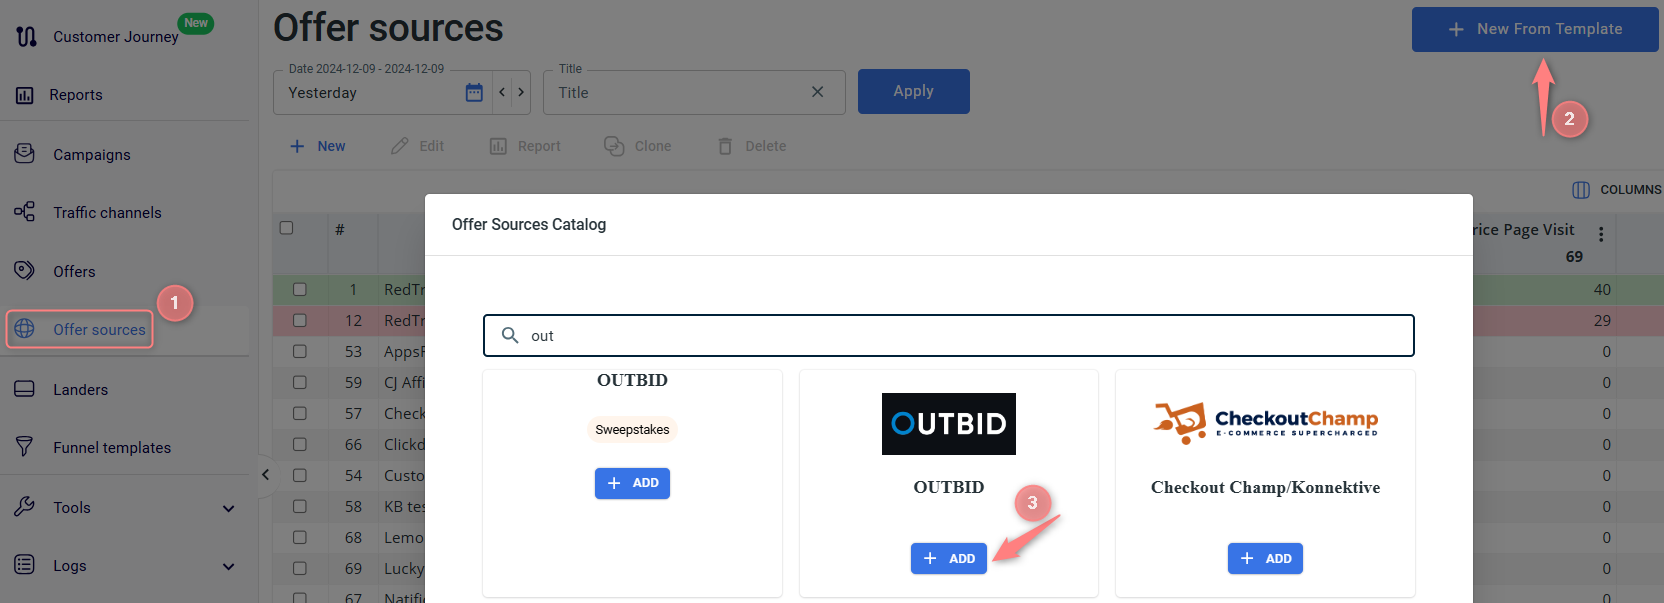
RedTrack → Offer sources → New from template → add Outbid template → copy the Postback URL → Save the template:


You can add additional macros to the POSTBACK link if you like. To do that in the added Outbid template go to the Additional parameters section. Here’s the list of Postback macros supported by LetsCPA:
Parameter | Description |
{uagent} | UserAgent of user browser |
{ip} | User IP-address |
{sub1} | Subaccount 1 |
{sub2} | Subaccount 2 |
{sub3} | Subaccount 3 |
{sub4} | Subaccount 4 |
{sub5} | Subaccount 5 |
{sub6} | Subaccount 6 |
{sub7} | Subaccount 7 |
{sub8} | Subaccount 8 |
{unid} | Additional parameter for tracking URL |
{ref_id} | Additional parameter for tracking URL |
{os_id} | Additional parameter for tracking URL |
{user_id} | Additional parameter for tracking URL |
{ext1} | Additional parameter for tracking URL |
{ext2} | Additional parameter for tracking URL |
{ext3} | Additional parameter for tracking URL |
{transactionid} | Conversion identificator of advertiser |
{date} | Date and time of conversion committing in format Y-m-d H:i:s |
{click_date} | Date and time of click committing in format Y-m-d H:i:s |
{offerid} | Offer identificator in the System |
{offer_name} | Offer title in the System |
{status} | Conversion status, available values: 1 – action “Allowed” (will be paid later by advertiser) 2 – action “In process” (decision is not taken yet, you need request the status later) 3 – action “Declined” (will not be paid later by advertiser) 5 – action is «Approved» and put on Hold (will be paid by advertiser at a certain amount of time – the period of hold is taken from the offer settings). |
{sum} | Conversion payout |
{city} | City |
{geo} | Country |
{goal} | Goal |
{currency} | Currency |
{comment} | Comment |
{time} | Time of click committing in format H:i:s |
{date_only} | Date of click committing in format Y-m-d |
{rand} | Randomly generated number |
{referrer} | Click referrer |
{custom_field_1} | Custom field 1 |
{custom_field_2} | Custom field 2 |
{custom_field_3} | Custom field 3 |
{custom_field_4} | Custom field 4 |
{custom_field_5} | Custom field 5 |
{custom_field_6} | Custom field 6 |
{custom_field_7} | Custom field 7 |
{custom_field1} | Custom field 1 |
{custom_field2} | Custom field 2 |
{custom_field3} | Custom field 3 |
{custom_field4} | Custom field 4 |
{custom_field5} | Custom field 5 |
{custom_field6} | Custom field 6 |
{custom_field7} | Custom field 7 |
{os} | OS Family |
{time} | Time of click committing in format H:i:s |
{timestamp} | unix timestamp of conversion creation |
2. Set up the Postback URL from RedTrack in Outbid.
2.1 In your Outbid account go to your Profile settings:

2.2 Find Global Postbacks section → Add Postback → paste the Postback URL (copied from RT in step 1) → Save:

3. Get the Outbid offer URL.
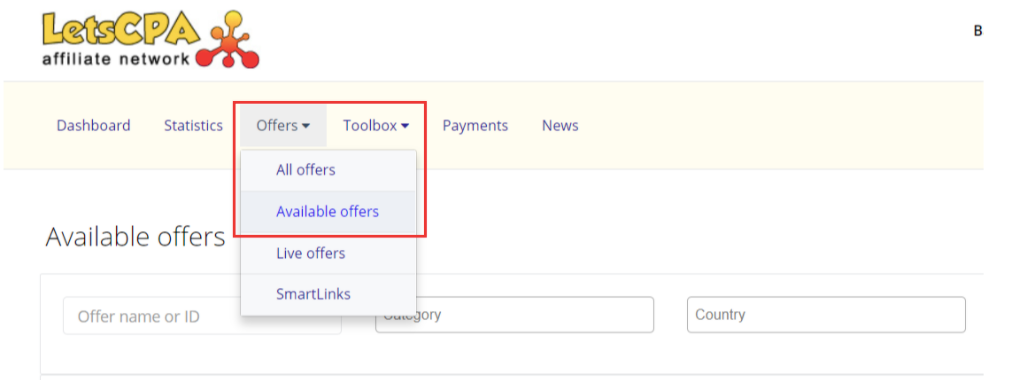
3.1 In your Outbid account go to Offers → Available Offers:

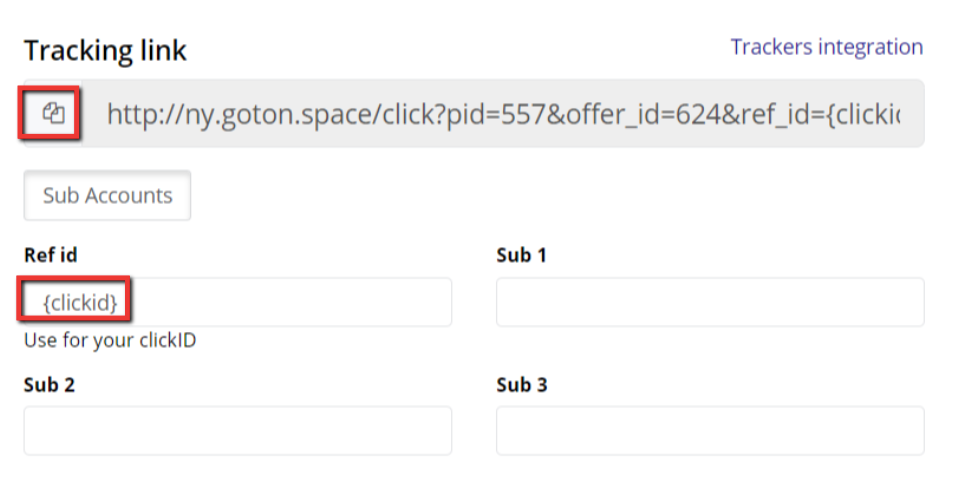
3.2 Open the one you wish to promote → fill in click id macro (the correct parameter for RedTrack is {clickid}). Offer link will be updated automatically → copy it:

4. Add Outbid offer to RedTrack.
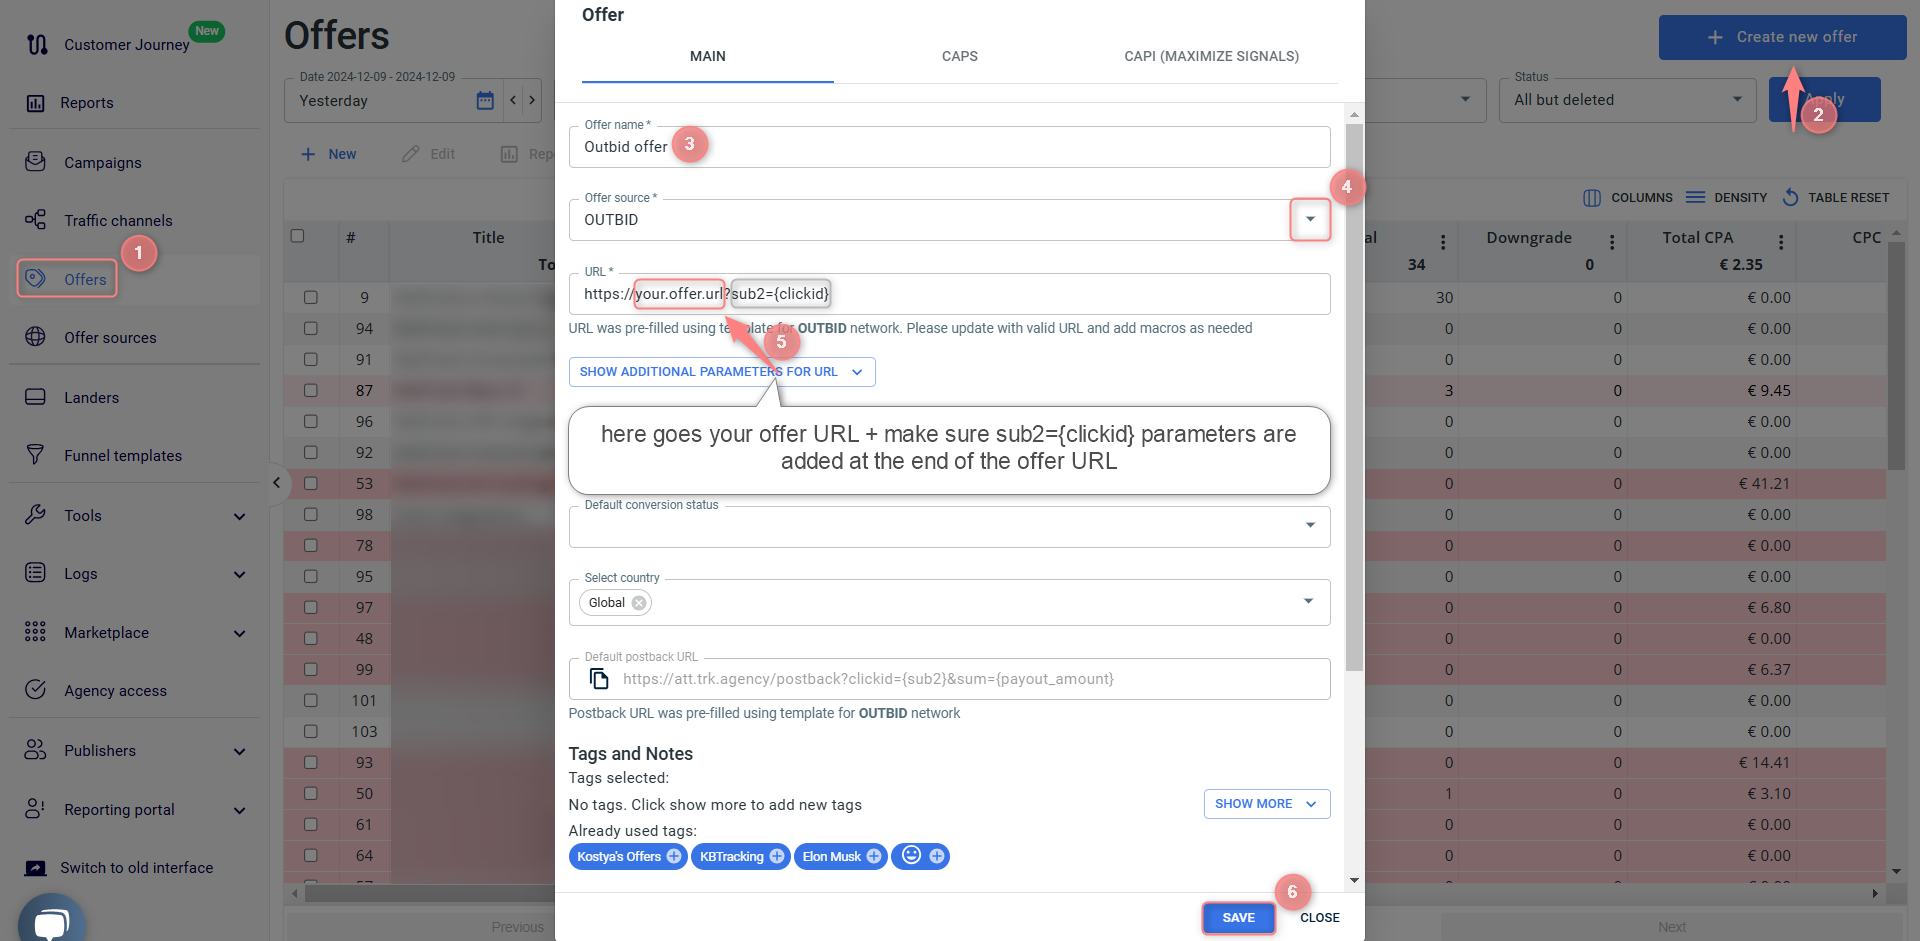
In your RedTrack account go to Offers → Create new offer → fill in the mandatory fields → add Outbid offer link in the URL field → make sure “sub2={clickid}” parameters are added at the end of the offer URL → Save:

5. Create a campaign in RedTrack with the traffic channel you buy the traffic from and the offer you have just added.
To help you add the campaign refer to:
- this guide for Advertisers.
- this guide for Affiliates.


