Konnektive and RedTrack

Konnektive CDM is a campaign and customer management platform that helps marketers automate and streamline complex sales procedures. It is a great web application for managing your products from a logistical and customer-driven standpoint.
CheckoutChamp is a standalone single-step checkout and one-click upsell tool that works with every e-commerce platform, designed to increase sales conversion, and average order value quickly and easily.
Integration
Setup in RedTrack
1. Add custom tracking domain.
2. Set up conversion tracking.
3. Add Konnektive/Checkout Champ Offer source (if you’re and an Affiliate)/ Brand (if you’re and Advertiser) to RedTrack:
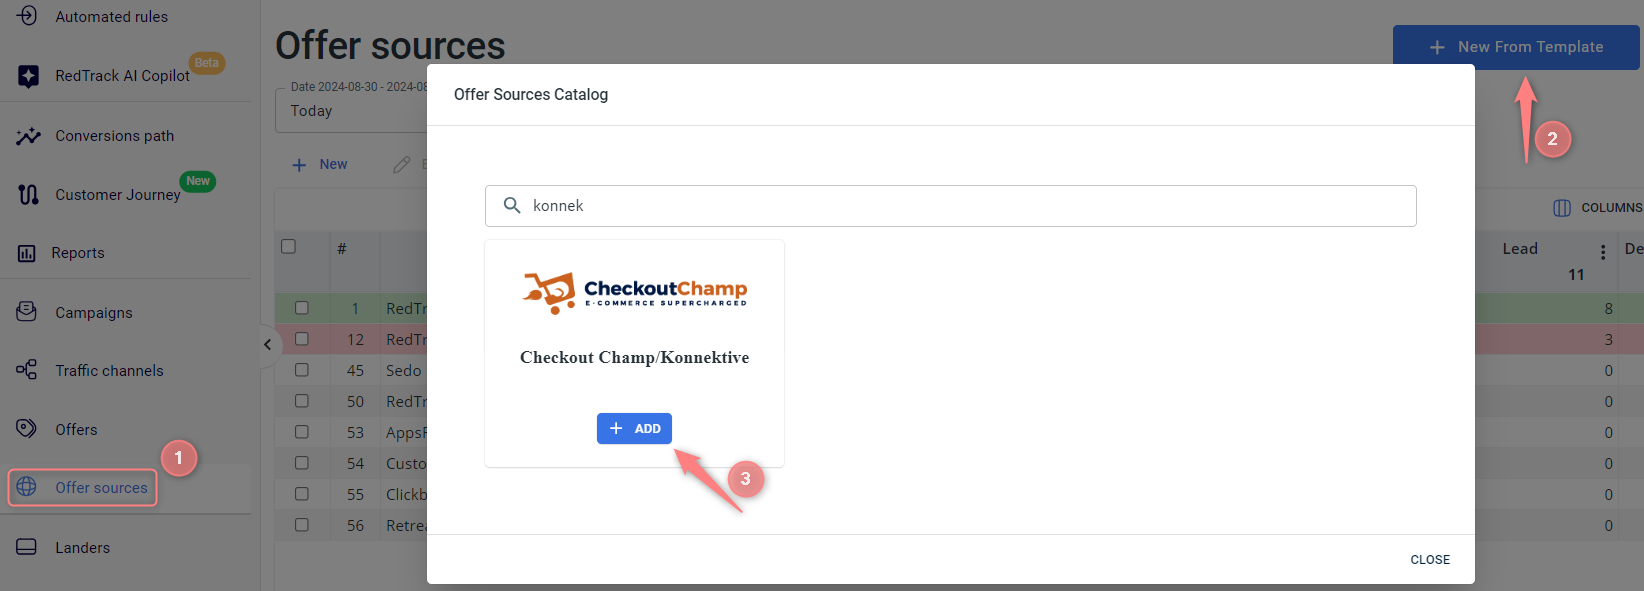
1. Offer sources → New from template → find Konnektive/Checkout Champ template and ADD it:
2. In this template you must:
- Add the affId parameter in the Offer URL template: copy the value for your affid parameter from Konnektive/CheckoutCamp → put it instead of REPLACE in the Offer URL field
- Add the following additional parameters:
[orderId] – represents the orderId (often TRANSACTION_ID)
[emailAddress] – represents the customer’s email address
[phoneNumber] – represents the customer’s phone number
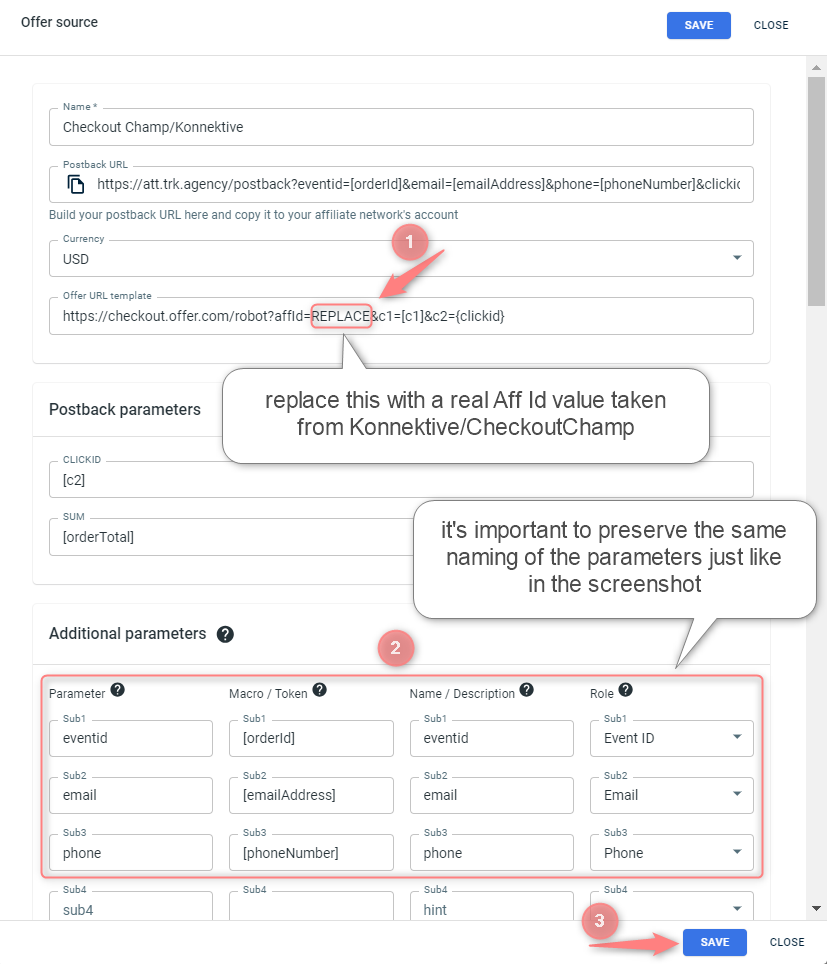
3. Once you’ve saved the template, copy the Postback URL to add it later in your Konnektive/CheckoutChamp pixel settings:

1. Brands → New from scratch → in the template you must:
- Give your brand a name.
- Add [c2] and [orderTotal] values to the Postback parameters fields.
- In the Additional parameters field add the following tokens:
[orderId] – represents the orderId (often TRANSACTION_ID)
[emailAddress] – represents the customer’s email address
[phoneNumber] – represents the customer’s phone number
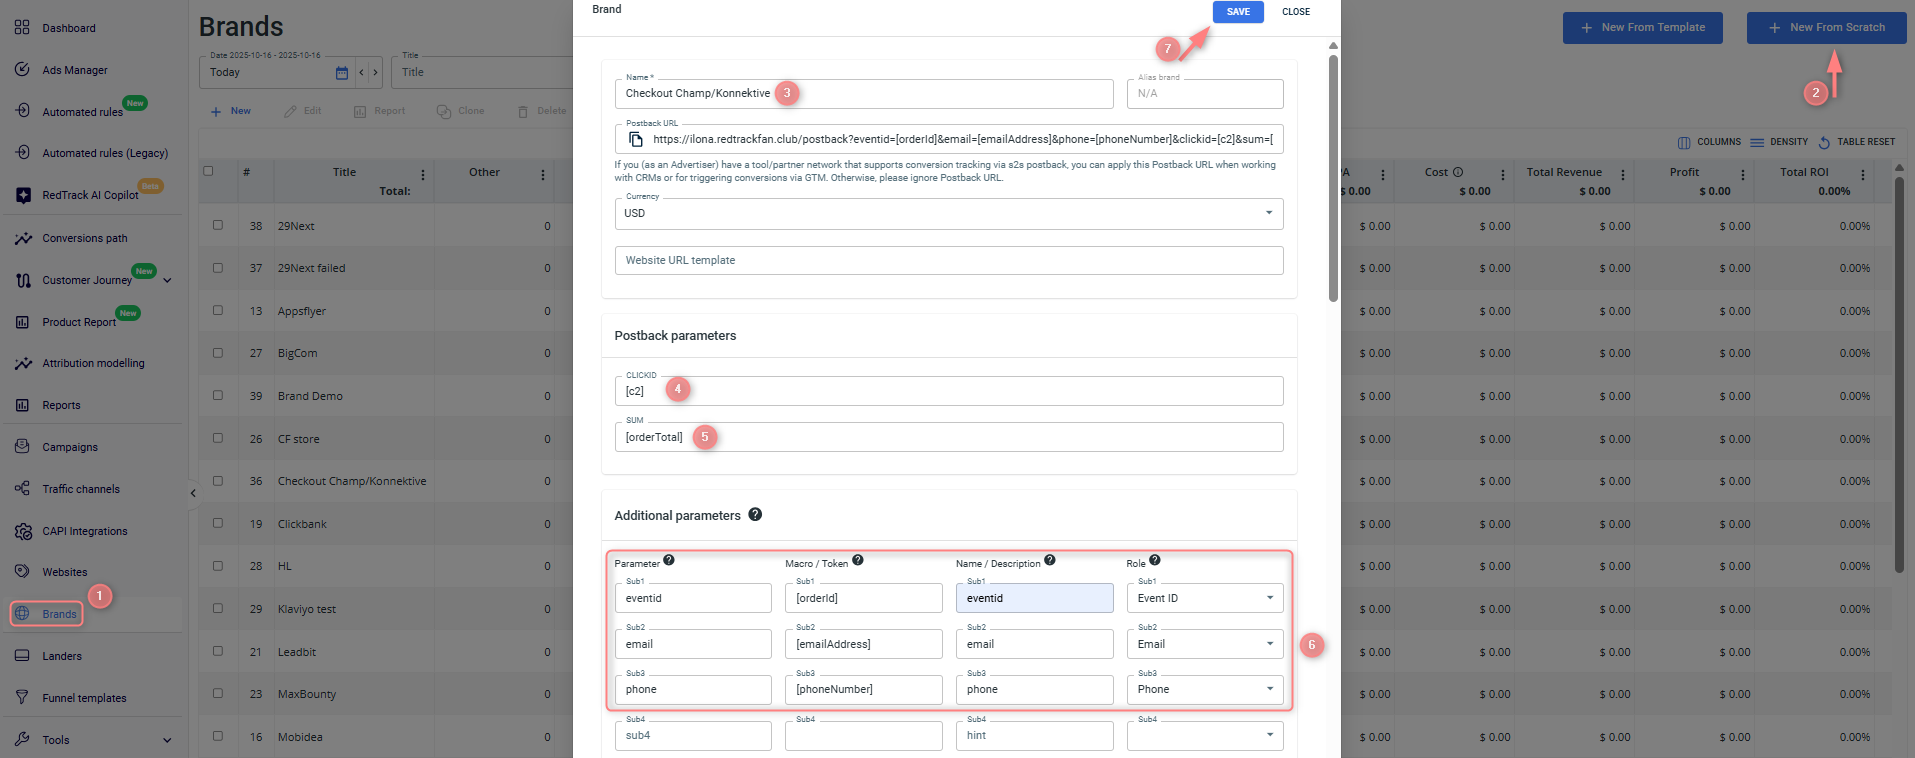
2. Once you’ve saved the template, copy the Postback URL to add it later in your Konnektive/CheckoutChamp pixel settings:

4. Add your Offer (if you’re an Affiliate)/ Website (if you’re an Advertiser):
Offers → Create new offer → Use this guide to help you with the offer setup.
– yourofferurl.com is the actual offer url.
– affId=12ABCC34 is the replaced Add Id value from Konnektive/CheckoutChamp.
Websites → Create new website → use this guide to help you with the website (aka offer) setup.
– yourofferurl.com is the actual website (offer) URL.
– affId=12ABCC34 is the replaced Add Id value from Konnektive/CheckoutChamp.
5. Create a paid traffic campaign
– Affiliates should add the campaign for the unattributed (organic) traffic as per this guide.
To create a campaign for the paid traffic, follow these simple steps:
- Add the Traffic channel. Most of them have a preset template in RedTrack.
- Launch a campaign for the paid Traffic channel. Your website/shop will be the main link added to the traffic channel. Be guided by this article for Advertisers / this one for Affiliates.
Setup in Konnektive/Checkout Champ
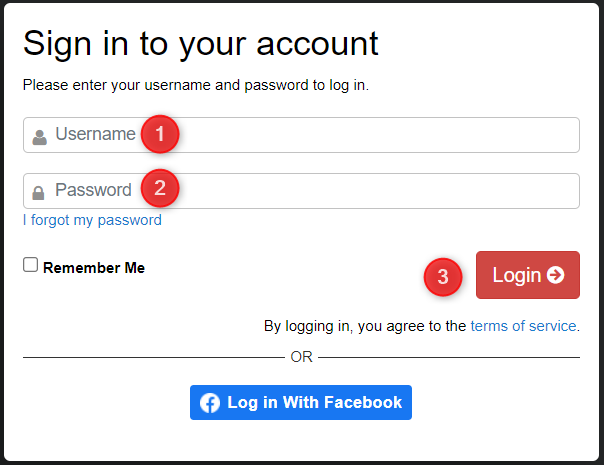
1. Log in to your Konnektive/Checkout Champ account:
2. Go to CRM → Affiliates → press “+” to add the Affiliate profile:

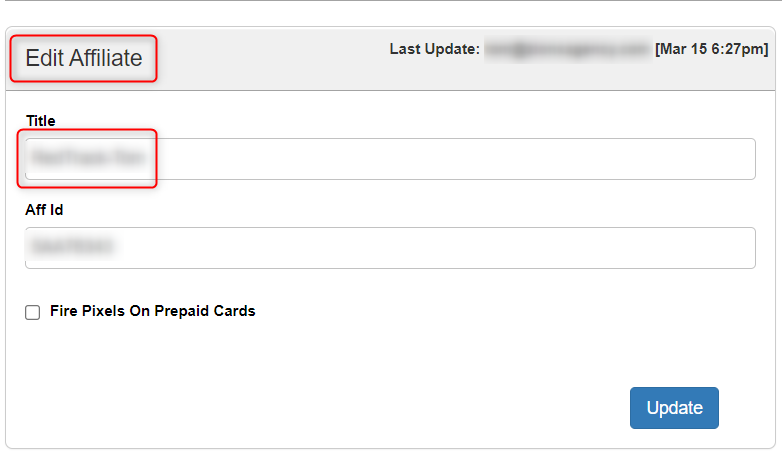
3. In the pop-up window Edit Affiliate fill in the Title field:
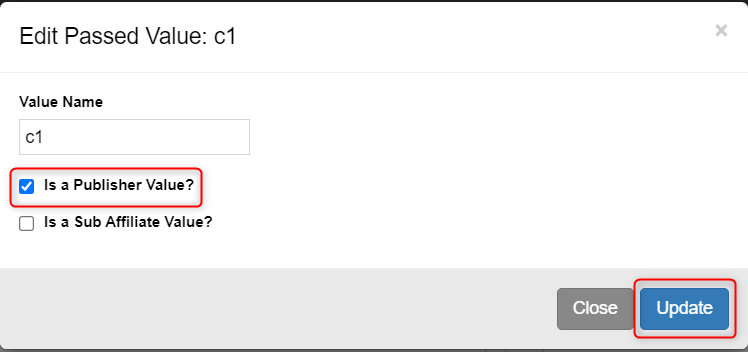
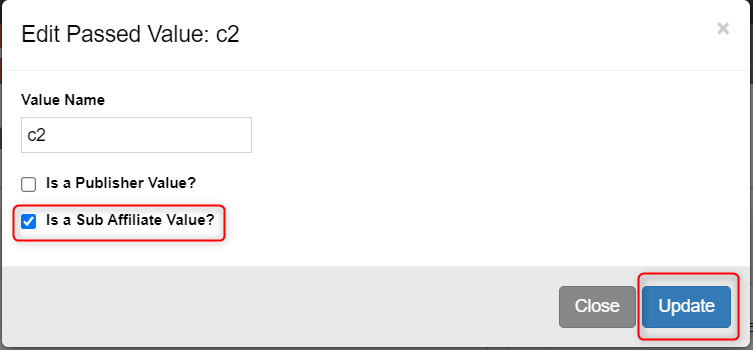
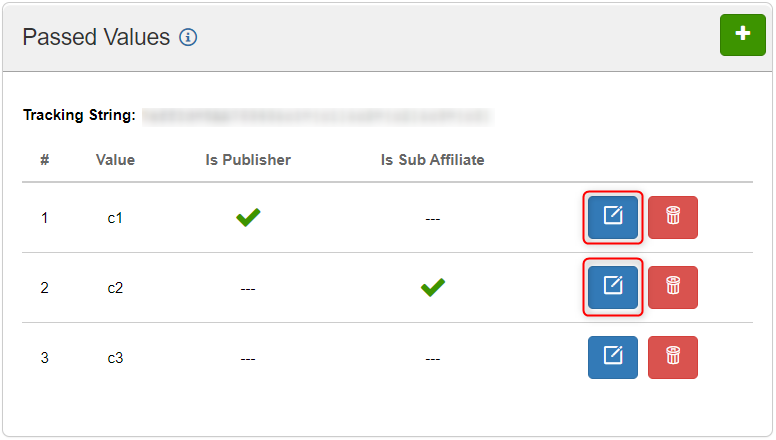
4. In the Passed Values window press “+” to add a new value → define c1 and c2 values → Update:

- c1 = Publisher ID:
- c2 = Sub Affiliate (this is clickid passed to RedTrack):

5. Create a Campaign in Konnektive/CheckoutChamp
5.1 Go to CRM → Campaigns → use this guide to help you add your campaign.
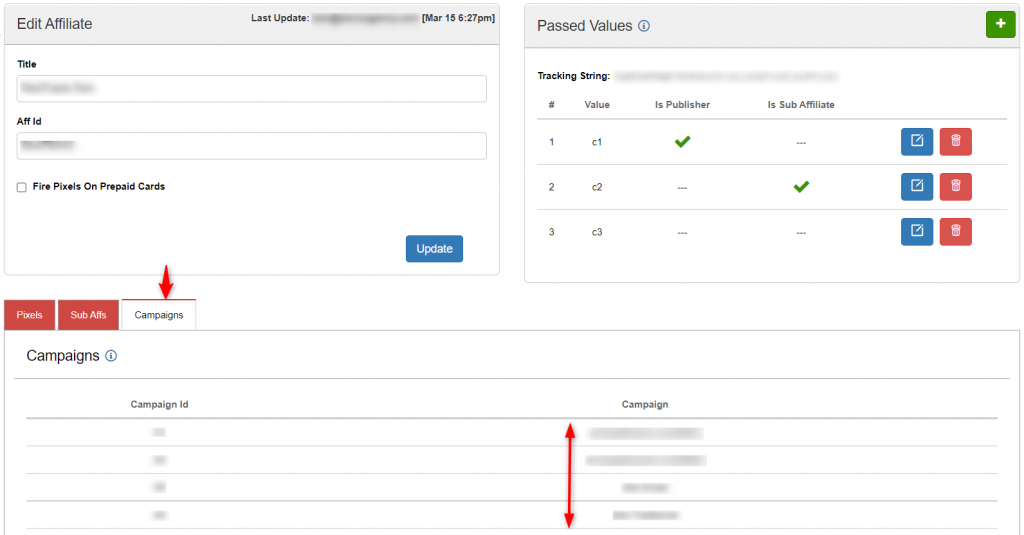
5.2 Go to your Affiliates profile in Konnektive/CheckoutChamp → Pixels → press “+“ → add Postback URL from RedTrack (Setup in RedTrack → step 3) to the Postback Url field in your Konnektive/CheckoutChamp account → Update:

– Commission type: choose CPA Pixel
– Fire after page: choose All offers
– Pixel type: select Postback
– Postback Url: paste the Postback URL from RedTrack (in this guide it’s Setup in RedTrack → step 3)
Here is more info about pixel in Konnektive.
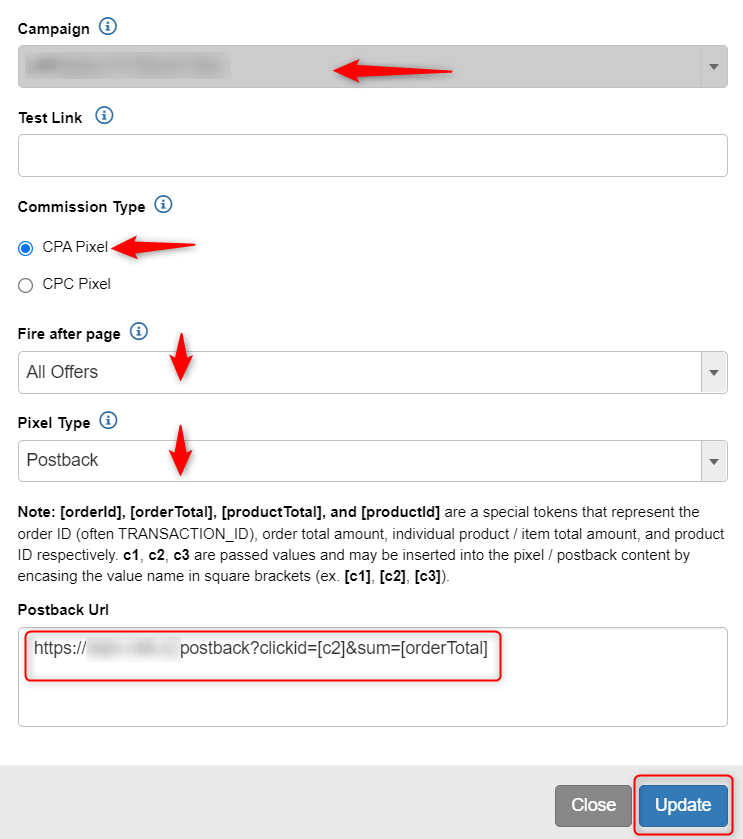
If you want to track Upsells, then in the Postback URL you must manually change the token from [orderTotal] to [productTotal]. Thus, for tracking Purchase it’s left [orderTotal], but for tracking Upsells it’s [productTotal]:


