Create a traffic channel
What is a traffic channel?
Traffic channel (ad network, any place with the traffic) is where you get your traffic from. It can either be a paid channel of traffic like Google Ads, Facebook, MGID, Propellerads, etc., or your own website with organic traffic. In both cases, it is obligatory to add it to your account.
Traffic channels in RedTrack can be added in one of the following ways:
- Via template, which means that your traffic channel has the API integration with RedTrack and has a pre-set table with all the necessary data, or maybe it’s not integrated via the API, but we have the template for this channel with some pre-set data.
- From scratch, which means that your traffic channel has not been integrated with RedTrack yet, and it needs to be added in a custom manner.
This is the list of non API-integrated traffic channel templates available in RedTrack.
How to add a traffic channel
1. Traffic channels → New from template → find your traffic channel in the catalog → Add:
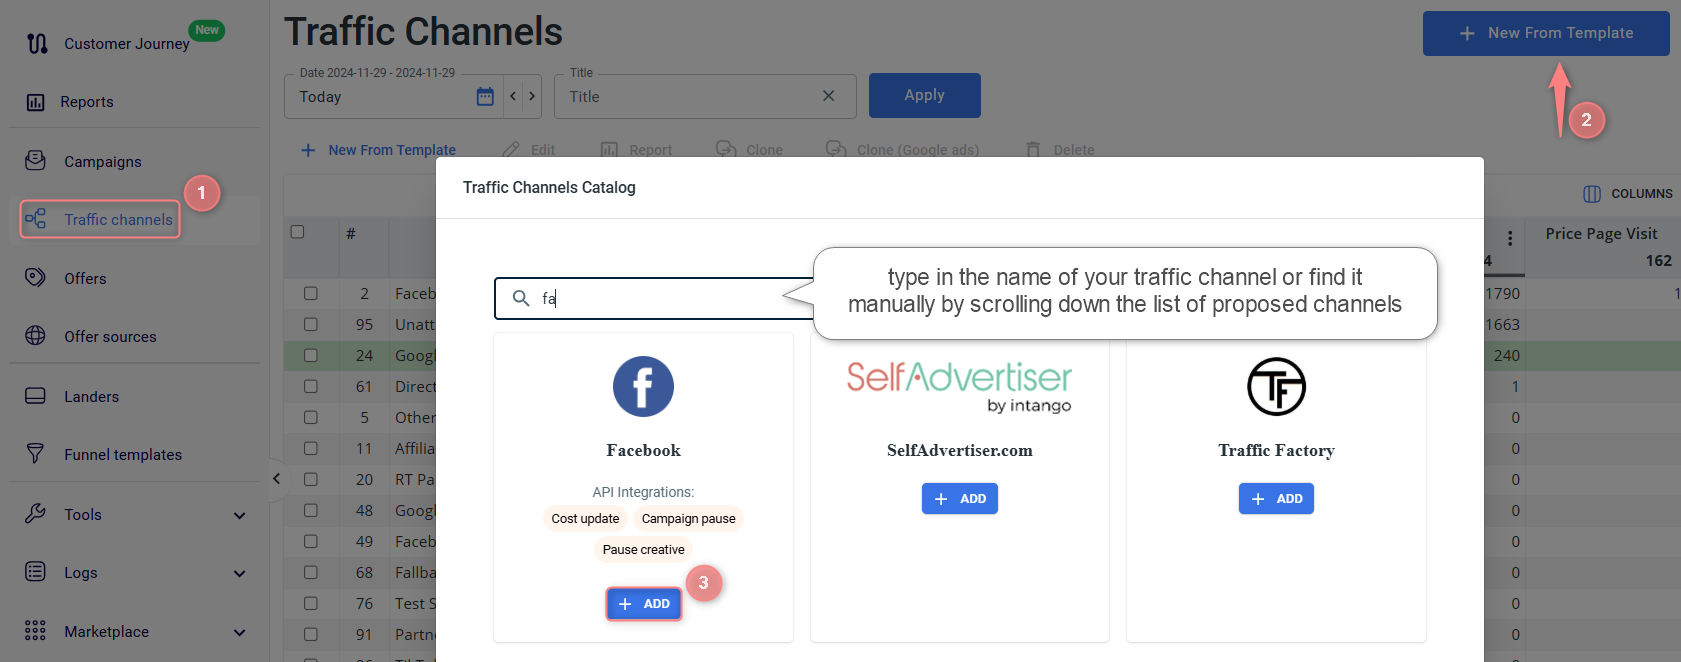
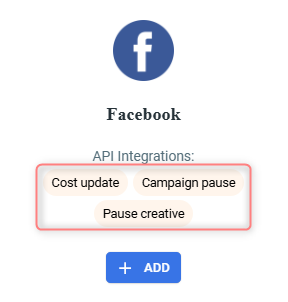
Check the Traffic channel integration status for more information about integrations and their features
2. Once the traffic channel template pops up, Save it:

3. Since you added this channel from the template, all the necessary info has already been preset. At this point, you can edit the following data in the template:
- Cost update depth and frequency:

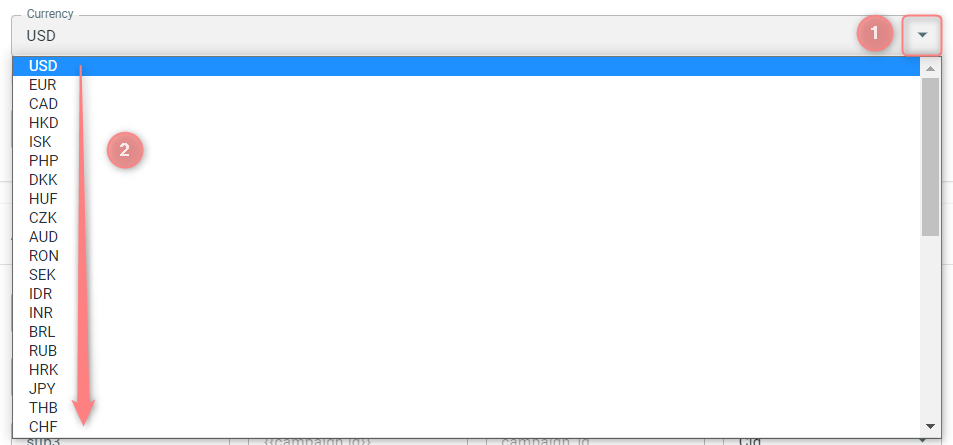
In the template, it is set by default according to your account settings. You can change it from the currency drop-down:
- Additional parameters
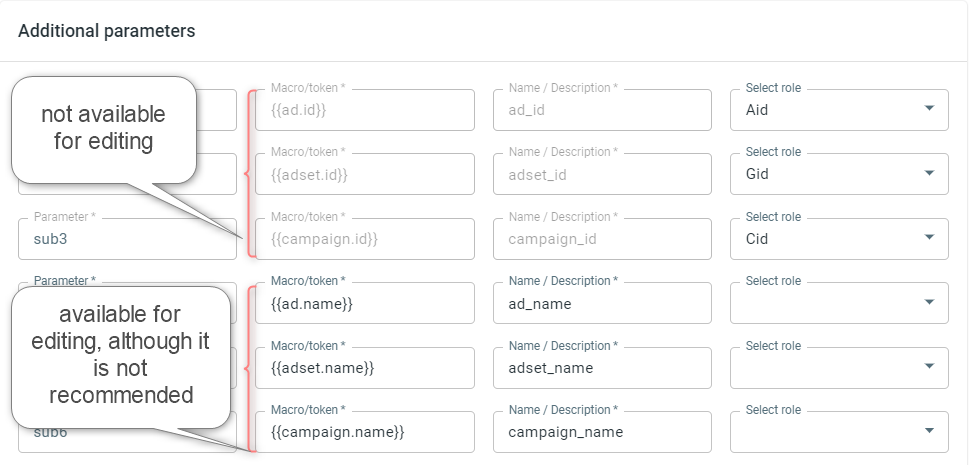
These parameters are preset depending on the integration type. Thus, not all of them can be changed. Parameters not available for editing are marked in grey:
4. That’s not all you should/may do to your traffic channel template, but the rest of the changes depend on the added traffic channel. You may need to adjust the postback URL (if that’s how you’re tracking conversions), set up the integration, add pixels, etc. To go on with your traffic channel settings:
a. Go to the list of our guides for each traffic channel: API integrated channels/Non-API integrated channels.
b. Find your channel and continue adjusting the settings according to your needs as per the guide.
1. Traffic channels → New from scratch:

2. In the New Traffic channel window, fill in all the necessary fields:
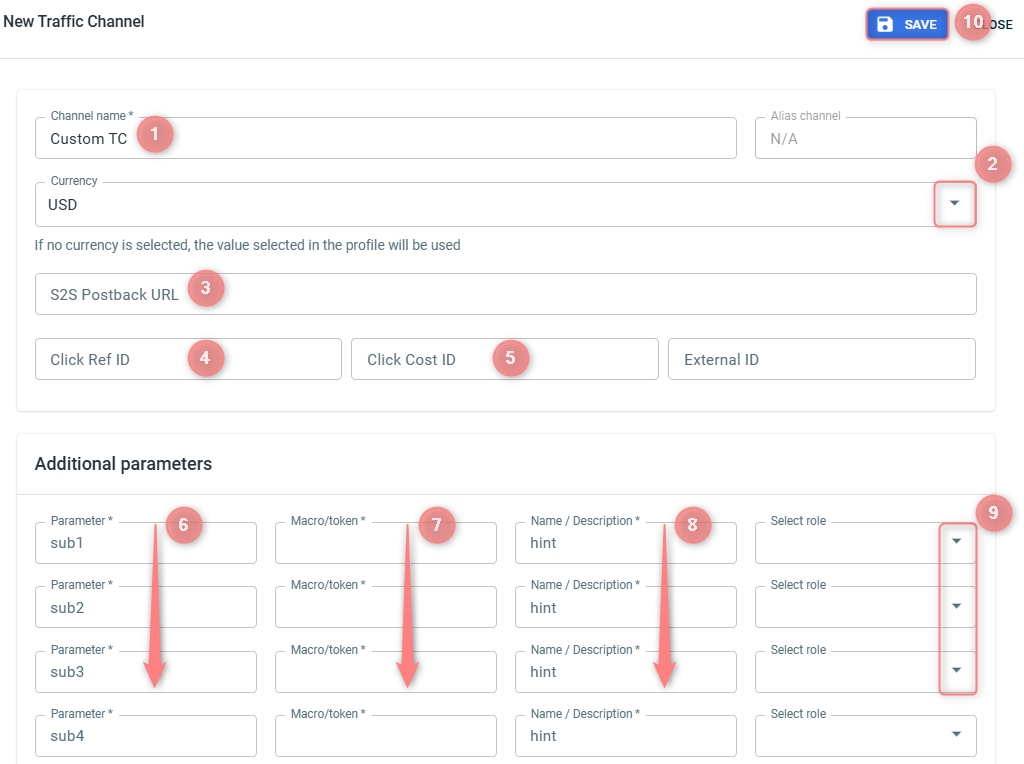
(1) Give your traffic channel a name.
(2) Set the currency by choosing it from the drop-down.
(3) S2S Postback URL can be obtained from your traffic channel, and it should contain a valid clickid macro supported by this traffic channel. The clickid macro should be equal to RedTrack {ref_id}. If you need to send the payout info, use RedTrack {offer_payout} macro.
The changes in the S2S postback URL are not replicated to your campaign settings automatically, you need to add/update the postbacks manually in each campaign used.
(4) Click id (for tracking the clicks from your channel of the traffic and associating them with the conversion data and sending the postbacks back to the traffic channel later).
(5) Click cost macro.
(6)–(9) If your traffic channel supports any other additional tracking parameters (utms), you can add them in the Additional parameters section of your traffic channel template. Add the values for Parameter, Macro, Name and assign the roles for the added parameter. Refer to this video explaining how the Roles in RedTrack operate.
(10) Save changes to the template.


