
Automated rules
Rules: overview
Rules in RedTrack are automated actions that help you manage your advertising campaigns more efficiently. They continuously monitor your campaign performance and automatically react when specific conditions are met, for example, pausing underperforming ads or increasing traffic to high-performing ones.
In simple terms, Rules save you time, protect your budget, and help optimize results by letting RedTrack take care of routine monitoring and adjustments automatically.
How to set up a rule
1. On the main RedTrack menu, go to Automated rules → Create new rule:

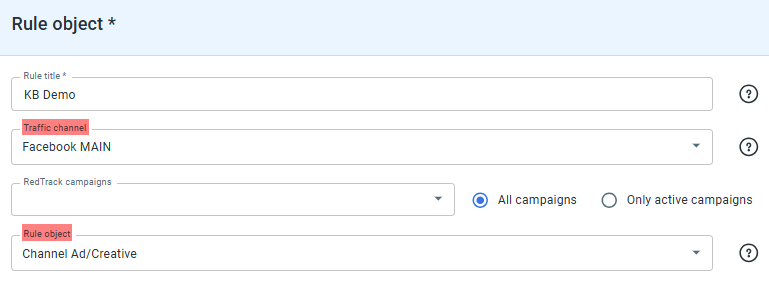
2. Fill in the mandatory fields for the rule to trigger → Save and activate:
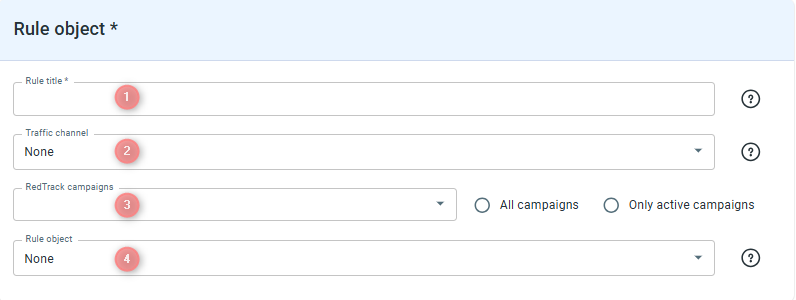
Give your rule a name to distinguish this one from all the other ones in the list.
This title will be included in all email notifications.
1. To be selected from the drop-down, your traffic channel should be added to RedTrack first, otherwise you won’t find it in the drop-down menu.
2. Traffic channels field is in direct correlation with the Rule object field and the Actions section, since all traffic channels have a different set of available objects and actions.
Choose the Campaigns where you want to apply this rule. You can work with this field in different ways:
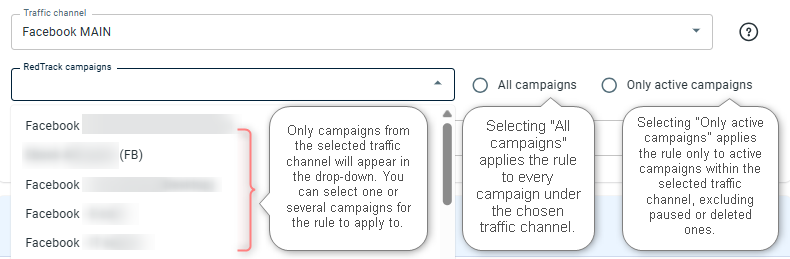
→ correct example: you choose Facebook in the Traffic channels drop-down → you find all the campaigns with Facebook traffic source in “Redtrack campaigns” drop-down.
→ incorrect example: you choose Google Ads in the Traffic channels drop-down → you want to find some campaign with Facebook traffic source in the Redtrack campaigns drop-down → your can’t, as you can only see campaigns with the previously chosen Facebook traffic source in the Traffic channels field.
Select the specific data entity or component (e.g., campaign, placement, creative, etc.) on which the rule will be evaluated and applied. The Rule object determines the scope of the rule’s logic, meaning it defines what level of your tracking structure the rule targets (e.g., entire campaigns vs. individual ads or channels). Choosing the correct Rule object ensures that your conditions, actions, and notifications are triggered based on the relevant performance data.
You can verify which rule types are supported for your channel here: API integrated traffic channels (Rules).
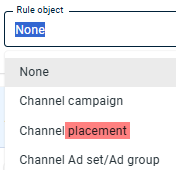
A term Placement refers to an ad inventory source, such as widgets (Revcontent), placements (Taboola), or similar units, depending on the platform. These are just examples, as each ad network may use its term. RedTrack uses “placement” as a standard term for consistency. If you’re unsure what your platform calls it, check their documentation or contact their support or account manager.
How to set up an action for the rule
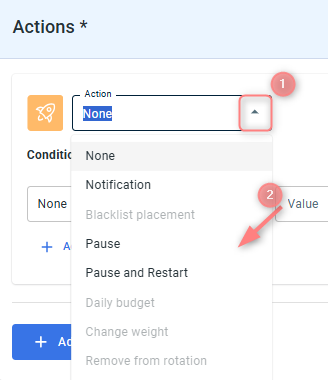
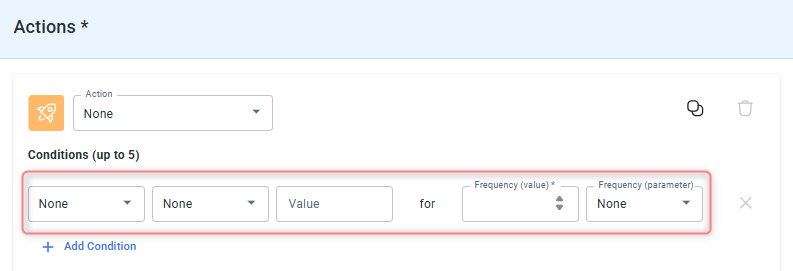
1. Select the Action type from the drop-down:
1. Selected Traffic channel from the Rule object section;
2. Rule object from the Rule object section:
You can verify which rule objects (and consequently actions) are supported for your channel here: API integrated traffic channels (Rules).
2. Set up the Condition for the action to trigger:
Example
Setup:

Detailed breakdown of how the rule works out:
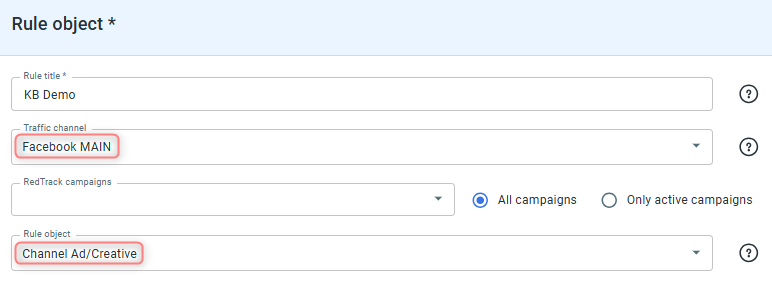
This rule is set up to automatically pause underperforming Facebook ads based on revenue results over time.
1. Traffic channel: Facebook.
→ The rule monitors campaigns connected to the Facebook traffic channel only.
→ Any actions triggered will apply exclusively to ads running through this channel.
2. Rule Object: Channel Ad/Creative.
→ The rule is applied at the ad or creative level, not the whole campaign.
→ This means RedTrack will evaluate each ad (creative) individually to decide whether it meets or fails the set performance condition.
3. Action: Pause.
→ When the set condition is met, RedTrack will automatically pause the corresponding ad or creative in your Facebook account.
→ You won’t need to manually stop the ad, the rule handles it for you.
4. Condition: Total Revenue < 100 for the last 7 days.
→ RedTrack checks the total revenue generated by each ad or creative over the past 7 days.
→ If an ad has earned less than $100 in total revenue during that period, the rule triggers.
→ As a result, the underperforming ad is paused automatically to prevent further spend without adequate return.
Result in a nutshell:
This rule automatically pauses Facebook ads that generate less than $100 in total revenue over the past 7 days. It helps ensure that only well-performing ads continue to run, saving budget and improving overall campaign efficiency.
The Schedule section allows you to define when and how often your rule will run. This gives you full control over timing, frequency, and specific periods of rule execution.
1. Set the Frequency run every value.
From the dropdown, choose how often the rule should check and apply your conditions (for example, every 5 minutes, 15 minutes, or 30 minutes):
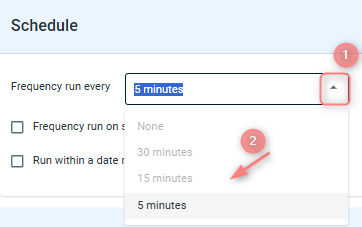
If your current plan limits frequency (for example, only allows every 30 minutes), but you need faster checks, you can upgrade or purchase additional access by contacting our sales team at sales@redtrack.io
2. To specify when your rule should be active, you can enable either or both of the following options:
Enable Frequency run on specific days and times to select exact days of the week and hours when the rule should run.
For example:
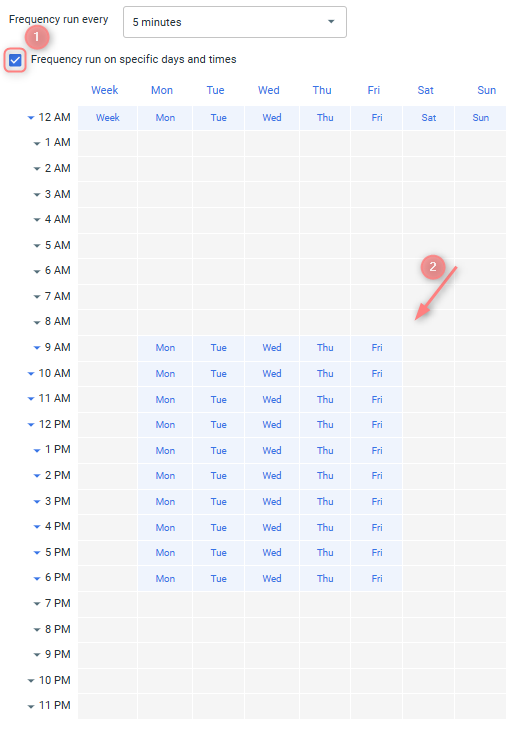
Based on the settings from the screenshot above, the rule will execute every 5 minutes between 9 AM and 6 PM, Monday to Friday, pausing automatically outside these hours.
Enable Run within a date range if you want the rule to run only during a specific period (custom range). The rule will activate and perform checks only during the selected dates, then stop automatically once the range ends.
For example:
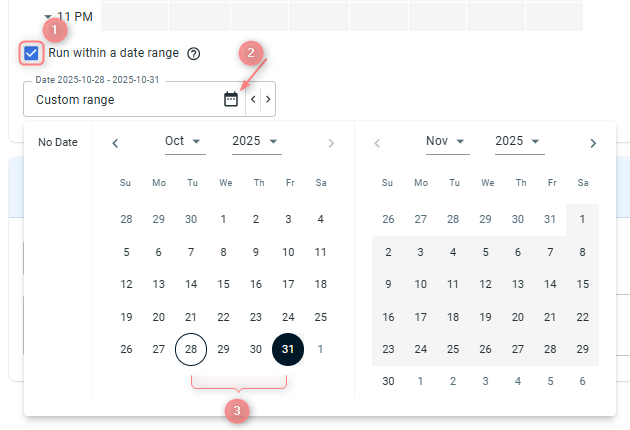
Based on the settings in the screenshot the rule will run only from October 28 to October 31, 2025, and will automatically stop once this period ends.
1. Set the frequency;
2. Define specific days and times AND limit the rule to a certain date range.
Alternatively, you can use just one or two options, depending on your needs.
For example, set a certain minute frequency only on weekdays, or define a specific date range without limiting hours.
You can be alerted when a rule fires (via email or webhook) so you stay informed of automated actions:
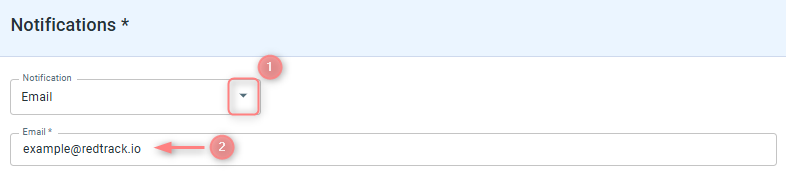
This is the easiest choice. When your rule runs, a plain-text email is sent to your inbox. It’s perfect when you or a team member want a direct notification to manually review the situation before deciding to take any next steps.
To enable this method select Email from the Notification field → add your email address to the Email field:
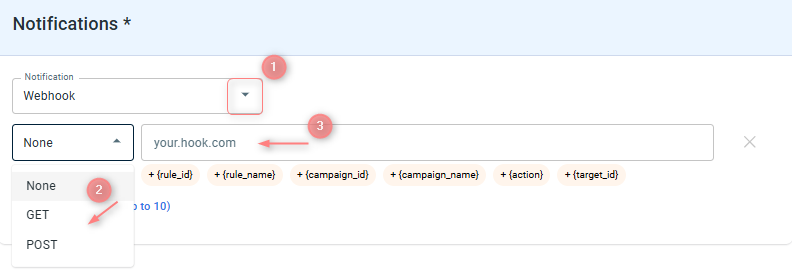
This is for advanced users who want hands-off processing. When your rule runs, RedTrack sends raw data directly to another software application (e.g, CRM). It’s ideal for instant, fully automated responses where you don’t want to rely on checking your email.
To enable this method:
- Select Webhook from the Notification field;
- Choose the method type: GET or POST;
- Insert your webhook URL.
Manipulations with created rules
Once created, all your rules appear in the Rules list. From here, you can easily view, filter, and manage them as needed.
To edit/delete/pause/start a rule, locate it in the list → tick the box next to it → choose the desired action from the menu:

This allows you to quickly control your automation settings without recreating or manually adjusting individual rules.
If you have many rules, use filters to find the one you need faster. You can filter rules by Campaign and/or Status (active, paused, or deleted) → Apply:
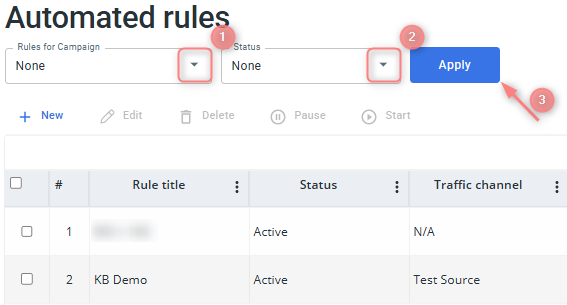
The list will show only the rules based on the applied filters.